


Your Cart Is Our Priority
Explore our store to see what our products and resources can do for you.


.
Written by: Amber Ripley
Read Time: 5 minutes
.
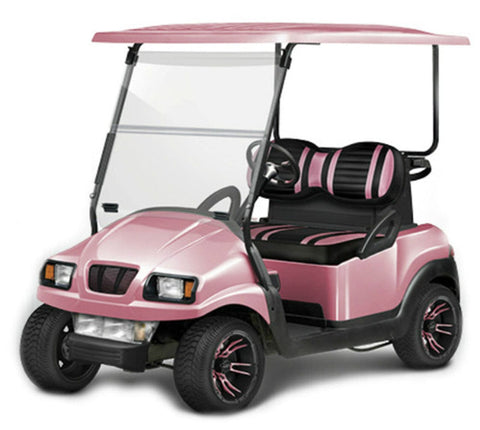
These days, golf carts are far more than just a means to get around a golf course. From cruising around small towns in your street-legal LSV to navigating large commercial properties and campgrounds, golf carts have become more mainstream as time goes on. Some communities even have golf cart parades to show off all the custom parts and accessories added to their otherwise standard golf carts.

With all these exciting new ways to use your golf cart or LSV (low-speed vehicle), you're going to want to transform your basic buggy into a machine as unique as you-- a golf cart that truly reflects your personality; and it's simpler than you may think!

If you own a golf cart and you're looking to update it to reflect your personality, you're in the right place. Installing an aftermarket body kit from Golf Cart Stuff is the quickest and most effective way to take your trusty buggy to the next level, and we only supply the best in the industry. MadJax® and DoubleTake® are the trusted pioneers in the Golf Cart Body Kit market, and we're proud to carry the most sought after styles for the most popular carts:
This article will guide you through the general steps involved in removing the existing body from your golf cart and replacing it with an aftermarket kit. Please note specific steps will vary depending on the body kit you purchase, and will be detailed in your installation instructions.
Before you begin the process, it's essential to conduct thorough research on the aftermarket body kit options available for your specific golf cart model. Consider factors such as style, material, and compatibility with your cart.
ICYMI: Part 1 of this Golf Cart Body Kit blog goes into detail about how a body kit will enhance your standard buggy and all of the different styles available for EZGO and Club Car Golf Carts.
Once you've selected the body kit that suits your preferences, it's time to gather all the necessary tools and equipment outlined in your installation instructions, including a socket wrench set, screwdrivers, pliers, and a trusty assistant, if possible.

Ensure you are working in a safe and well-ventilated area, preferably outdoors or in a spacious garage.
Park your golf cart on a level surface and engage the parking brake. Disconnect the battery to prevent any accidental electrical shorts during the process.
Start by removing all accessories or components attached to the existing body, such as headlights, taillights, mirrors, or windshield. Don't forget your charging port cover and forward/reverse switch cover. Carefully detach these items while keeping track of screws, bolts, or clips for reinstallation.
Use a socket wrench or screwdriver (depending on the fasteners used) to remove the body panels. Start with the front cowl, followed by the sides, rear, and finally, the roof, if applicable. Enlist the help of a friend to lift off larger panels safely.
Once the old body is removed, take the opportunity to inspect the frame and underlying components for any damage or wear.

This is also your chance to clean the frame and other areas that are otherwise hidden by the golf cart body panels. Remove all debris, dirt, and rust using a brush, cleaning solution, and a hose.

Before permanently installing the new body kit, perform a test fit to ensure proper alignment and fitment. This step allows you to identify any modifications required for a seamless installation. Pay close attention to the attachment points and compare them to the new body kit's instructions or manual. If any modifications are necessary, use appropriate tools to make adjustments to the frame or mounting locations, ensuring the complete body kit is a secure and accurate fit.
Once you are satisfied with the fitment, carefully position the new body kit panels onto the frame of your golf cart. Start with the largest panels first and work your way to the smaller ones, following the instructions provided by the manufacturer.
Secure each panel using the appropriate fasteners, such as screws, bolts, or clips, while referring to the installation manual for torque specifications. Take care not to overtighten the fasteners, as it may damage the new body kit or the underlying frame.

With the new body kit securely in place, reattach all the accessories and components you removed in Step 3. This includes headlights, taillights, mirrors, windshield, and any other exterior items specific to your golf cart model. Ensure all electrical connections are properly reestablished, and test the functionality of the lights and other electrical components before proceeding.

After completing the installation, give your golf cart body kit a final inspection to ensure everything is in order. Check that all panels are securely attached and there are no loose or protruding parts.
Clean the newly installed body kit and apply any necessary finishing touches, such as waxing or polishing, to enhance its appearance and protect the finish.

By following these general steps, you can confidently remove the stock body from your golf cart and install an aftermarket body kit, giving your cart a uniquely customized and refreshed look.
Remember to always refer to the manufacturer's installation instructions specific to your kit and golf cart model for precise guidance.
With a bit of patience and attention to detail, you'll be able to transform your golf cart into a unique and stylish ride that stands out from the crowd.
When you're shopping for Golf Cart Parts and Accessories, we've got the Stuff you need.
Leave us your questions, pro-tips, and other friendly thoughts in the comment section below!
What would you get if you crossed a scientist and a golf cart? It would be our Senior Content Writer, Amber Ripley! If you have a question, she knows how to research to bring you the information you need. Before joining the ranks at Golf Cart Stuff™, Amber was in sales and marketing for industrial tool and die products, so digging into all the nitty gritty, technical details about Golf Carts is par for the course…In the words of a famous songwriter: “If you got a problem, Yo! She’ll solve it!”
Explore our store to see what our products and resources can do for you.

Leave a comment