Phone: 574-333-2494 | Email: sales@golfcartstuff.com


Golf Cart Seat Covers
OEM And Custom Seat Covers

Seat Covers For Club Car, EZGO, and Yamaha Carts
Available For the Following Models
Club Car: DS | Precedent | Tempo / Onward
EZGO:TXT | RXV | Marathon
Yamaha:G14 | G16 | G19 | G20 | G22 | G29 (Drive) | Drive2
At Golf Cart Stuff, we pride ourselves on offering only the highest quality golf cart seat covers on the market. All of our covers are made right here in the USA. Our covers are made from marine-grade vinyl, which is incredibly durable and UV resistant. The stitching is also of the highest quality, ensuring that your covers will last for years to come. In addition, our covers are mildew resistant and easy to clean. They also feature a quick and easy fitment, so you can get them installed quickly and easily. When it comes to protecting your golf cart seats, there is simply no better option on the market than our covers from Golf Cart Stuff. We sell covers for various EZGO, Club Car, and Yamaha golf cart models.
Benefits:
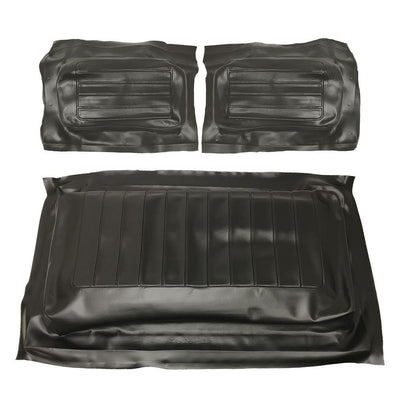
OEM Style Seat Covers:
- Marine-grade vinyl to protect against UV and mildew damage
- Stitch Free- Complete barrier against moisture and the elements
- Designed to be an exact match in color to the factory color of your cart
- Thermoformed to the cushions to take the guess work out of installation
Custom Golf Cart Seat Covers:
- Marine-grade vinyl to protect against UV and mildew damage
- Various color designs to add a unique look to your cart
- Quality stitching from a local shop to ensure top-notch craftsmanship
- Available in both front and rear seat options *Check listing for rear seat dimension availability*
These kits include pieces for the backrest and bottom cushions, and you’ll find numerous color combinations to suit your cart’s style. Shop our vinyl golf cart seat covers today.
Seat Covers Sub-Collections
Use The Quick Links Above Or The Filters Below To See Products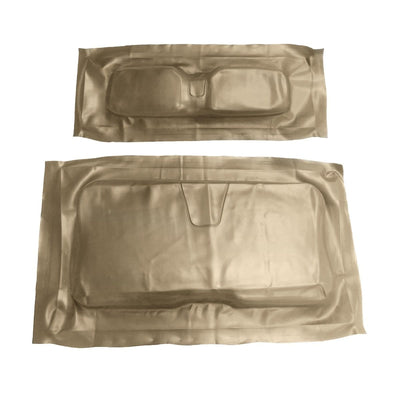

Golf Cart Seat Cover Installation and FAQ's
Do I Have To Remove My Old Covers Or Can I Install My New Covers Over Them?
You can absolutely install your new golf cart seat covers without removing the old ones! However, if your old covers are dry and cracking or have any sort of mold/mildew we strongly recommend removing them prior to installing the new covers.
What Tools Will I Need?
There are a few things you will need when installing your new seat covers.
- Staple Removal Tool- If you are removing the old covers.
- High Powered Staple Gun and Staples- We recommend either a pneumatic stapler or another high powered option. Regular office use staplers will NOT work.
- Screwdriver and Socket Wrench- These will be used to remove the hip restraints on the bottom cushion of your seats.
How To Install Your Golf Cart Seat Cover
When installing new golf cart seat covers, the first thing you will want to do is get your new covers warmed up. You can either place them in the warm sun for 20-30 minutes or throw them in your dryer on a low setting for 5-10 minutes. Warming up the covers will ensure they are nice and pliable and help the installation process go smoothly. After that, place the new cover face down on a clean flat surface. You will then put the old seat on the backside of the cover. Be sure to check that the top side of the cover and the top side of the seat line up correctly. You don't want random loose sections in your cover because they are flipped upside down and not aligned top and bottom. To ensure proper coverage before stapling, check all four corners of the old seat/new cover and look to see that all four corners have similar amounts of extra fabric. You will also want to check the seems of the cover and make sure they aligned correctly on the edges of the seat. Once that is completed, find a corner, fold that edge down and attach. At this point, you will continue the same process on all four corners, starting with the opposite corner of the one you just attached. Connecting the seat cover in a star pattern helps keep the cover from sliding in one direction. Before every attachment, check that the seat cover is lined up correctly and has not moved out of position. Once you have the four corners attached, move to the top of the cover and repeat. Lastly, move to the bottom portion of the seat, and guess what... do it again! Finish installing by slowly moving around the edge of the seat and pulling the covers tightly across, continuously checking that the covers are still in the proper position.
How To Clean Your Golf Cart Seat Covers?
The best way to clean your covers is with mild soap and water. This solution gets the job done and protects your covers from any harsh chemicals that could damage them.
