
Your Cart Is Our Priority
Explore our store to see what our products and resources can do for you.

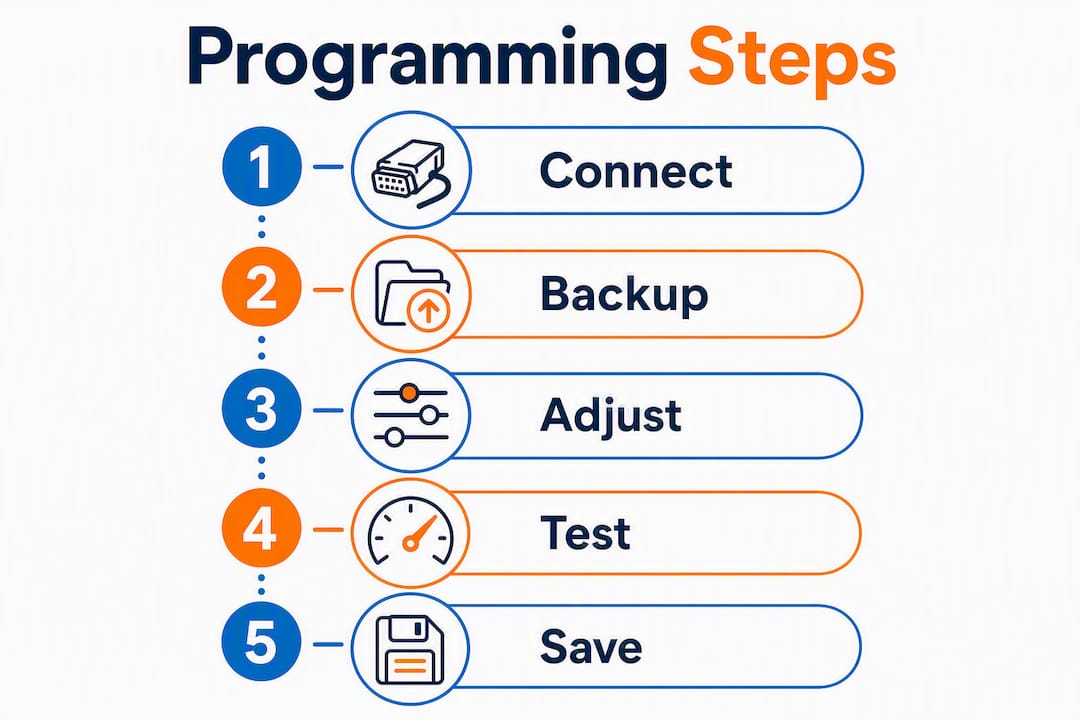
Controller programming for golf carts means adjusting the electronic motor controller’s parameters — speed limits, torque and current limits, throttle map, and regenerative braking — so the controller matches your motor, drivetrain, and safety requirements. Before you touch a single setting, do two things: get the right Curtis programming tool for your controller family (the Curtis 1313 Handheld Programmer or the Curtis 1314 PC Programming Station), and back up every existing parameter. That backup is your insurance policy.
If you need a broader primer on what a controller actually does, Golfcartstuff’s golf cart controller complete guide covers the fundamentals before you dive into tuning.
What you need at minimum:
Pro Tip: Never start a programming session on a partially discharged pack. Low voltage can trigger undervoltage cutback mid-session and corrupt a parameter write.
The Curtis 1313 is a self-contained handheld unit. Plug it into the controller’s programming port, scroll through menus on its LCD, and adjust parameters directly. No laptop required. It works well for field adjustments and quick diagnostics on most Curtis AC and DC controllers found in EZGO, Club Car, and Yamaha carts.
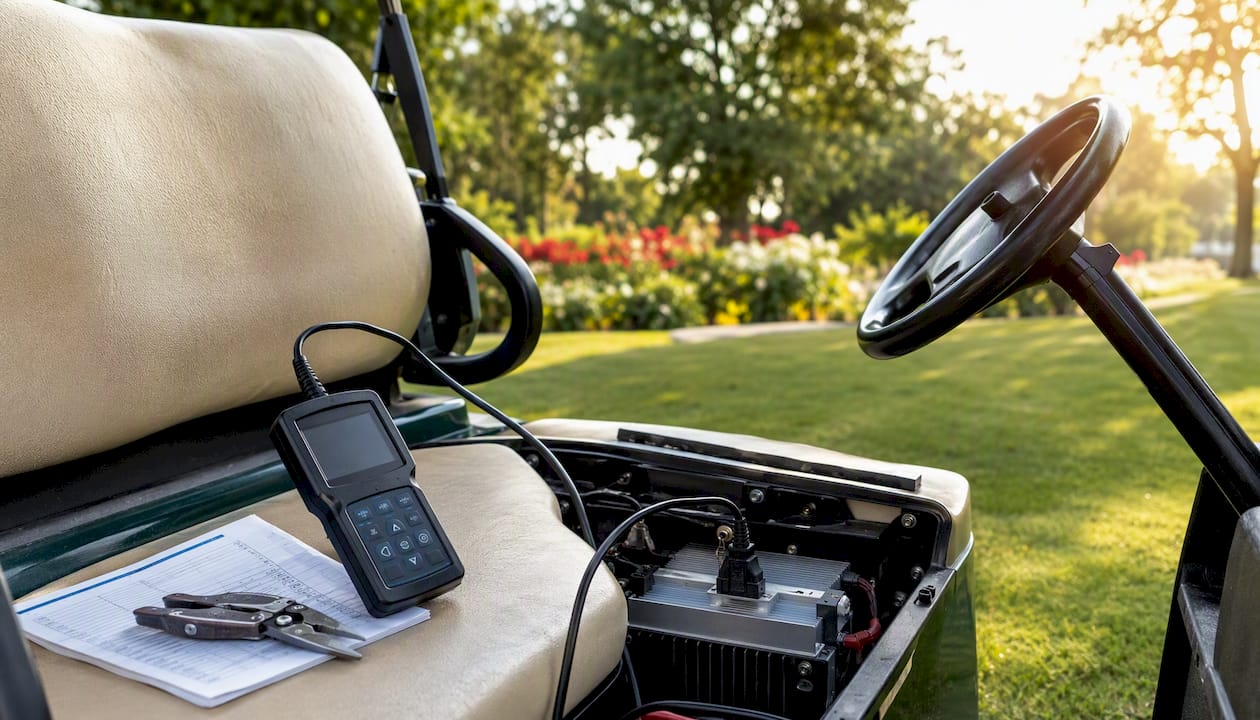
The Curtis 1314 PC Programming Station connects to a laptop via USB or serial adapter and runs Curtis’s desktop software. It gives you a full parameter tree, graphical throttle-map editing, and the ability to save named configuration files. For a shop doing multiple cart setups, the 1314 pays for itself fast. For a single owner doing a one-time tune, the 1313 is usually the practical choice.
Beyond the programmer, gather these before you start:
Pro Tip: Write down every current parameter value before editing anything. If the controller has no saved backup file, photograph the LCD screen for each menu page.
Pro Tip: Confirm your controller’s exact model number from the nameplate, not from the cart’s year or trim level. A Club Car Precedent and a Club Car DS can carry different Curtis controller variants even in the same model year.
The table below covers the parameters you’ll encounter most often on Curtis AC controllers (models 1232, 1234, 1236, 1238, and similar families used across EZGO, Club Car, and Yamaha platforms). The Curtis controller manual groups these into speed, torque, throttle, and current-limit menus.
| Parameter | Typical range / units | What it changes | Safety note |
|---|---|---|---|
| Max Speed (forward/reverse) | 100% of base RPM | Top speed in each direction | Never exceed motor’s rated RPM |
| Drive Current Limit | 100% of controller rating | Peak torque / acceleration force | Must stay within motor’s armature rating |
| Regen/Brake Current | 100% of controller rating | Braking strength during decel | Too high causes abrupt stops |
| Throttle Deadband | 25% of pedal travel | Pedal feel at low speed | Too low causes creep or surging |
| Accel Rate | — | How quickly torque ramps up | Aggressive ramp stresses drivetrain |
| Decel Rate | — | How quickly torque drops off | Affects regen and coasting feel |
| Control Mode | Speed Mode / Torque Mode | How the controller interprets throttle | See note below |
Control Mode Select is the most consequential single setting. Speed Mode holds a target RPM regardless of load, which suits flat terrain and consistent speed. Torque Mode delivers a current proportional to pedal position, giving a more natural, load-sensitive feel on hilly courses. Most stock golf cart setups ship in Torque Mode. Switching to Speed Mode without adjusting the throttle map first often produces jerky low-speed behavior.
Parameters interact. Raising Max Speed without reviewing Drive Current Limit can push the motor beyond its rated torque and power thresholds. Change one parameter, test, then move to the next.
This workflow applies to Curtis-family controllers using either the 1313 handheld or the 1314 PC station. For carts with a Curtis 3140 display, you can enter program and diagnostic mode directly through the display’s menu button without a separate programmer.
Pro Tip: Use the cart’s live display (where present) to watch throttle percentage and motor RPM in real time during test runs. It removes the guesswork from throttle-map validation.
Curtis controllers report faults two ways: a status LED on the controller body that flashes a coded pattern, and a fault name or history readable through the programmer’s LCD or PC software. HPEVS diagnostic documents map LED flash counts to specific fault types and recommend cycling KSI and checking the 35-pin connector as first actions for most faults.
| Fault name / type | Likely causes | First actions | Stop and call a pro when… |
|---|---|---|---|
| Throttle Wiring Fault | Loose or shorted throttle pot/APPS wiring | Check 35-pin connector, inspect throttle harness | Fault persists after connector reseating |
| Parameter Change Fault (e.g., code 49) | Parameter written; power cycle needed | Cycle KSI (key off, key on) | Fault reappears after multiple cycles |
| Over-Temperature | Extended load, blocked airflow, high ambient temp | Let controller cool, check mounting surface | Thermal faults repeat under normal load |
| Undervoltage / Voltage Cutback | Low battery, bad cell, high resistance connection | Charge pack fully, check terminal connections | Voltage normal but cutback persists |
| Pedal Interlock Fault | Pedal not returning to zero at startup | Inspect pedal switch and throttle zero position | Interlock wiring damaged or missing |
Troubleshooting checklist:
For wiring-specific faults, Golfcartstuff’s golf cart wiring troubleshooting guide walks through harness inspection in detail.
Yes, and skipping them is the most common reason a replacement controller throws faults immediately after installation. Work through this list before ordering or installing:
Pro Tip: Pull the motor’s nameplate data (voltage, rated current, RPM) and compare it against the replacement controller’s parameter defaults before the first power-on. A five-minute check prevents a burned controller.
Golfcartstuff’s controller installation guide covers the full installation sequence for DIY owners.
The clearest lesson from real-world forum reports is that owners who raise field current or RPM settings without checking motor datasheets end up with thermal failures, not faster carts. The Curtis technical guidance is direct: exceeding a motor’s rated field or armature current causes hardware failure, not incremental gains.
Before every session:
During tuning:
When to stop and call a professional: repeated thermal faults under normal load, any VCL (Vehicle Control Logic) changes, wiring harness modifications, or faults you cannot reproduce and isolate consistently.
Time depends on what you’re doing:
On tool costs: the Curtis 1313 handheld is the more affordable entry point and handles the majority of golf cart programming tasks. The Curtis 1314 PC station costs more but is worth it for shops programming multiple carts. If you’re doing a single tune on one cart, check whether a local golf cart shop will program it for you — when the tool cost exceeds the labor for a one-time job, paying a technician makes more sense.
Golfcartstuff’s service resources can point you toward compatible programmers and replacement parts so you’re not sourcing blind.
Programming a golf cart motor controller safely requires the correct Curtis tool, a backed-up parameter set, and a disciplined one-change-at-a-time tuning sequence starting at low speed.
| Point | Details |
|---|---|
| Back up before editing | Save every parameter value before changing anything — it’s your only restore point. |
| Match tool to controller | Use the Curtis 1313 for field work or the Curtis 1314 for multi-cart shop setups. |
| Tune low-speed first | Set throttle deadband, accel, and decel before touching max speed or current limits. |
| Never exceed motor ratings | Raising current beyond the motor’s rated spec causes thermal failure, not more speed. |
| Golfcartstuff for parts | Replacement controllers, 35-pin connector kits, and programmer accessories are available at Golfcartstuff. |
Most controller programming mistakes don’t happen during the programming session itself. They happen in the five minutes before it, when someone skips the backup step or assumes a replacement controller’s default parameters are safe for their specific motor.
The tuning order matters more than most owners expect. Low-speed behavior and throttle feel affect how the cart handles 90% of the time. High-speed settings get all the attention, but a cart that lurches at 3 mph or has no regen on a downhill slope is genuinely unpleasant and potentially unsafe. Getting the low-speed calibration right first also makes high-speed tuning faster, because you’re not chasing two problems at once.
There’s also a tendency to treat the controller’s maximum allowable parameter range as a target rather than a ceiling. The controller will let you set Drive Current to 100%. The motor’s datasheet will tell you why that’s a bad idea. Those two numbers are not the same number, and the gap between them is where controllers and motors get destroyed.
For complex changes — VCL logic, harness modifications, or faults that repeat despite clean wiring — the right call is a qualified technician. No programming guide replaces hands-on diagnosis when the fault is intermittent or the root cause is unclear.
Sourcing a replacement controller or programmer cable from a supplier who understands EZGO, Club Car, and Yamaha compatibility saves time and avoids the wrong-part problem entirely.
Golfcartstuff stocks replacement controllers, 35-pin connector kits, programmer cables, and installation accessories matched to specific cart models. Whether you’re fitting a new controller to a Club Car DS or sourcing parts for a Yamaha G-series cart, the catalog is organized by model so you’re not guessing at compatibility. Browse the full parts selection and check shipping options directly on the site.
Keep these references open during any programming session:
Always cross-reference the manufacturer’s manual for your specific controller model number. Parameter ranges and fault codes vary between Curtis families, and a setting that’s safe on a 1236 may behave differently on a 1238.
Explore our store to see what our products and resources can do for you.

Leave a comment