


Your Cart Is Our Priority
Explore our store to see what our products and resources can do for you.

Damaged or worn golf cart body panels can make your vehicle look tired and reduce its overall function. Whether you’re dealing with minor cracks from everyday use or severe damage from rough terrain, knowing how to replace panels properly transforms your cart’s appearance and durability. This guide walks you through every step of the replacement process, from assessing damage to finishing touches. You’ll learn how to prepare your workspace, remove old panels safely, install new ones correctly, and protect your investment with the right finishing options.
| Point | Details |
|---|---|
| Repair versus replace | Minor surface cracks can be repaired with fiberglass repair kits or plastic welding, while severe shattering, warping, or multiple cracks require full panel replacement. |
| Workspace and tools | Prepare a clean well lit workspace, protect the area, and assemble screwdrivers, wrenches, panel removal tools, gloves, safety glasses, and a parts tray before starting. |
| Take damage photos | Take photos from multiple angles before starting to aid ordering replacement parts and guide reassembly. |
| Panel removal before finishing | Removing panels before finishing preserves the chassis and makes it easier to upgrade components. |
| Choose finishing options | Finish options include paint, vinyl wraps, or molded color kits to restore the cart’s appearance and protection. |
Assessing your golf cart’s panel condition determines whether you need a simple repair or complete replacement. Minor surface cracks that haven’t compromised structural integrity can often be repaired with appropriate materials and techniques. These small issues typically respond well to fiberglass repair kits or plastic welding. However, severe shattering, warping, or multiple fracture points signal the need for full panel replacement to ensure long term durability.
Environmental factors play a significant role in panel deterioration. Carts used primarily on smooth paths may develop minor cosmetic damage over years, while vehicles navigating rocky trails or harsh weather conditions experience accelerated wear. Sun exposure causes plastic panels to become brittle, making them more susceptible to cracking. Salt air in coastal areas accelerates corrosion around mounting points.
Replacing panels rather than repeatedly patching severe damage prevents ongoing issues. Each repair weakens the surrounding material, creating stress points that fail under normal use. When panels show multiple repair sites or cracks extending across large sections, replacement becomes the cost effective choice. Fresh panels restore structural integrity and eliminate the cycle of recurring damage.
Pro Tip: Take photos of panel damage from multiple angles before starting any work. These images help when ordering replacement parts and serve as reference points during reassembly.
Several indicators suggest replacement over repair:
Consider the overall condition of your golf cart when making replacement decisions. If multiple panels show wear, replacing them together ensures color matching and uniform appearance. Mixing old and new panels often creates obvious visual discontinuity. For guidance on related repairs, check out golf cart windshield repair guidance to understand similar assessment principles.
Proper preparation streamlines the replacement process and prevents frustrating delays. Start by selecting a clean, well lit workspace with adequate room to maneuver around your golf cart. Indoor spaces protect against weather changes during multi day projects, while outdoor areas should offer shade and level ground. Clear the area of obstacles and lay down protective covering to catch dropped hardware.
Gathering the right tools before starting saves time and reduces stress. Essential items include Phillips and flathead screwdrivers in various sizes, socket wrenches with metric and standard sizes, panel removal tools or plastic pry bars, work gloves, safety glasses, and a container for organizing fasteners. Having a magnetic tray keeps small screws and bolts from rolling away. A digital camera or smartphone captures the original configuration for reference during reassembly.
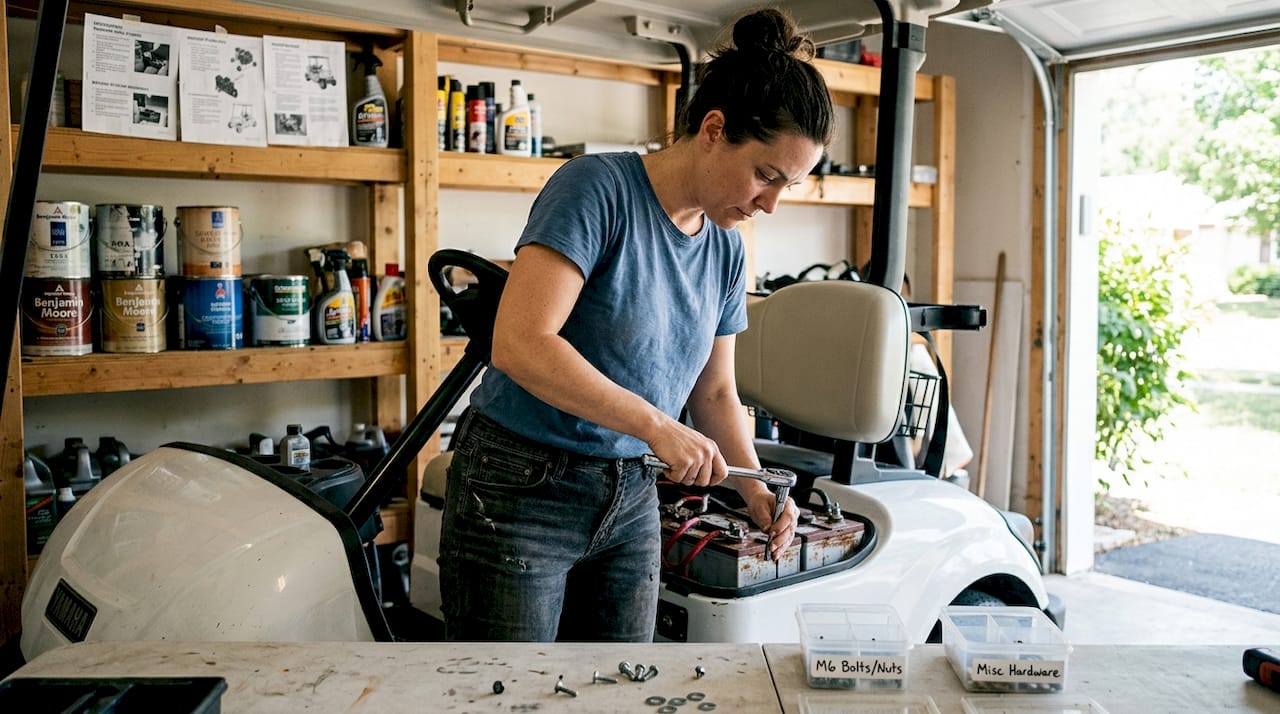
Safety comes first when working on golf carts. Always disconnect the battery before removing panels to eliminate electrical hazards. For electric carts, this means disconnecting both positive and negative terminals. Gas powered carts require fuel system precautions if panels near the engine are being replaced. Wear protective gloves when handling panels with sharp edges or broken sections.
Removing panels before applying finishes delivers superior results compared to painting or wrapping in place. This approach preserves chassis integrity and allows upgrades to underlying components. You can inspect and clean areas normally hidden by body panels, addressing rust or wear before it becomes serious. The exposed frame also provides opportunity to upgrade wiring, add accessories, or reinforce mounting points.
| Tool Category | Specific Items | Purpose |
|---|---|---|
| Hand Tools | Screwdrivers, socket set, pliers | Removing fasteners and hardware |
| Panel Tools | Plastic pry bars, trim removal tools | Separating panels without damage |
| Safety Equipment | Gloves, safety glasses, work light | Protecting yourself during work |
| Organization | Magnetic tray, labeled bags, camera | Tracking parts and assembly order |
Remove accessories that obstruct panel access before starting disassembly. Mirrors, lights, windshields, and storage compartments often attach to or overlap body panels. Disconnecting these items first prevents accidental damage and provides clear access to mounting hardware. Label each removed accessory and its fasteners to simplify reinstallation.
Pro Tip: Create a simple diagram showing where each type of fastener came from. Different panel sections often use various screw lengths or bolt types, and mixing them up during reassembly causes frustration.
Keep all hardware organized throughout the process. Use small containers or resealable bags labeled by panel section. Some mechanics photograph each fastener group next to its corresponding panel before removal. This documentation proves invaluable when reassembling, especially if the project extends over several days. For additional context on body modifications, explore golf cart body kits overview to understand how panels integrate with complete kit systems.
Begin panel removal by identifying all attachment points. Most golf cart panels secure with a combination of visible screws, hidden clips, and occasionally adhesive strips. Work systematically from top to bottom, removing fasteners in a logical sequence that prevents panels from falling unexpectedly. Start with any trim pieces or molding that overlap panel edges, as these often hide additional screws.
Step 1: Remove all visible screws and bolts securing the panel. Check along edges, in recessed areas, and behind trim pieces. Some fasteners hide under decorative caps that pop off with gentle prying. Place removed hardware in labeled containers immediately to avoid confusion during reassembly. Use the appropriate screwdriver or socket size to prevent stripping screw heads.
Step 2: Detach any wiring or accessories connected to the panel. Light assemblies, speakers, and storage compartments often mount directly to body panels. Disconnect electrical connectors carefully, noting their orientation for reconnection. Some wiring may route through panel openings, requiring you to feed it back through as you remove the panel. Take photos of wire routing before disconnection.
Step 3: Gently separate the panel from the cart frame. Apply even pressure and work around the perimeter rather than pulling from one point. Plastic clips may require wiggling or slight twisting to release. If a panel resists removal after all visible fasteners are out, hidden clips likely remain engaged. Panel removal tools with angled edges help release stubborn clips without breaking them.
Step 4: Compare your replacement panel to the original before installation. Verify that mounting holes align and any cutouts for lights or accessories match. Minor adjustments may be needed for aftermarket panels that don’t perfectly match OEM specifications. Test fit the new panel without fasteners first to identify any alignment issues.

Step 5: Install the new panel by reversing the removal process. Start by positioning the panel and engaging any clips or alignment tabs. Insert fasteners hand tight initially, allowing slight adjustment before final tightening. Work from the center outward to maintain even pressure distribution. Once all fasteners are in place, tighten them in a cross pattern to prevent warping.
| Panel Type | Removal Difficulty | Special Considerations |
|---|---|---|
| Factory OEM | Moderate | Precise fit, may have hidden clips |
| Aftermarket replacement | Easy to Moderate | Verify hole alignment before purchase |
| Molded color kits | Easy | Pre finished, handle carefully to avoid scratches |
| Custom body kits | Moderate to Difficult | May require modification of mounting points |
Common mistakes during replacement include forcing panels that aren’t properly aligned, overtightening fasteners that crack plastic, and forgetting to reconnect wiring before securing panels completely. Take your time with alignment, as rushing leads to gaps between panels or misaligned mounting holes. If a panel doesn’t sit flush, back out fasteners and reposition rather than forcing it into place.
Pro Tip: Apply a thin bead of automotive silicone sealant along panel edges before installation to reduce rattles and prevent water intrusion. This extra step significantly improves the finished result.
For comprehensive guidance on complete body transformations, review golf cart body kit installation techniques that apply similar principles to full kit systems. The installation process for individual panels follows the same fundamental approach as complete body kit installation, just on a smaller scale.
Finishing options transform replaced panels from functional to impressive. Paint provides the most durable and customizable finish, with Krylon Fusion recommended for plastics due to its excellent adhesion and flexibility. Proper surface preparation determines paint longevity. Clean panels thoroughly with degreaser, sand lightly with 400 grit sandpaper to create tooth for adhesion, and apply primer designed for plastic substrates. Multiple thin coats produce better results than single heavy applications.
Vinyl wraps offer a quicker alternative with impressive visual impact. Quality automotive vinyl lasts 3 to 7 years depending on sun exposure and care. Wraps allow complex designs, color changes, and patterns impossible with paint. The application process requires patience and proper technique to avoid bubbles and wrinkles. Heat guns help vinyl conform to curved surfaces and complex contours. Wraps also protect underlying paint, making them ideal for preserving original finishes while updating appearance.
Molded color kits combine replacement and finishing in one step. These panels come pre colored in popular shades, eliminating painting or wrapping. While convenient, color matching with existing panels can be challenging unless replacing all body panels simultaneously. Molded kits cost more upfront but save labor time for those uncomfortable with finishing work.
Removing panels before finishing preserves chassis integrity and allows upgrades to underlying components while ensuring professional quality results.
The finishing method you choose impacts long term maintenance requirements. Painted panels need periodic waxing to maintain gloss and protect against UV damage. Inspect paint annually for chips or scratches that expose bare plastic, touching up damage promptly prevents expansion. Wrapped panels require gentler cleaning with wrap specific products that don’t degrade adhesive. Avoid automatic car washes that might catch wrap edges.
Pro Tip: Apply a ceramic coating over painted panels for superior protection against scratches, UV rays, and chemical damage. This extra layer significantly extends finish life with minimal maintenance.
Finishing option comparison:
Protecting your investment extends beyond initial finishing. Store your golf cart under cover when possible to minimize sun exposure. Regular cleaning removes contaminants that degrade finishes over time. Inspect mounting points periodically, as loose panels develop stress cracks from vibration. Address any issues immediately rather than waiting for small problems to become major repairs.
For complementary upgrades that enhance your refreshed appearance, explore 2026 golf cart upgrades that coordinate with your new panels. Matching wheels, lights, and accessories create a cohesive custom look that maximizes the impact of your panel replacement project.
Transforming your golf cart doesn’t stop with body panel replacement. GolfCartStuff.com offers an extensive selection of premium components that complement your refreshed exterior. From high performance wheels and tires to complete body kits and custom accessories, you’ll find everything needed to create a truly personalized vehicle. Their catalog includes OEM replacement parts and aftermarket upgrades designed for durability and style.

Explore premium golf cart wheels and tires that enhance both appearance and performance. Upgrading wheels transforms your cart’s stance while improving ride quality. Detailed body kits installation guides walk you through complete transformations with professional results. Whether you’re replacing a single damaged panel or planning a full custom build, golf cart parts and accessories from GolfCartStuff.com provide the quality and selection serious enthusiasts demand.
Replacing a single golf cart body panel takes 2 to 4 hours for someone with basic mechanical skills. Complete body panel replacement requiring multiple panels can extend to 8 to 12 hours spread across several days. Time increases significantly if you’re painting or wrapping panels, as preparation, application, and curing add substantial duration.
Yes, DIY painting produces excellent results with proper preparation and technique. Clean panels thoroughly, apply plastic primer, and use paint formulated for flexible substrates like Krylon Fusion. Work in a dust free environment with temperatures between 60 and 80 degrees for optimal results. Multiple thin coats prevent runs and ensure even coverage.
Regular cleaning with mild soap removes contaminants that degrade finishes. Store your cart under cover to minimize UV exposure, which causes fading and brittleness. Inspect mounting hardware quarterly and tighten any loose fasteners before vibration causes stress cracks. Apply wax or protectant every 3 months to maintain appearance and protection.
Molded color kits are manufactured for specific cart makes and models. Verify compatibility before purchasing by checking manufacturer fitment guides. Some aftermarket kits offer universal designs that fit multiple models with minor adjustments. Always confirm mounting hole locations and overall dimensions match your cart’s specifications.
Always disconnect batteries before starting work to eliminate electrical hazards. Wear safety glasses and gloves when handling panels with sharp edges or broken sections. Support panels properly during removal to prevent them from falling and causing injury. Work in a well ventilated area if using adhesives or finishing products, and follow all product safety instructions carefully.
Explore our store to see what our products and resources can do for you.

Leave a comment