


Your Cart Is Our Priority
Explore our store to see what our products and resources can do for you.

Your golf cart charger is essential for keeping your cart running, but without proper care, it can fail prematurely. Issues like overheating, voltage errors, and connection problems are common but preventable. This guide walks you through practical maintenance steps to extend your charger’s lifespan and ensure reliable performance year after year.
| Point | Details |
|---|---|
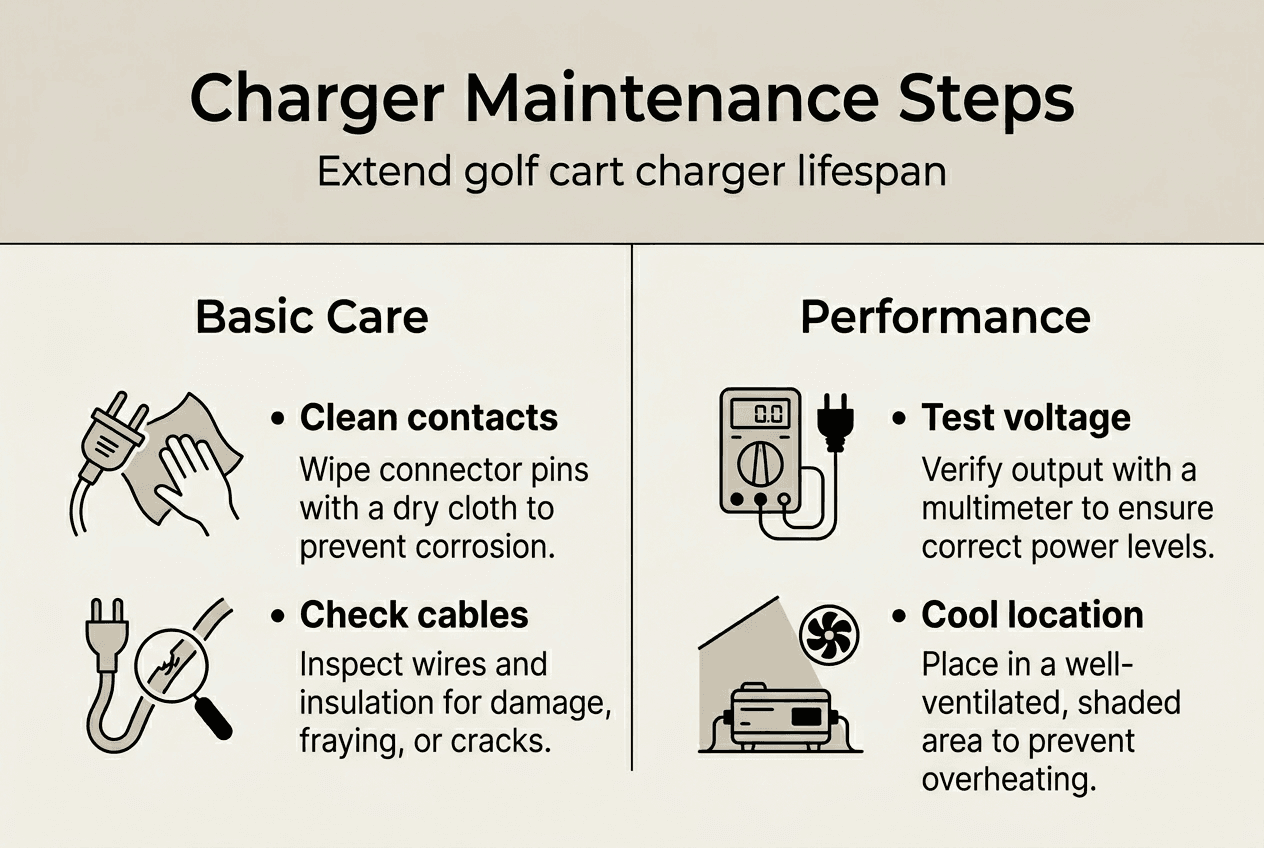
| Regular cleaning prevents failure | Clean contacts and terminals every 3 to 6 months to avoid dust buildup and corrosion that interrupt charging. |
| Proper ventilation stops overheating | Place your charger in well-ventilated areas to prevent heat damage and component failure. |
| Voltage calibration protects batteries | Match charger voltage and current settings to your battery specs to avoid undercharging or overcharging. |
| Routine inspection catches problems early | Check cables, plugs, and connections regularly to spot wear before it causes breakdowns. |
| Testing confirms proper operation | Use a digital multimeter after maintenance to verify output voltage and ensure your charger works correctly. |
Golf cart chargers come in different voltage ratings to match your battery system. Most golf carts run on 36V or 48V systems, and your charger must match that voltage for safe, effective charging. Using the wrong charger can cause slow charging or even battery damage.
Modern smart chargers include safety features that protect your batteries and the charger itself. Many modern chargers include built-in protection circuits that shut down when they detect voltage problems, overheating, or incorrect battery conditions. These protections keep your equipment safe but can also cause frustration if you don’t understand why your charger won’t start.
Your charger won’t activate if your battery pack voltage drops too low. Smart chargers will not start if the pack is too low, with 48V carts needing about 38V to 42V and 36V carts requiring 28V to 30V minimum. This safety feature prevents damage but can leave you puzzled when your charger appears dead.
Common charger failures stem from several causes:
Understanding how your charger’s protection systems work helps you troubleshoot problems faster and maintain the unit properly to avoid false alarms.
Matching your charger specifications to your battery needs is critical for both safety and performance. When you use the right charger for your system, you protect your investment and ensure consistent, reliable charging. For more guidance on choosing golf cart chargers that fit your needs, check specialized selection guides.
Before you start any maintenance work, disconnect your charger completely from both the wall outlet and your golf cart. This simple safety step prevents electrical shocks and protects your equipment from accidental damage during cleaning or inspection.
Start with a thorough visual inspection of all charger components:
Cleaning your charger contacts and terminals regularly prevents charging interruptions. Regular cleaning of charger contacts and terminals can prevent charging interruptions due to dust or corrosion, extending charger lifespan. Use these cleaning methods every three to six months:
Create a maintenance checklist to catch potential problems before they cause failures. Your inspection should cover cable integrity, connection tightness, ventilation clearance, and any unusual sounds or smells during operation. Document what you find each time so you can track changes over time.
Pro Tip: Set a recurring calendar reminder every three months to perform a quick visual inspection and cleaning. This prevents buildup between major maintenance sessions and helps you catch small issues before they become expensive repairs. For more comprehensive care routines, explore step-by-step golf cart maintenance guides.
Proper charger placement makes a huge difference in longevity. Proper ventilation is crucial for preventing overheating in 48V chargers, which can lead to premature component failure. Choose a charging location that stays cool and allows air to circulate freely around all sides of the unit.
Follow these ventilation best practices:
Voltage and current calibration directly affects your battery health and charging efficiency. Proper voltage and current calibration are crucial for optimal charging performance and battery health. Check your charger settings against your battery manufacturer’s specifications at least twice a year.
Here’s how proper calibration impacts your system:
| Calibration Status | Battery Life Impact | Charging Efficiency | Common Problems |
|---|---|---|---|
| Properly Calibrated | 100% expected lifespan | 95% to 98% efficiency | Minimal issues, consistent performance |
| Slightly Off | 80% to 90% lifespan | 85% to 90% efficiency | Slow charging, incomplete cycles |
| Significantly Wrong | 50% to 70% lifespan | 60% to 75% efficiency | Overheating, sulfation, premature failure |
Common troubleshooting steps resolve most charger problems:
Pro Tip: Environmental conditions change with seasons, affecting charger performance. In summer, verify your charger has extra ventilation to handle higher ambient temperatures. In winter, check that cold hasn’t affected connection integrity or caused moisture buildup. Adjust your charging location seasonally for optimal results.
For specific issues with popular models, consult resources on golf cart charger troubleshooting or check guides addressing EZ Go charger problems for targeted solutions.
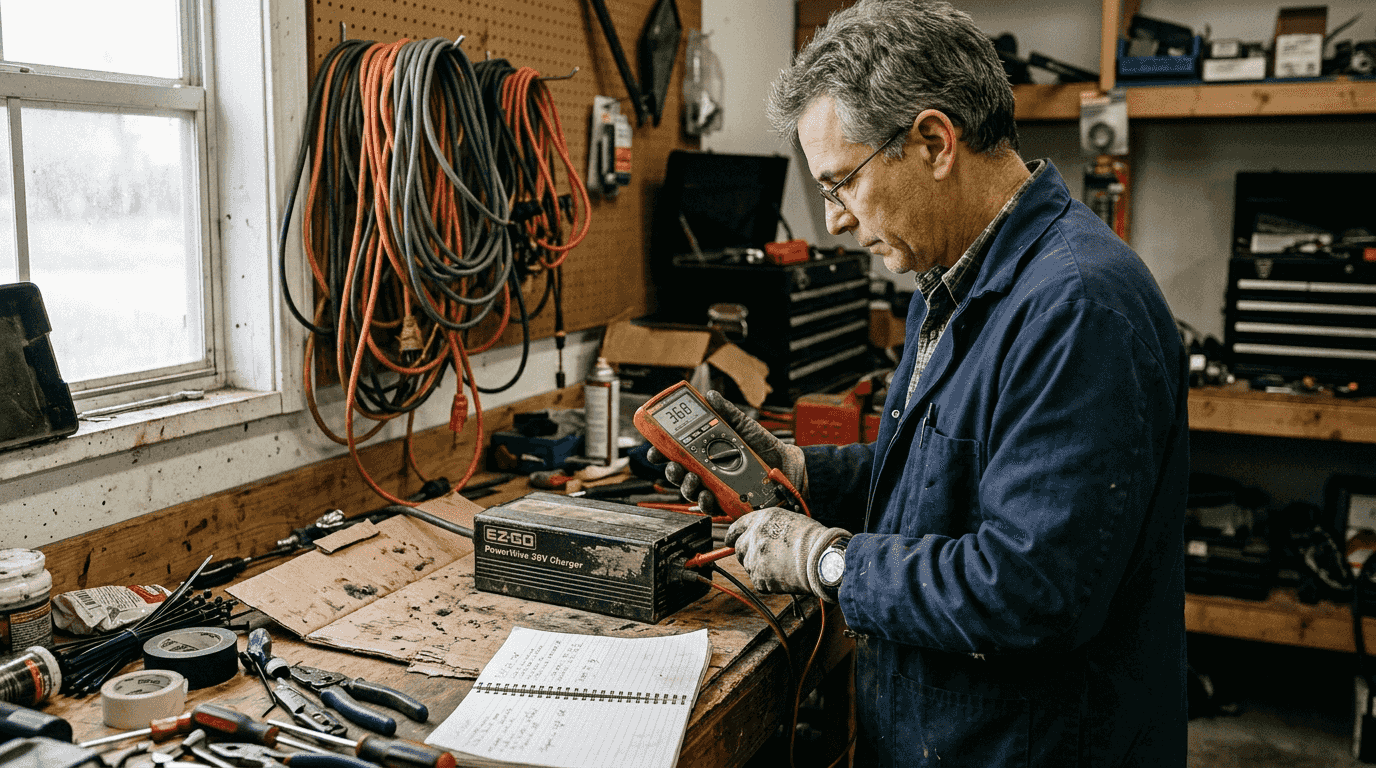
Testing your charger after maintenance confirms everything works properly. The digital multimeter is the most important tool for testing a golf cart battery charger, allowing measurement of voltage and resistance to determine if power is flowing correctly.
Follow these steps to test your charger:
Visual inspection catches problems that testing might miss. Regular inspection of charger cables and connectors is essential to prevent electrical hazards and ensure efficient power transfer. Look for these warning signs:
Common failure signs require immediate attention. If your charger makes clicking sounds but won’t charge, check for low battery voltage triggering protective shutdown. Chargers that start but stop prematurely often have overheating issues or faulty temperature sensors. Units that won’t power on at all may have blown fuses or internal component failure.
Quick fixes solve many common problems without professional help. Cleaning corroded terminals often restores charging capability. Tightening loose connections eliminates intermittent charging issues. Resetting the charger clears temporary electronic glitches. However, internal repairs require professional service to avoid safety hazards.
Pro Tip: Keep a maintenance log recording your multimeter readings, inspection dates, and any issues you’ve addressed. This history helps you spot trends like gradually declining voltage output or increasingly frequent resets, signaling it’s time for professional service or replacement before complete failure leaves you stranded.
For comprehensive battery care that complements charger maintenance, review guides on maintaining golf cart batteries to keep your entire power system running smoothly.
Maintaining your golf cart charger is just one piece of keeping your cart in peak condition. You need reliable information and quality parts to tackle every maintenance challenge effectively.

Our website offers detailed maintenance guides covering everything from battery care to motor troubleshooting. Browse our collection of expert articles that break down complex repairs into simple, actionable steps. Whether you’re dealing with electrical issues or mechanical problems, you’ll find clear instructions backed by industry expertise.
Explore our golf cart maintenance resources for comprehensive guides on every aspect of cart care. Check out our step by step golf cart maintenance guide to develop a complete maintenance routine. When you encounter motor issues, our motor troubleshooting guide provides diagnostic help and repair solutions.
Our parts selection includes everything you need to keep your charger and cart running smoothly. Find the right replacement cables, connectors, and accessories backed by expert product recommendations. Join our community of golf cart owners who rely on practical advice and quality products to maintain their investments.
Clean your charger contacts every three to six months to prevent charging interruptions. Cleaning contacts every 3 to 6 months can prevent common charging issues related to dust and corrosion. Use a soft cloth for surface cleaning and electrical contact cleaner for stubborn corrosion, always ensuring components are completely dry before reconnecting.
Move your charger to a cooler, well-ventilated location away from direct sunlight and heat sources. Check for dust blocking cooling vents and clean them thoroughly with a soft brush. Ensure at least six inches of clearance around all sides of the charger to allow proper airflow and heat dissipation.
Use a digital multimeter set to DC voltage mode to measure your charger’s output voltage. The digital multimeter is the most important tool for testing a golf cart battery charger. Touch the probes to the output terminals and verify the reading matches your charger’s rated voltage, staying stable without significant fluctuation.
Incorrect voltage or current settings reduce battery life by causing undercharging or overcharging, both damaging to battery cells. Using the wrong charger can cause slow charging or even battery damage. Proper matching ensures optimal charging performance, extends battery lifespan, and prevents safety hazards like overheating or thermal runaway.
Explore our store to see what our products and resources can do for you.

Leave a comment