


Your Cart Is Our Priority
Explore our store to see what our products and resources can do for you.

Maintaining your golf cart shouldn’t feel like decoding a puzzle. Without clear, step by step guidance, you risk expensive repairs, safety issues, and shortened cart life. This guide walks you through practical daily checks, battery care, tire maintenance, and troubleshooting to keep your cart running smoothly for years. You’ll learn exactly what to do, when to do it, and why it matters.
| Point | Details |
|---|---|
| Battery maintenance extends life by up to 25% | Regular watering, charging, and cleaning prevent premature failure and costly replacements. |
| Proper tire care increases lifespan by 30% | Weekly pressure checks and rotation every 500 to 1,000 miles reduce uneven wear. |
| Daily inspections prevent breakdowns | Checking battery charge, brakes, steering, and tire pressure before each use ensures safe operation. |
| Lubrication reduces wear and improves comfort by 20% | Greasing moving parts every 6 to 12 months keeps your ride quiet and smooth. |
| Routine brake and steering checks ensure safety | Inspecting every 3 to 6 months maintains reliable control and stopping power. |
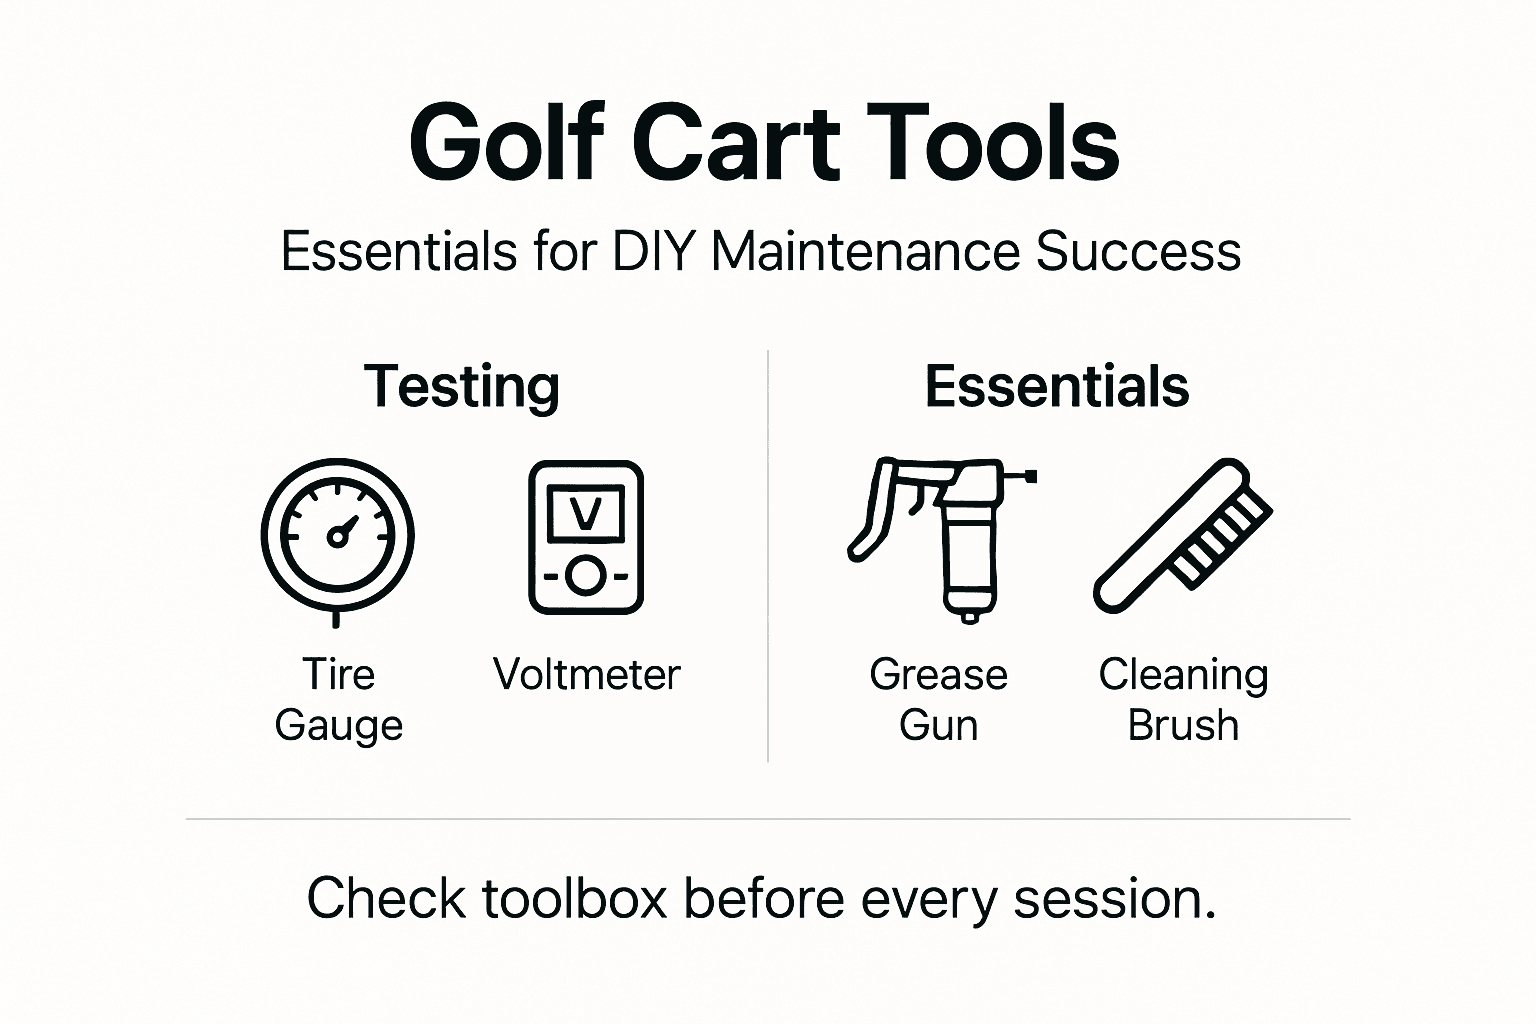
Before you start any maintenance, gather the right tools and understand your golf cart type. You’ll need a tire pressure gauge, battery hydrometer, multi-purpose grease, oil-based lubricants, distilled water, cleaning supplies like baking soda and a wire brush, and basic hand tools. Safety gear matters too. Wear gloves and eye protection to avoid chemical burns from battery acid or grease injuries.
Knowing whether you own an electric or gas cart determines which procedures apply. Electric carts require battery watering and charging routines, while gas models need oil changes and spark plug checks. Always consult your owner’s manual before performing maintenance to confirm specifications like tire pressure and lubrication intervals. Distilled water is essential for lead-acid batteries because tap water contains minerals that damage battery plates and shorten life.
Pro Tip: Create a dedicated maintenance station in your garage with labeled bins for tools, lubricants, and cleaning supplies. This organization saves time and ensures you never skip a step because you can’t find what you need.
Perform a daily pre-operation inspection checking battery charge, steering, brakes, tire pressure, and fluid levels to ensure safety and avoid breakdowns. Following essential golf cart maintenance tips keeps your cart reliable. This comprehensive golf cart maintenance guide covers detailed procedures.
| Tool Category | Items Needed | Purpose |
|---|---|---|
| Testing Equipment | Tire pressure gauge, battery hydrometer | Measure tire PSI and battery electrolyte levels |
| Lubricants | Multi-purpose grease, oil-based lubricants, spray lube | Reduce friction on bearings, cables, hinges |
| Cleaning Supplies | Baking soda, wire brush, distilled water, rags | Remove corrosion and maintain battery terminals |
| Safety Gear | Gloves, eye protection | Protect against acid and grease injuries |
Performing a daily pre-operation inspection takes five minutes but prevents hours of frustration. Start with these checks before every ride:
To properly test brakes, roll forward slowly and apply firm pressure. The cart should stop smoothly without pulling to one side. For steering, drive in a figure eight pattern at low speed and listen for grinding or clicking noises that signal worn components.
Pro Tip: Keep a small notebook in your cart to log daily inspection results. Note the date, battery charge level, tire pressure readings, and any issues. Over time, patterns emerge that help you predict when parts need replacement before they fail.
Completing daily golf cart safety checks using this daily maintenance checklist becomes second nature with practice.
Battery care determines how long your golf cart runs reliably. Follow these steps to maximize battery life:
Monthly cleaning and terminal maintenance with baking soda solution prevents corrosion and extends battery life by 25%. Never overcharge by leaving the charger connected for more than 24 hours, as this boils off electrolyte and warps plates.
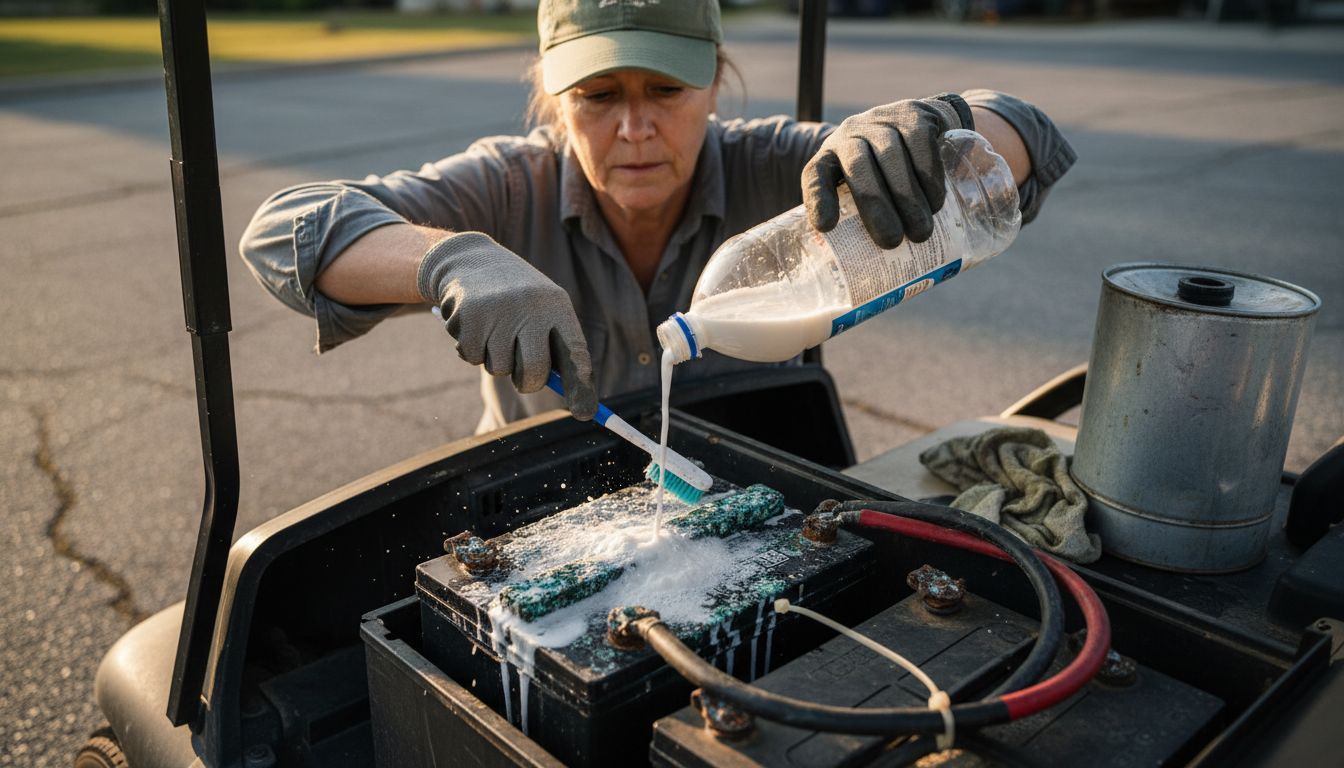
Pro Tip: Mark your calendar for the first day of each month to remind yourself to check water levels and clean terminals. Consistency matters more than perfection with battery care.
| Maintenance Task | Frequency | Time Required | Expected Benefit |
|---|---|---|---|
| Daily charging | After each use | 8 to 10 hours overnight | Prevents deep discharge and sulfation |
| Water level check | Monthly | 10 minutes | Maintains electrolyte coverage of plates |
| Terminal cleaning | Monthly | 15 minutes | Reduces corrosion and improves conductivity by 25% |
| Full battery replacement | Every 4 to 6 years | 1 to 2 hours | Restores full capacity and range |
Learn more battery maintenance tips, avoid battery care mistakes to avoid, and master cleaning golf cart batteries. This battery charging and cleaning guide offers detailed procedures.
Tires affect safety, comfort, and cart performance more than most owners realize. Proper tire maintenance is straightforward:
Improper inflation increases blowout risk by 15%, especially in hot weather when air pressure rises. If you notice uneven wear patterns like bald spots on one side or center wear, check alignment and suspension components for damage.
Pro Tip: Keep a portable 12-volt air pump in your golf cart for emergency inflation on the course or trail. These compact pumps plug into any outlet and inflate a tire in minutes.
Apply these tire care tips to reduce annual golf cart tire maintenance costs significantly.
Lubrication keeps your cart rolling smoothly and quietly. Here’s how to do it right:
Focus on these key areas during lubrication:
Pro Tip: Schedule lubrication during seasonal maintenance in spring and fall. This twice-yearly routine aligns with weather changes that affect grease viscosity and ensures you never forget.
Follow these lubrication tips to maintain smooth operation and extend component life.
Reliable brakes and steering keep you safe. Inspect and maintain these systems regularly:
Follow these steps to inspect and adjust brakes:
Address brake and steering system maintenance issues promptly to maintain control and safety.
Working lights and electrical systems matter for safety and legal compliance, especially on street-legal carts. Perform these monthly checks:
Common electrical issues and quick fixes:
Understand street-legal golf cart electrical requirements if you drive on public roads. Local laws mandate working lights, mirrors, and signals for legal operation.
Avoiding these frequent errors saves money and prevents breakdowns:
What to do instead:
Review common maintenance mistakes and fixes to troubleshoot issues quickly.
Consistent maintenance delivers measurable results. Battery maintenance can extend battery life by up to 25%, proper tire care can extend tire life by up to 30%, and lubrication improves ride comfort by 20%. Routine inspections reduce costly repairs by catching problems early.
| Frequency | Maintenance Tasks | Time Required | Expected Benefits |
|---|---|---|---|
| Daily | Check battery charge, test brakes and steering, inspect tire pressure | 5 minutes | Prevents breakdowns and ensures safe operation |
| Weekly | Measure tire pressure, look for leaks or damage | 10 minutes | Maintains handling and prevents flats |
| Monthly | Water batteries, clean terminals, test lights and signals | 30 minutes | Extends battery life 25%, ensures visibility |
| Quarterly | Inspect brakes, adjust cables, check steering components | 45 minutes | Maintains stopping power and control |
| Annually | Lubricate moving parts, deep clean, replace worn components | 2 to 3 hours | Reduces wear 20%, improves comfort and quiet |
Why sticking to this schedule matters:
Follow this golf cart maintenance schedule to maximize golf cart maintenance benefits throughout the year.
Now that you know the maintenance steps, you need the right parts and accessories to keep your cart running at peak performance. We carry essential maintenance supplies like battery hydrometers, tire pressure gauges, and premium lubricants designed specifically for golf carts. Our expert buying guides help you choose replacement batteries, tires, brake components, and lighting upgrades matched to your cart’s make and model.

Whether you need routine maintenance items or performance upgrades, we stock trusted brands at competitive prices. Explore top golf cart upgrades and accessories to enhance your ride. Learn choosing the right golf cart parts with our detailed guides. Visit the Golf Cart Stuff homepage to discover everything your cart needs.
Check water levels monthly and add distilled water when electrolyte levels drop below half an inch above the plates. In hot climates or with frequent use, check every two weeks to prevent plate exposure and damage.
Most golf cart tires require 18 to 22 PSI, but always check the sidewall stamp for your specific tire’s recommendation. Maintain pressure within 2 PSI of the recommended value for optimal performance and safety.
Never use tap water in golf cart batteries. Minerals in tap water coat the plates and reduce capacity permanently, leading to premature failure and costly replacement.
Replace brake pads when thickness drops below 1/8 inch or when you hear grinding metal-on-metal sounds. If the brake pedal requires excessive travel or feels spongy, inspect and adjust cables immediately.
Reduced runtime, slow acceleration, difficulty holding a charge, and visible bulging or leaking indicate battery failure. If your cart runs less than half its normal distance per charge, test batteries with a hydrometer and replace the entire pack if readings are low.
Discover more golf cart battery maintenance strategies to extend battery life and performance.
Explore our store to see what our products and resources can do for you.

Leave a comment