


Your Cart Is Our Priority
Explore our store to see what our products and resources can do for you.

TL;DR:
- Proper safety precautions require disconnecting the negative battery terminal before working on a golf cart’s electrical system. Using a voltage reducer is essential for 12V accessories on 36V or 48V carts to prevent immediate damage. Starting with simple, plug-and-play accessories and thorough planning reduces errors and ensures successful upgrades.
Golf cart accessory installation tips are techniques every owner must master to upgrade their cart safely and without damaging the electrical system. The single most important rule: disconnect the negative battery terminal before touching any wiring. On 36V or 48V systems, failure to disconnect risks destroying a 12V accessory in under one second. Whether you are adding LED lights, a rear seat, or a phone mount, the same core principles apply: verify compatibility, wire correctly, and test before reassembly.
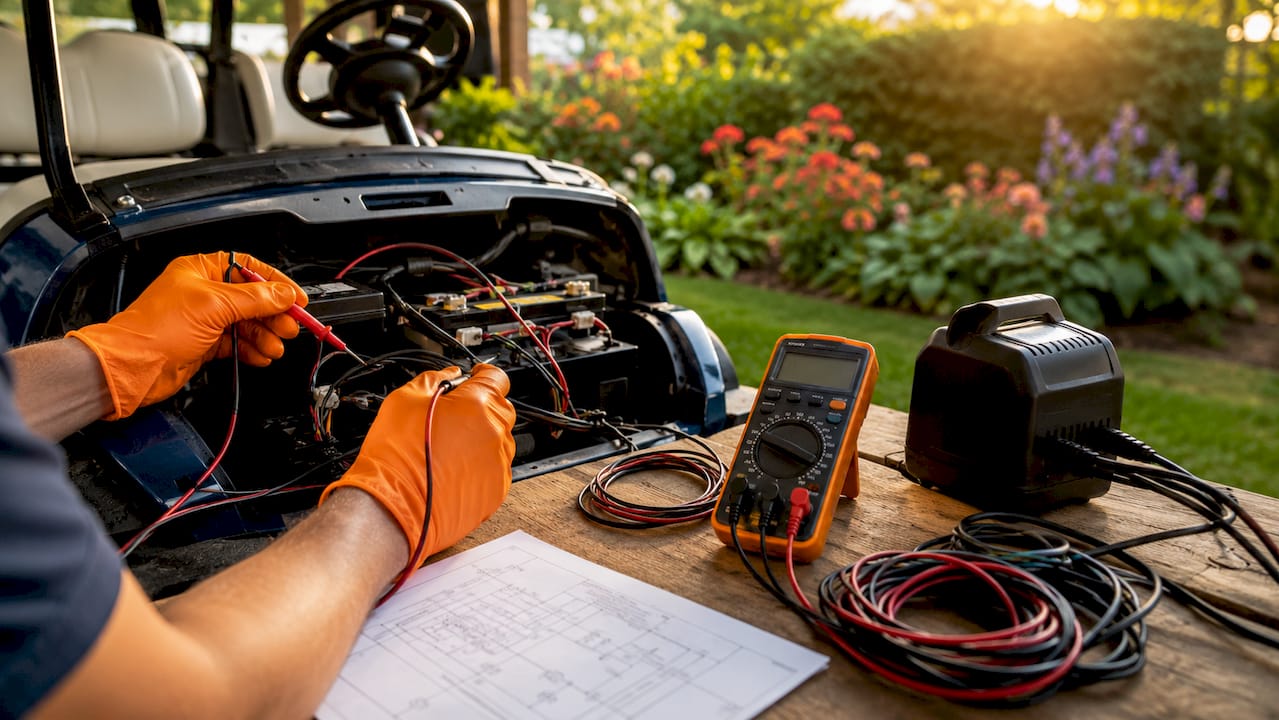
Safety comes before every tool you pick up. The right preparation prevents electrical shorts, physical injury, and expensive part failures.
Follow these steps before any installation:
Pro Tip: Take a photo of your cart’s existing wiring before removing anything. That photo becomes your reference map when reconnecting.
Verifying your cart’s voltage system is not just a safety step. It determines which accessories are compatible and whether you need additional components like a voltage reducer.
Correct wiring is the difference between an accessory that lasts years and one that burns out in minutes. The core issue most owners miss is voltage mismatch.
12V accessories on 36V or 48V carts require a voltage reducer. The reducer taps into the battery pack and steps the voltage down to a stable 12V output. Without it, you will fry USB chargers, LED controllers, radios, and any other 12V device immediately.
Key wiring best practices:
| Accessory type | Voltage needed | Requires reducer? | Fuse rating |
|---|---|---|---|
| LED light kit | 12V | Yes (on 36V/48V) | 10A–15A |
| Phone mount charger | 12V | Yes (on 36V/48V) | 5A |
| Horn | 12V | Yes (on 36V/48V) | 5A |
| Rear seat (no wiring) | N/A | No | N/A |
| Fender flares (no wiring) | N/A | No | N/A |
Pro Tip: Poor grounding is the leading cause of intermittent accessory failures. If a light flickers or a horn cuts out randomly, check the ground connection first before replacing the part.
Proper grounding to bare metal and multimeter verification are the two steps most owners skip. Both are fast and both prevent hours of troubleshooting later.
The best starting point for any owner is accessories that deliver real utility without complex wiring. The most cost-effective upgrades include LED lighting kits, mirrors, and rear seats, with prices ranging from $40 to $490.
Top beginner-friendly accessories:
Plug-and-play accessory kits are the right choice for beginners. They are designed for specific cart models and eliminate the guesswork of universal kits that require custom wiring. Performance upgrades like lithium battery conversions cost $800 or more and involve complex wiring. Save those for after you have completed two or three simpler installs.
Pro Tip: Always search by your cart’s make, model, and year when buying accessories. A kit labeled “universal” often requires modifications that add time and risk.
Most installation failures come from a short list of repeated errors. Knowing them in advance saves money and prevents safety hazards.
Skipping the battery disconnect is the single most common cause of accessory failure during installation. One second of contact with a live 48V circuit is all it takes to destroy a 12V device permanently.
The electrical system basics of your specific cart model are the most useful reference you can have before starting any install. Read them before you pick up a wrench.
A planned installation takes less time and produces cleaner results than one started without preparation. The difference shows up in your wiring, your finish quality, and how easy future upgrades become.
Follow this sequence for any upgrade project:
Pro Tip: Use a label maker or masking tape to mark every wire before disconnecting it. Reconnecting unlabeled wires from memory is how mistakes happen.
Taking before photos of your wiring is one of the highest-value habits you can build. It costs 30 seconds and saves hours. Organized wiring also makes your cart easier to service and sell.
For a broader look at what upgrades make the most sense for your cart right now, the best golf cart add-ons for 2026 is a solid starting point.
Successful golf cart accessory installation requires disconnecting the battery first, matching voltage with a reducer, selecting compatible parts, and testing every circuit before final assembly.
| Point | Details |
|---|---|
| Disconnect battery first | Always remove the negative terminal before any electrical work to prevent instant accessory damage. |
| Use a voltage reducer | 12V accessories on 36V or 48V carts need a reducer to avoid immediate burnout. |
| Match wire gauge to fuse | Use at least 14 AWG wire for a 10A fuse to prevent overheating and fire risk. |
| Start with plug-and-play kits | Model-specific kits reduce wiring errors and are the right choice for first-time installers. |
| Test before reassembly | Verify each accessory individually after reconnecting the battery to catch faults early. |
The first time I wired a 12V LED kit directly to a 48V battery pack, I learned the voltage reducer lesson the hard way. The lights lasted about three seconds. That one mistake cost me more than the reducer would have.
What I have found over time is that the owners who get the best results are not the ones with the most tools. They are the ones who plan before they touch anything. Photographing existing wiring, labeling connectors, and laying out parts before starting cuts installation time significantly and eliminates most errors.
Plug-and-play kits changed how I approach beginner installs entirely. When a kit is built for your specific cart model, the connectors fit, the mounting points line up, and the wiring diagram actually matches what you see in front of you. Universal kits sound appealing until you spend two hours adapting brackets that almost fit.
My honest advice for anyone new to installing golf cart accessories: start with a bolt-on upgrade like mirrors or a rear seat. Get comfortable with how your cart is built. Then move to a simple LED kit with a plug-and-play harness. By the time you tackle a lift kit or a lithium battery swap, you will have the confidence and the reference photos to do it right.
— Roshan

Every installation tip in this article works better when you start with parts built for your specific cart. Golfcartstuff carries a wide selection of golf cart accessories covering LED kits, mirrors, rear seats, fender flares, and more, all organized by cart make and model. If you own a Club Car or Yamaha, you can filter directly to Club Car DS parts or Yamaha golf cart parts to find compatible options fast. The Golfcartstuff team also provides compatibility guidance so you buy the right part the first time. Fast shipping means your upgrade project does not sit waiting.
You need a voltage reducer only for 12V accessories on 36V or 48V carts. Bolt-on accessories like mirrors and rear seats require no electrical connection at all.
Use at least 14 AWG wire for circuits protected by a 10A fuse. Higher-draw accessories require heavier gauge wire to prevent overheating.
Check the accessory listing for your cart’s make, model, and year. Plug-and-play kits list specific compatibility, while universal kits often require custom fitting.
Reconnect the positive terminal first, then the negative. This order prevents shorts and protects newly installed accessories from voltage spikes.
Intermittent operation almost always points to a poor ground connection. Check that the ground wire connects to bare metal chassis, not a painted or plastic surface.
Explore our store to see what our products and resources can do for you.

Leave a comment