


Your Cart Is Our Priority
Explore our store to see what our products and resources can do for you.

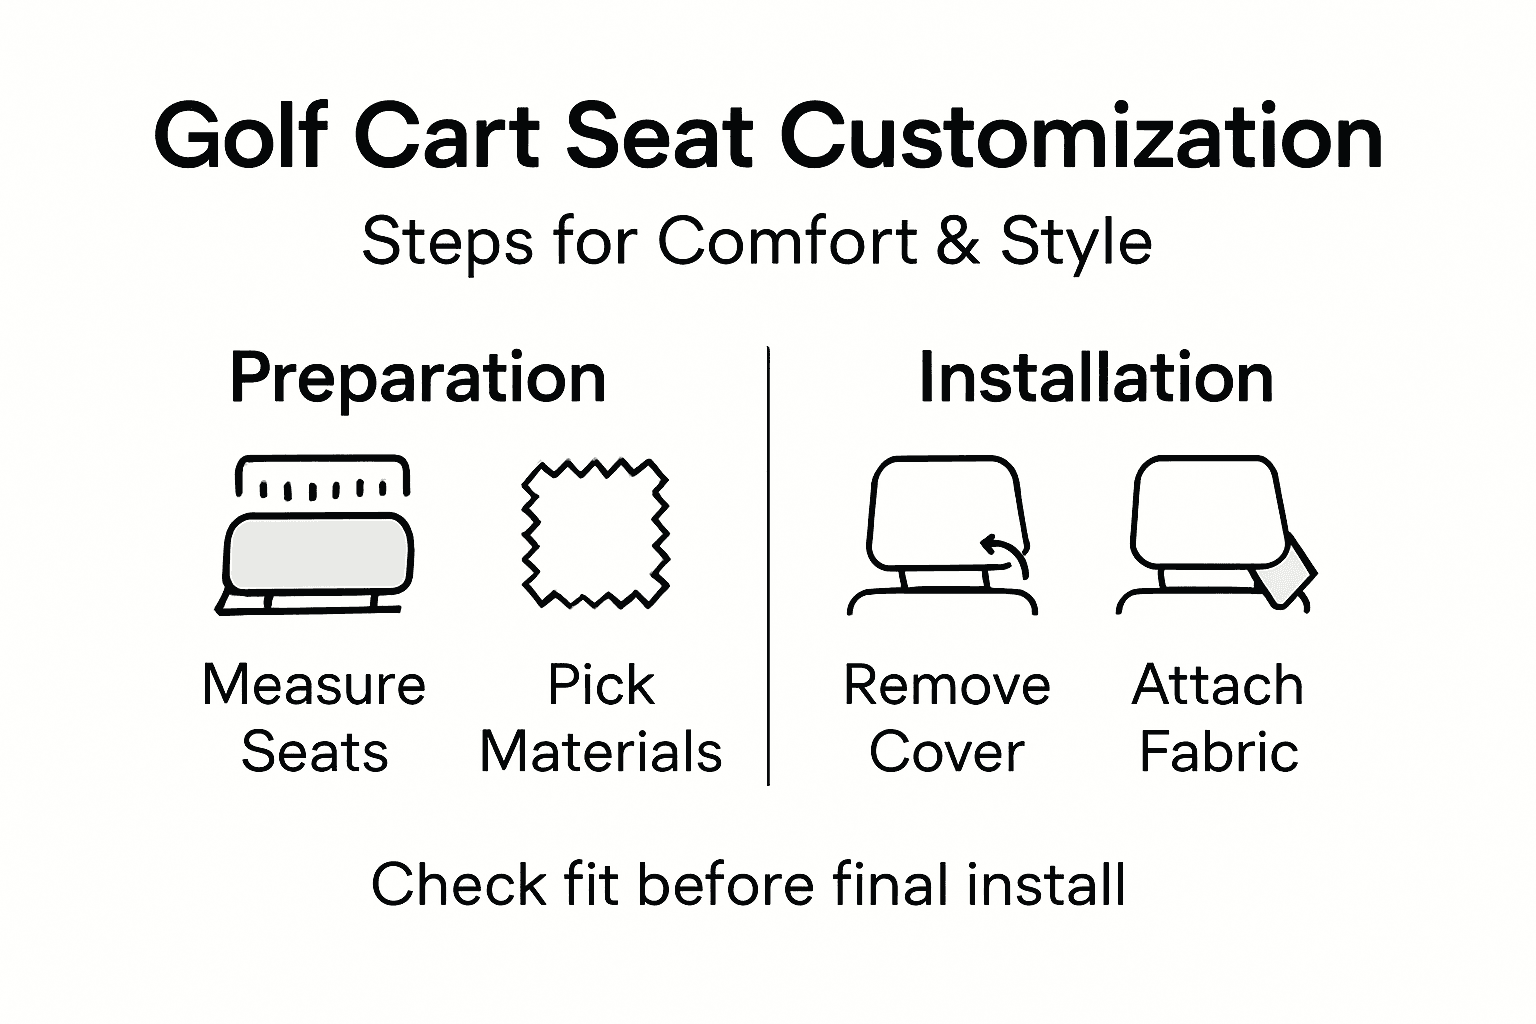
Turning your golf cart into a comfortable and stylish ride starts with having the right materials and a clear plan. Many American golf cart owners know that adding custom seats can transform every round on the course or trip around the neighborhood. Accurate measurements prevent costly errors while following safety guidelines and using quality tools ensure your project delivers lasting comfort and durability. This guide walks you through each step, helping DIY enthusiasts achieve professional results.
| Key Point | Explanation |
|---|---|
| 1. Gather essential tools and materials | Proper preparation with tools and materials ensures a smooth seat customization process while adhering to safety guidelines. |
| 2. Follow proper removal techniques | Carefully detach old covers to prevent damage, understanding different attachment methods aids in a successful removal. |
| 3. Ensure precise installation of new materials | Installation requires attention to detail; stretch materials evenly and secure them correctly for a professional look. |
| 4. Adjust and secure fittings accurately | Properly aligning and tightening fittings is crucial for safety and stability of the seat during usage. |
| 5. Conduct a thorough quality inspection | A comprehensive inspection assesses comfort and safety, ensuring the newly customized seats meet desired standards. |
Customizing your golf cart seats requires careful preparation and the right equipment. Before diving into the project, you’ll want to collect a comprehensive set of materials that align with safety performance guidelines.
Start by assembling your toolkit with these key items:
Your material selections are equally critical. You’ll need high-quality replacement components like:
Here’s a helpful selection guide for choosing golf cart seat materials:
| Material Type | Weather Resistance | Comfort Level | Maintenance Needs |
|---|---|---|---|
| Marine-grade Vinyl | Excellent in all weather | Firm but durable | Easy to clean with soap |
| Leather | Good if maintained | Soft and luxurious | Requires regular conditioning |
| Fabric | Moderate (can fade) | Plush and breathable | May need stain protection |
Pro tip: Always purchase slightly more material than you think you’ll need to account for potential mistakes or adjustments.
Before purchasing materials, double-check your golf cart’s specific model and seat dimensions to ensure a perfect fit. Accurate measurements prevent costly errors and guarantee a professional-looking customization.
Pro tip: Keep all your tools organized in a dedicated toolbox to streamline your golf cart seat modification process.
Removing your existing golf cart seat covers is a crucial first step in customization, requiring careful attention to detail and precision. When approaching seat removal techniques, you’ll want to take a methodical approach to avoid damaging your golf cart’s interior.
Start by thoroughly examining your seat’s attachment mechanism. Most golf cart seats are secured using one of several methods:
Consider this quick overview of common attachment methods and their pros and cons:
| Attachment Method | Main Advantage | Potential Drawback |
|---|---|---|
| Bolts and Screws | Secure, long-lasting | May require special tools |
| Retaining Clips | Fast removal | Can break if forced |
| Stapled Upholstery | Cost-effective | Less reusable |
Here’s a step-by-step process for safe seat cover removal:
Careful removal prevents unnecessary damage to your golf cart’s seat structure.
When removing the cover, work slowly and systematically. Inspect the underlying foam and frame for any signs of wear or damage that might require additional attention during your customization process.
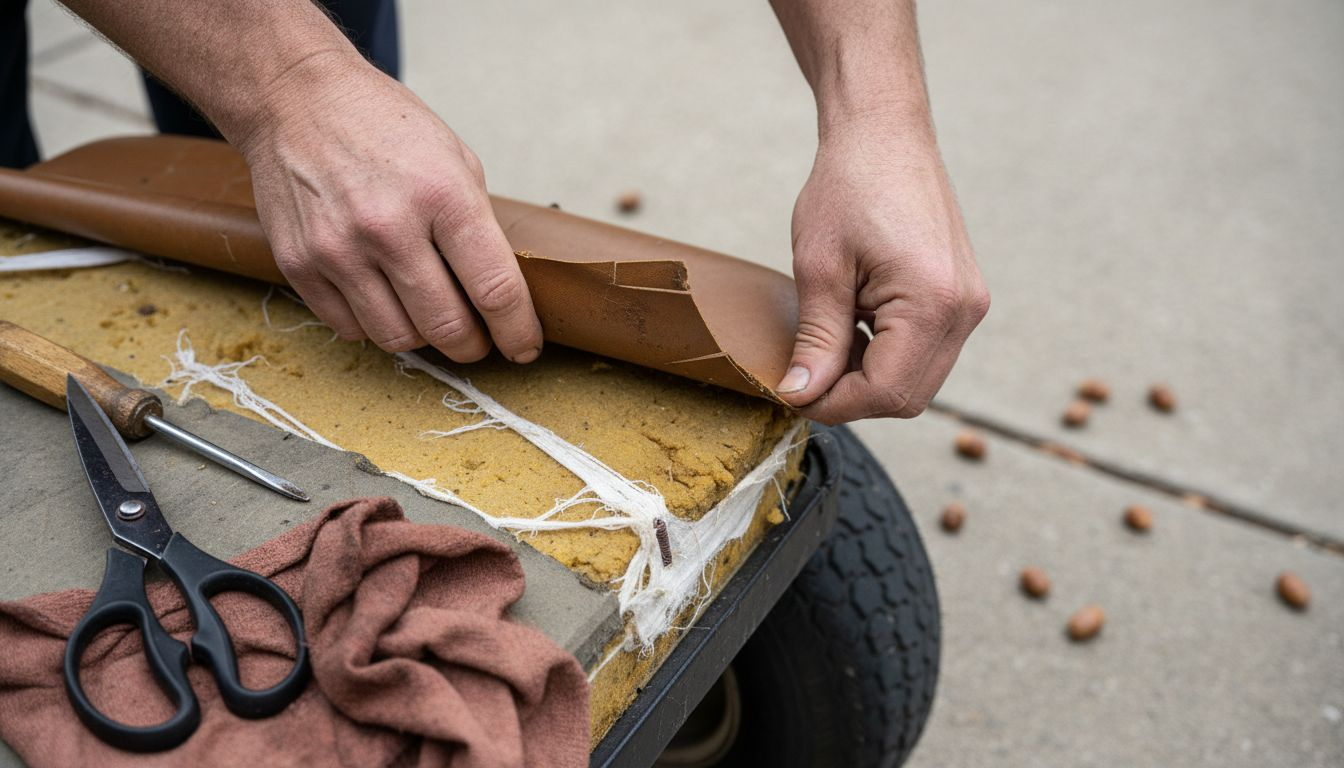
Pro tip: Take clear, well-lit photographs of the original seat configuration before disassembly to help you during reinstallation.
With your old seat covers removed, you’re ready to transform your golf cart’s interior with new custom seat materials. Seat material installation requires precision and patience to achieve a professional-looking finish.
Begin by laying out your new upholstery and preparing your workspace. You’ll need these essential tools:
Follow these key installation steps:
Consistent tension is crucial for a smooth, professional-looking seat cover.
Check your work frequently during installation, making small adjustments to ensure the material remains taut and aligned. Pay special attention to corners and edges, where wrinkles tend to develop.
Pro tip: Warm the upholstery material slightly with a hairdryer to increase its flexibility and make stretching easier.
With your new seat material in place, the next critical step is ensuring everything is properly secured and perfectly adjusted. Seat fitting standards require careful attention to structural integrity and safety.
Your seat adjustment toolkit should include:
Follow these crucial installation steps:
Proper torque prevents loosening and ensures maximum safety during operation.
Inspect all connection points thoroughly, making sure no gaps exist between the seat base and mounting surface. Slight adjustments can make a significant difference in overall comfort and stability.
Pro tip: Keep a small notebook to record exact torque specifications for each bolt, creating a reference for future maintenance.
After completing your seat installation, a thorough inspection is crucial to ensure your customization meets both safety and comfort standards. Golf cart seat quality requires a comprehensive evaluation of multiple aspects.
Use this detailed inspection checklist to assess your newly customized seats:
Perform these key inspection steps:
Comfort and safety are equally important in seat customization.
Move through different seating positions to ensure the new seat provides consistent support and comfort across various sitting angles. Pay close attention to how the seat responds to movement and weight distribution.
Pro tip: Use a bright light and magnifying glass to inspect intricate details of stitching and material connections that might be missed by the naked eye.
Customizing golf cart seats can be a rewarding challenge when it comes to improving both style and comfort. The article highlights common pain points like choosing the right materials, ensuring perfect fit, and achieving a professional installation without damaging your cart. If you want to avoid costly mistakes and get the best results, having access to premium components like marine-grade vinyl, durable foam padding, and strong fastening hardware is key.

Now is the time to bring your golf cart customization to life with confidence. Explore Golf Cart Stuff where you can find all the essential parts and accessories for upgrading your seats with ease. Whether you need replacement seat covers, foam cushions, or tools to secure your fittings, our selections are designed to help you create a stylish and comfortable ride. Visit Golf Cart Stuff today and start your golf cart transformation the right way.
You will need measuring tape, a sharp utility knife, heavy-duty scissors, a leather or fabric stapler, screwdrivers, and work gloves. Additionally, choose high-quality materials like marine-grade vinyl or leather, high-density foam padding, and heavy-duty thread to ensure durability and comfort.
To remove existing seat covers, start by disconnecting the battery and locating any visible fasteners. Carefully use the right screwdrivers to loosen and remove any bolts, screws, or clips securing the covers, making sure to handle everything gently to avoid damaging the seat structure.
Begin by positioning the new upholstery over the seat base and stretching it evenly to eliminate wrinkles. Secure the material starting from the center and work outward, using a staple gun or industrial adhesive to ensure it stays taut and smooth throughout the installation.
To secure the seat, align it with the mounting points and hand-tighten all bolts before using a torque wrench to ensure they are properly tightened. Test for movement and stability by rocking the seat side to side, and check for comfort while sitting in different positions.
Inspect for even stitching and material imperfections, assess the cushion’s support, and verify that all attachment points are secure. Pay attention to the upholstery’s tension to ensure it is smooth and comfortable, checking that there are no sharp edges or loose fasteners present.
Explore our store to see what our products and resources can do for you.

Leave a comment