
Your Cart Is Our Priority
Explore our store to see what our products and resources can do for you.

If your golf cart brake lights won’t come on, or won’t turn off, the brake light switch is almost always the culprit. Press the pedal and watch the plunger or pad move. If it sticks, doesn’t spring back, or shows no continuity on a multimeter, the switch has failed. Replace it with a switch matched to your cart’s make and voltage, sold through Golfcartstuff.
TL;DR:
- A brake light switch that sticks, fails to move, or shows no continuity indicates it needs replacement, especially if lights stay on or never turn on.
- Proper diagnosis requires testing the switch with a multimeter while pressing the pedal to confirm circuit opening and closing, ruling out wiring or fuse issues.
- Choosing between plunger or pressure pad styles depends on your cart’s make, with voltage ratings of 12V, 36V, or 48V critical to prevent premature failure.
- Correct installation involves disconnecting the battery, verifying wiring, and testing the switch before reassembling to avoid wiring or alignment faults.
- Mismatched parts, such as using a universal pressure pad on a cart that requires an OEM plunger switch, often causes functional issues, so confirm compatibility first.
A failed switch shows up in one of two ways: lights that never turn on, or lights that never turn off. Both point to the same part, just failing in opposite directions. A switch stuck open cuts the circuit entirely. A switch stuck closed keeps sending power to the lights even with your foot off the pedal, which drains your battery faster than most owners realize.
Before you assume the switch is the problem, run through a quick physical check:
The most reliable test is electrical, not visual. With the cart powered down, set a multimeter to continuity and probe the switch terminals while pressing the pedal by hand. A functioning switch closes or opens the circuit cleanly the instant the plunger moves. No change on the meter, no continuity, means the switch itself has failed.
Pro Tip: If your lights work sometimes but flicker over bumps, don’t replace the switch yet. That pattern usually points to a loose connector or a chafed wire, not a dead switch, and swapping parts won’t fix a wiring problem.
If continuity checks out fine at the switch but the lights still don’t work, the fault has moved downstream: check the fuse first, then the relay, then voltage at the light harness itself. A switch that tests good electrically is not your problem.
Two designs dominate the golf cart market, and picking the wrong one is the single most common mistake owners make.
Plunger (micro switch) style mounts near the pedal linkage and gets triggered by mechanical movement of the pedal arm. This is the OEM design on most Club Car DS models, and it’s the more precise of the two since it responds to actual pedal travel rather than pressure. Pressure pad style sits under or against the brake mechanism and closes the circuit when compressed. Pressure pads are more common as universal replacements because they don’t require matching a specific bracket geometry.
Voltage matters more than most buyers expect. Golf carts run on 12V, 36V, or 48V systems depending on the cart’s age and drivetrain, and the switch itself needs to handle that load without arcing or failing prematurely. Universal brake light pad switches are typically rated across 12V, 36V, and 48V systems, but they only work once wired into an existing street-legal light harness. A universal pad is not a standalone brake light upgrade. It’s a component that needs the rest of the lighting circuit already in place.
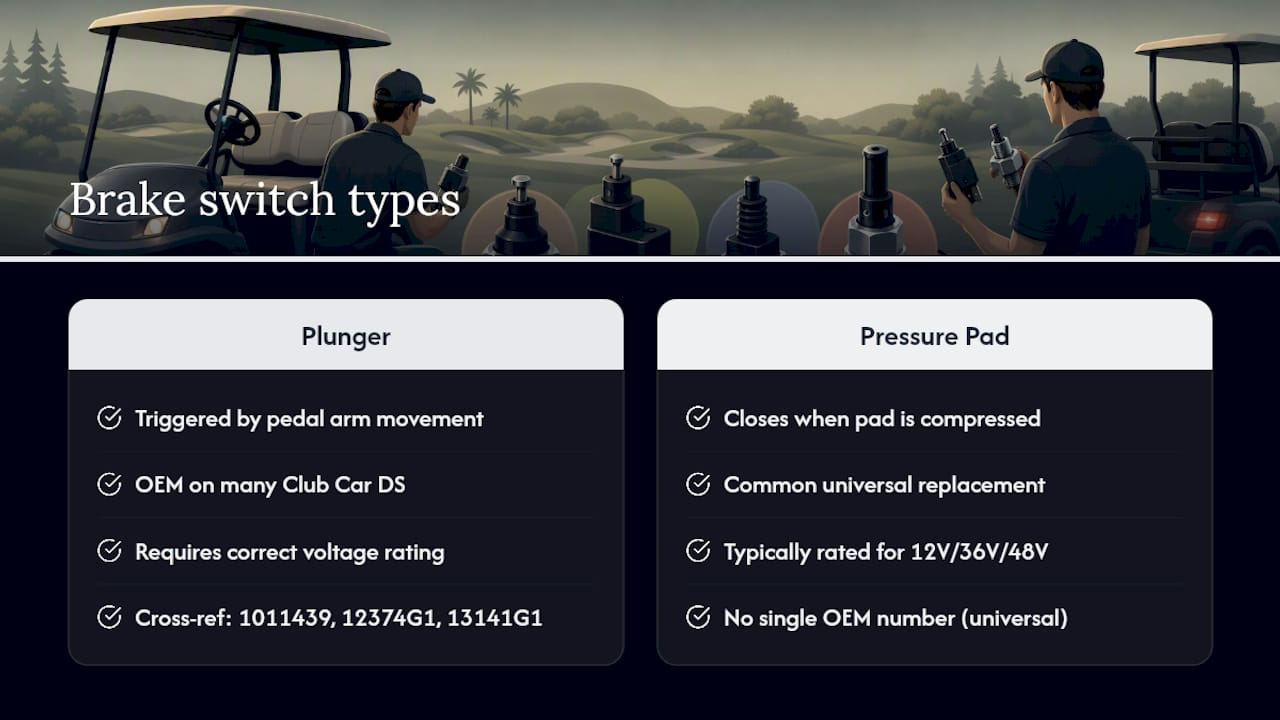
For Club Car owners, fitment gets easier because the aftermarket cross-references OEM numbers directly. Plunger-style micro switches commonly cross-reference part numbers 1011439, 12374G1, and 13141G1, all covering Club Car DS applications with simple bracket mounting. If you want a factory match rather than an aftermarket equivalent, genuine OEM kits like part 103597101 are sold as direct replacements.
Here’s the rule of thumb: if your cart already has a factory brake light circuit and you just need a like-for-like part, match the OEM number. If you’re adding street-legal lighting to a cart that never had it, a universal pad switch paired with a street-legal light kit makes more sense than forcing OEM fitment onto a system that wasn’t built for it. The micro switch mechanism itself is simple, but getting the connector style and voltage right is what actually determines whether the swap works the first time.
Start with safety, not tools. Disconnect the battery pack completely and set the parking brake so the cart can’t roll while you’re under the pedal assembly.
What you’ll need:
Replacement steps:
Pro Tip: Test the switch before you reassemble the pedal cover, not after. Chasing a wiring mistake with the cover back on doubles your repair time.
If the wiring at the pedal assembly is corroded, cut short, or spliced multiple times already, that’s your cue to stop and consult a technician rather than adding another patch to an already compromised harness. For a deeper walkthrough of accessing the pedal linkage itself, the pedal assembly guide covers the mechanical side in more detail.
A fresh switch that still misbehaves almost always traces back to installation, not a defective part.
Lights stuck on after the swap:
Lights that won’t come on at all:
Intermittent flickering, especially over rough terrain, points to a loose crimp or a corroded splice rather than the switch itself. Reflow or re-crimp that connection rather than replacing the switch a second time. If none of these checks resolve it, the fault likely sits in the relay or the harness feeding the lights, not the switch you just installed. The wiring repair workflow walks through isolating harness faults if you get to this point.
The mistake I see most often is owners grabbing a universal pressure pad when their cart actually needs an OEM plunger switch, then wondering why the fit is wrong or the lights behave strangely. Universal pads are great, but only once they’re wired into a real light harness. Working brake lights aren’t cosmetic on a street-legal cart. They’re what keeps you visible to the car behind you at dusk. Test voltage and confirm connector fit before you close anything up. It takes five extra minutes and saves a second trip to the parts bin.
— Roshan
Brake switch parts and kits are organized by make, to help determine whether a plunger switch or a universal pad fits your cart.
Search by your cart’s model and year, or plug in an OEM number if you already know it. Club Car owners will find matched parts in the Club Car DS parts collection, while EZGO owners can check the EZGO TXT parts collection for model-specific switches and mounting hardware. Whichever route you take, confirm your cart’s voltage and connector style before checkout. A 12V switch on a 48V system, or a mismatched terminal count, is the fastest way to end up reordering. If you’re unsure which part number applies to your cart, Golfcartstuff’s team can help you cross-reference it before you buy.
Explore our store to see what our products and resources can do for you.

Leave a comment