
Your Cart Is Our Priority
Explore our store to see what our products and resources can do for you.

Most owners should buy a model-specific steel or thermoplastic utility box sized to their cart’s original seat-support points, not a generic universal box. Fit and load capacity are the two factors that decide whether a box lasts. If you’re ready to shop, jump to the buying checklist; if you already own a box, skip to the installation steps below.
TL;DR:
- Model-specific mounting kits that bolt into factory seat-support points ensure proper weight distribution and more secure long-term installation than universal straps.
- Steel boxes support the heaviest loads and resist dents but require annual rust checks, especially near drilled holes and drainage points.
- Aluminum boxes are lighter and rust-proof but more prone to dents; thermoplastic options are the lightest, cheapest, and ideal for moist environments.
- Cargo capacity typically peaks around 250 pounds, but exceeding this combined with passenger and battery weight can stress the cart’s suspension and frame.
- Always verify the compatibility of the cargo box dimensions, load rating, and hardware include with your specific cart model before purchase.
Steel, aluminum, and thermoplastic each solve a different problem, and picking the wrong one shows up fast once you’re loading fertilizer bags or beach gear every weekend.
Steel boxes are the workhorses. They handle the most weight, resist dents from tools and equipment, and typically run the widest price range of the three. The tradeoff is corrosion risk near salt air or standing water, plus more weight added to the cart’s rear axle. Aluminum, often finished as diamond plate, splits the difference: it’s lighter than steel, shrugs off rust, and looks sharp on a lifted cart, but it dents more easily under heavy point loads. Thermoplastic or ABS poly boxes are the lightest and cheapest, and they never rust. This makes them the obvious pick for pool and beach carts that see constant moisture.
A typical steel box runs about four feet wide externally, while poly boxes trend slightly smaller and lighter, which matters if you’re already running heavier wheels or a lift kit and don’t want more strain on the rear suspension.
This is where most first-time buyers get tripped up. A box that looks identical in a photo can be completely wrong for your cart’s frame.
Model-specific mounting kits, built for Club Car, Yamaha, and E-Z-GO platforms, bolt into the original seat-support points and use alignment pins to set the box square before you drill a single hole. E-Z-GO RXV kits slide support frames directly into the factory seat-support locations, then use those same alignment pins to guide fastening, according to the RXV mounting kit instructions. That’s the setup Golfcartstuff recommends for anyone planning to keep the box long-term, because it distributes weight through the frame the way the cart was engineered to handle it.
Universal boxes make sense if you swap carts often or want a lower-commitment option. They typically secure with heavy-duty Velcro straps or a universal bracket kit rather than drilled mounting points, based on how most retail cargo box listings describe their fit.
Before buying either style, measure these four things:
Get the dimensions wrong and you’ll either bang your knees getting in the cart or watch the tailgate refuse to close over a folded rear seat.
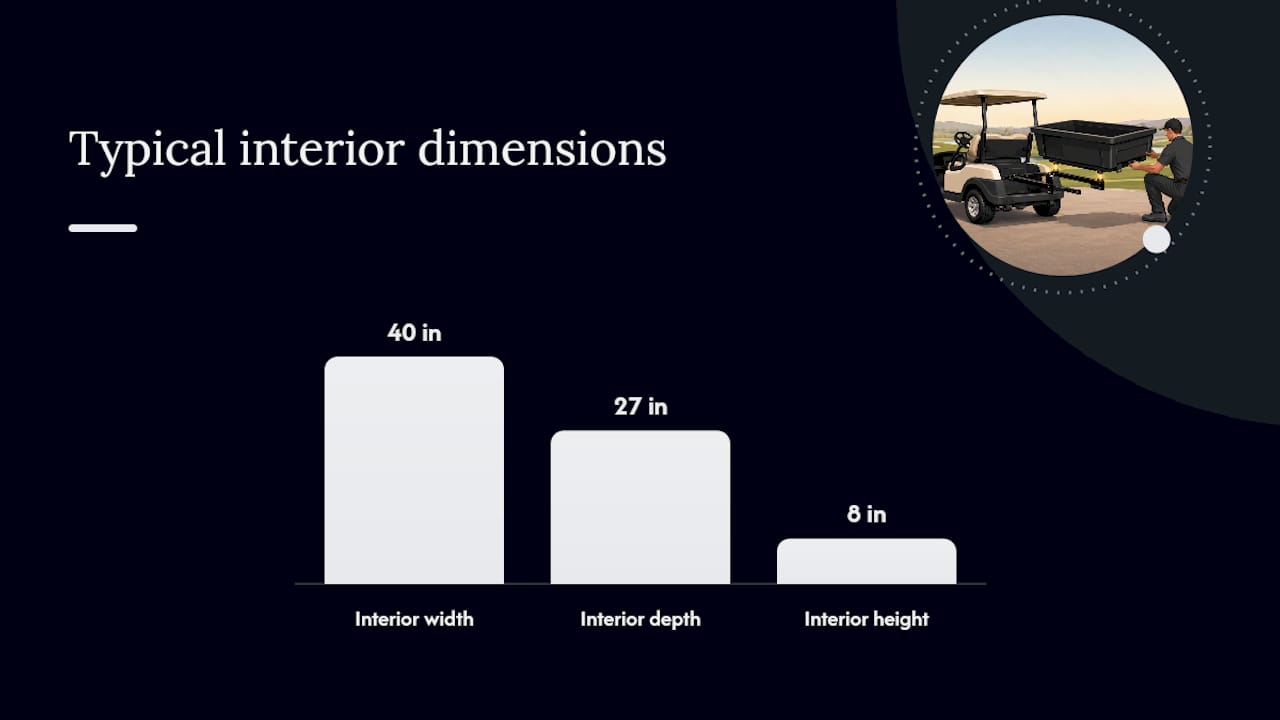
A common steel box spec lists an interior around 40 inches wide by 27 inches deep by 8 inches tall, with an exterior closer to 42 by 29 by 9 inches, based on a representative steel utility box sold for universal fitment. That same listing rates the box at 250 pounds of load capacity, which lines up with what most mid-size steel boxes advertise.
Before you load one up, check these against your own cart:
250 lb is a common capacity ceiling on standard steel boxes, but that number means nothing on its own. Compare it against your cart’s total gross vehicle weight rating, not just the box spec sheet. Golfcartstuff’s load capacity guide walks through how passenger weight, battery weight, and cargo weight all draw from the same GVWR limit, so a full box on a fully loaded cart can push past what the axle and suspension were built for.
Every OEM mounting kit follows roughly the same logic: reuse the factory seat-support points, align with pins, then drill and fasten. The specifics shift slightly by brand.
You’ll need a socket and wrench set (10 to 17mm), Allen wrenches for factory panel screws, a drill with bits stepping up to 7/16 inch, and a center punch to keep pilot holes from wandering. E-Z-GO TXT kits specifically call for 10mm x 40 hex head bolts and 3/8-16 fasteners to secure the support frames, per the TXT mounting kit instructions.
Pro Tip: Check behind the seat-support area for wiring harnesses before you drill. It’s a common miss on E-Z-GO carts, and a nicked wire is a far bigger headache than redrilling a hole.
Tighten fasteners progressively, in a rough cross pattern, rather than cranking one bolt down fully before moving to the next. That keeps the frame from twisting slightly out of alignment. Once everything’s torqued, load the box empty first and drive over a curb or rough patch at low speed. Rattling usually means a loose latch or an under-torqued bolt, not a bad box.
A box that’s installed correctly still needs basic upkeep, and the maintenance routine depends heavily on material.
Steel boxes need a rust check every few months, especially around drilled holes and drain points where paint gets scratched during install. Keep drain holes clear so water doesn’t pool inside during rain. Touch-up paint handles small chips before they spread. Poly and thermoplastic boxes hold up fine against UV exposure but benefit from a wipe-down after sandy or salty trips, plus a quick check of the Velcro straps or latch hardware for wear. Aluminum boxes rarely rust, but the fasteners holding them to steel brackets can corrode where the two metals touch, so a yearly fastener check prevents surprise loosening.
A box that looks perfect in photos can still be the wrong purchase if a few details go unchecked before checkout.
Confirm your cart’s exact model and year first, since bracket kits are rarely interchangeable even within the same brand’s lineup. Verify the bracket kit matches that model, check interior dimensions against what you’re actually hauling, and confirm the load rating fits your typical cargo weight, not just a worst-case guess. Ask the seller directly whether the box ships with all mounting hardware included, whether an installation PDF is available, and what the return policy covers if the fit turns out wrong. Some manufacturers, including Madjax’s expandable cargo box, publish install videos alongside written instructions, which is worth checking before you commit.
Watch for listings with vague phrases like “fits most carts” and no dimensions listed. That’s usually a sign the seller hasn’t tested fitment on your specific model, and pricing across steel and thermoplastic options varies enough that a suspiciously low price with no spec sheet is worth a second look.
| Red flag | Why it matters |
|---|---|
| No listed dimensions | Can’t verify tailgate or seat clearance |
| “Universal fit” with no bracket details | Likely needs straps only, weaker for heavy loads |
| No hardware included | Adds cost and delays install |
| No installation PDF or video | Harder to verify drill points before buying |
The installation steps throughout this guide come directly from OEM documentation rather than guesswork, which matters when you’re drilling into a cart frame you plan to keep for years.
Most buying guides spend too much time comparing colors and lid styles and not enough time on the two things that actually determine whether a box survives its first season: whether the bracket matches the cart’s factory mounting points, and whether the load rating matches how the box will actually get used.
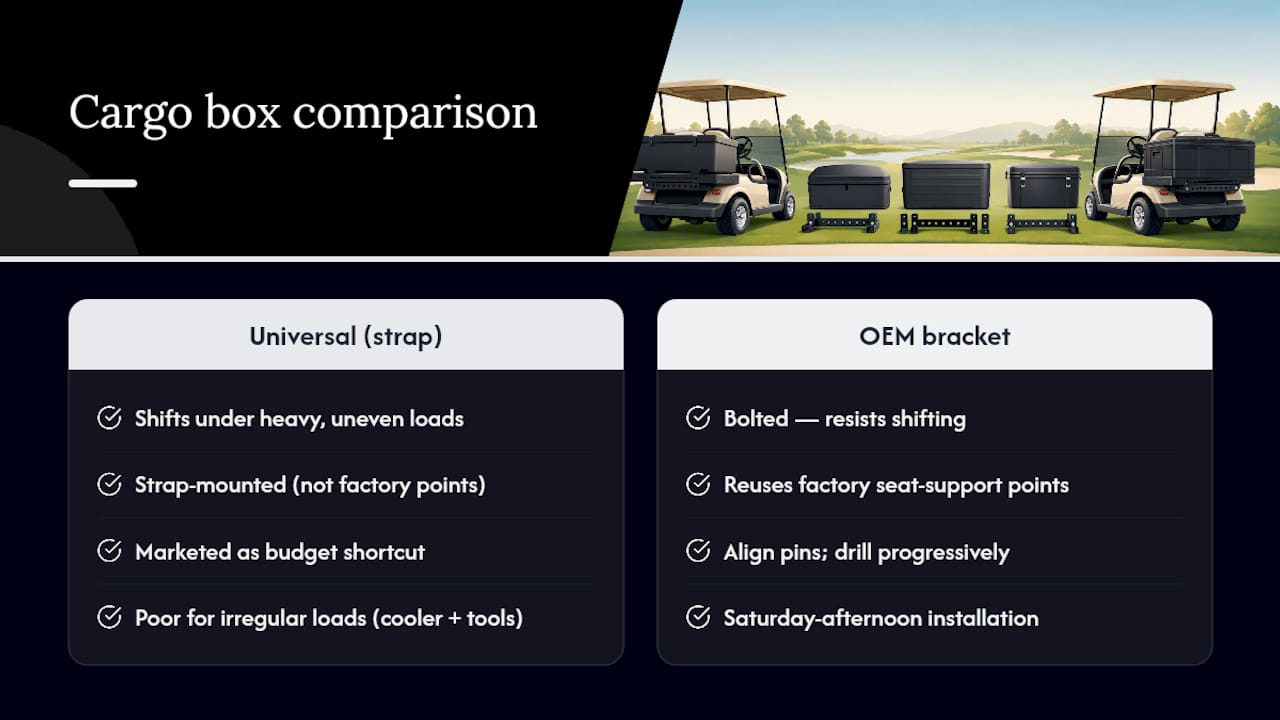
Here’s what conventional advice gets wrong. It treats universal boxes as a budget shortcut without mentioning that strap-mounted boxes shift under heavy, uneven loads in a way bolted brackets don’t. If you’re hauling anything irregular, like a cooler stacked on tools, that shift matters more than the price difference. I’d also push back on the idea that installation is intimidating. The OEM kits from Yamaha and E-Z-GO both follow the same logic: reuse factory seat-support points, align with pins, drill progressively. Once you’ve done it once, it’s a Saturday afternoon job, not a mechanic’s appointment.
Prioritize the bracket fit first, the load rating second, and the finish last. A box that matches your cart’s factory mounting points and your actual cargo weight will outlast three “prettier” boxes that never quite sat right.
— Roshan
Golfcartstuff stocks the bracket kits and boxes that match your cart’s factory mounting points instead of forcing a strap-on fit, which is the difference between a box that rattles loose in a season and one that doesn’t. If your cart is a Club Car, start with the Club Car parts collection; Yamaha owners can browse Yamaha G1 through G22 parts for compatible boxes and brackets.
Every model-specific listing notes the included hardware and bracket type up front, so you’re not guessing at fitment the way you might on a generic marketplace listing. Beyond boxes, the full golf cart accessories collection covers straps, latches, and mounting hardware if you’re piecing together a universal setup instead. Pick your cart’s model page, confirm the bracket kit listed matches your year, and check out with the hardware already bundled in.
Explore our store to see what our products and resources can do for you.

Leave a comment