
Your Cart Is Our Priority
Explore our store to see what our products and resources can do for you.

Most headlight flicker on a golf cart traces back to one of five things: a weak battery, a loose or corroded connection, a bad bulb or socket, a blown fuse or failing relay, or unstable voltage feeding an LED kit. Before touching any part, check your battery’s charge and scan visible wiring for loose or damaged connections. That single step resolves more cases than every other fix combined.
TL;DR:
- A weak or partially charged battery is the most common cause of headlight flicker, so verifying and fully charging the battery often resolves the issue.
- Loose, corroded, or damaged wiring and connections are the next most frequent problems, which can be quickly diagnosed by wiggling the harness while observing the lights.
- Swapping bulbs side to side helps identify whether the flicker follows the bulb or is rooted in wiring, socket, or housing issues.
- Faulty fuses, relays, or switches are easily tested and often cause flickering, especially if they are visibly corroded or wiggling the switch affects the lights.
- LED headlight flicker often results from unstable voltage supply or poor grounding, and confirming proper voltage regulation can fix the problem without replacing parts.
Work through these steps in order. Most flicker problems get solved in the first three.
Each of these steps funnels into a deeper section below, depending on what you find.
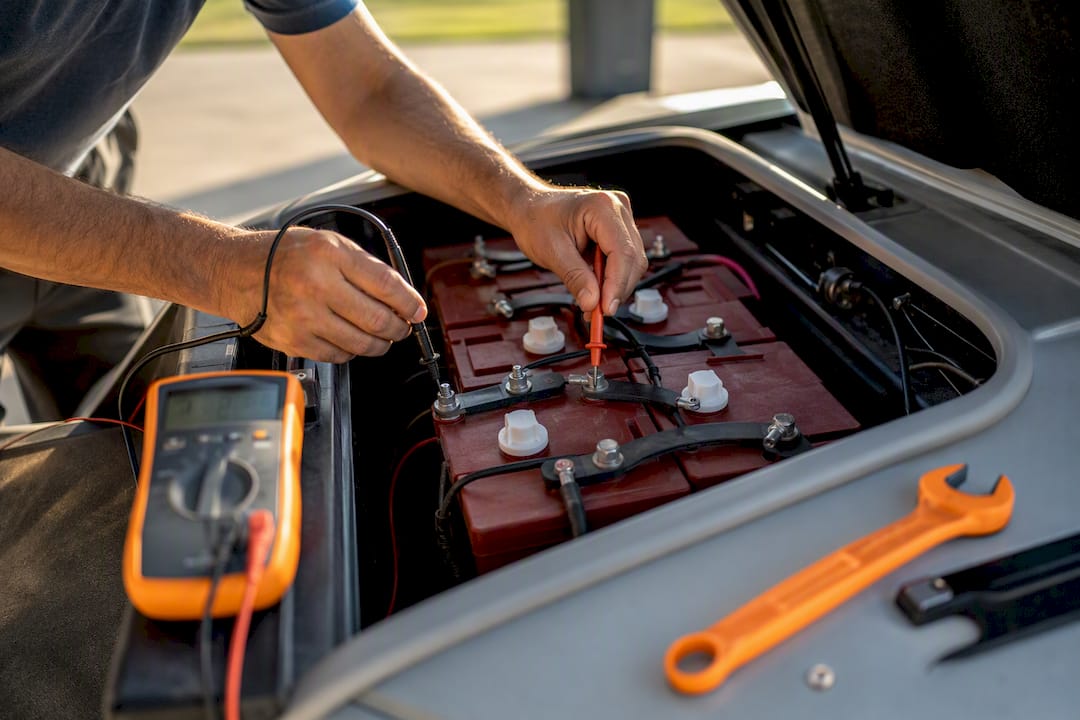
A resting 12 volt golf cart battery should read close to 12.6 to 12.8 volts when fully charged. A 6 volt battery in a series bank should read close to 6.3 to 6.4 volts. Anything noticeably below those numbers, especially under a light load, is a strong sign the battery is the culprit behind your flicker.
Testing takes two minutes with a basic multimeter:
Pro Tip: Charge the battery fully and let it sit for at least an hour before retesting. Batteries can show a falsely healthy voltage right off the charger, then sag once you actually load them. If voltage still looks low after a full charge and rest period, the battery itself likely needs replacing rather than another charge.
Loose connections and failing grounds don’t always announce themselves. A wire can look intact and still make poor contact, which is why wiggling the harness while the light is on is one of the fastest diagnostic moves available to you.
A wiring repair workflow built for this exact process will save you a second trip to the parts bin. Pro Tip: Mark the spot where the flicker responds to the wiggle test with a piece of tape before you disconnect anything. It’s easy to lose track of the exact failure point once wires start moving.
Swap the bulb from the flickering side with the one on the working side. If the flicker moves with the bulb, you’ve isolated it. If the same side keeps flickering with a known-good bulb installed, look at the socket and wiring instead.
Fuses, relays, and the headlight switch sit right in the middle of most troubleshooting guides for a reason: they fail often and they’re cheap to rule out. Standard service checklists always place this step after bulbs and wiring but before anything more involved.
A quick primer on how relays and switches wire together helps if you’ve never pulled one before.
A voltage regulator manages output from the charging system, while a separate voltage reducer steps down accessory power for lights and electronics. When either one degrades, or when the engine-to-frame ground strap on a gas cart goes bad, brightness can swing with engine RPM instead of staying constant.
Pro Tip: If your gas cart’s headlights only flicker while driving and settle down when idling, test voltage at steady throttle rather than at a stop. That’s when regulator and grounding faults actually show themselves.
Stop the DIY process and bring the cart to a technician if any of these apply:
When you do bring it in, hand the technician your voltage readings, the steps you already tried, and any parts you swapped. That alone can cut diagnostic time significantly.
Golfcartstuff publishes practical guides on common causes of light failures and safer wiring troubleshooting built from real repair patterns, not guesswork. If you’re unsure which bulb, harness, or reducer fits your specific model, our support team can help you match the part before you order.
Most troubleshooting guides list every possible cause with equal weight, which leaves owners chasing a bad ground strap before they’ve even checked whether the battery is charged. That’s backwards. Battery charge and visible wiring account for the overwhelming majority of flicker complaints, so they belong first, not buried in a middle paragraph.
The part conventional advice underplays is the LED variable. A cart that ran fine on incandescent bulbs for years can develop sudden flicker the moment someone drops in an LED kit without checking voltage stability first. Guides that treat LED upgrades as a simple bulb swap miss this entirely, and it’s become one of the more common support questions we see.
My honest read: skip straight to the multimeter if you’ve already replaced a bulb or added an LED kit recently. Don’t waste time re-checking wiring you just installed. For everyone else, the order in this checklist, battery, then wiring, then bulbs, then fuses and relays, then the regulator, reflects where the actual failure rate concentrates. Work it in that order and you’ll usually find the answer before you reach the last section.
— Roshan
Once you’ve narrowed down the flicker to a specific part, buying the wrong replacement just resets the clock. Golfcartstuff stocks bulbs, wiring repair kits, fuses, relays, and voltage reducers matched to specific cart models, so you’re not guessing at compatibility the way you might with a generic auto parts substitute.
Browse the golf cart accessories collection for lighting parts and reducers, or head straight to your model’s page, including EZGO TXT parts, Club Car parts, or Yamaha parts for all models. Every product page includes fit details so you can confirm compatibility before checkout, and returns are straightforward if a part doesn’t match your setup. If you’re not sure which bulb base, connector, or reducer your cart uses, reach out to our support team with your model year and we’ll help you find the exact fit.
Explore our store to see what our products and resources can do for you.

Leave a comment