


Your Cart Is Our Priority
Explore our store to see what our products and resources can do for you.

Standard golf cart interiors often feel generic and uncomfortable, leaving owners wanting more from their ride. Whether you use your cart for neighborhood cruising or golf course rounds, a personalized interior transforms both comfort and visual appeal. This guide walks you through reupholstering seats, adding rear seat kits, upgrading dashboards, and avoiding common mistakes. You’ll learn the materials, tools, and step-by-step processes needed to create an interior that reflects your style while delivering genuine comfort improvements.
| Point | Details |
|---|---|
| Seat reupholstery | Reupholstering seats is the primary method to update golf cart interiors and enhances comfort and appearance. |
| Rear seat kits | They expand interior functionality but require checking suspension compatibility and mounting on your cart. |
| Weather resistant materials | Using outdoor grade fabrics such as marine grade vinyl improves durability against moisture sun and temperature changes. |
| Careful cuts and staples | Rushing cuts and staples can cause puckering and uneven surfaces so measure accurately and work slowly for a professional finish. |
| Safety prep | Disconnect the negative battery terminal before removing seats to prevent electrical shorts and protect the cart’s electrical system. |
Successful interior customization starts with proper preparation and quality materials. You’ll need a staple remover, torque wrench, scissors, measuring tape, screwdriver, marine-grade vinyl or leather, and high-density foam. Reupholstering golf cart seats requires battery disconnection before removing seats to prevent electrical shorts. This safety step takes two minutes but prevents potential damage to your cart’s electrical system.
Prepare your workspace by clearing a flat area with good lighting where you can lay out materials and work comfortably. Verify your golf cart model number, typically found on the frame near the motor, to ensure compatibility with replacement parts. Different manufacturers like EZGO, Club Car, and Yamaha use varying seat mounting systems and dimensions. Checking golf cart accessory trends 2026 helps you choose materials that align with current design preferences.
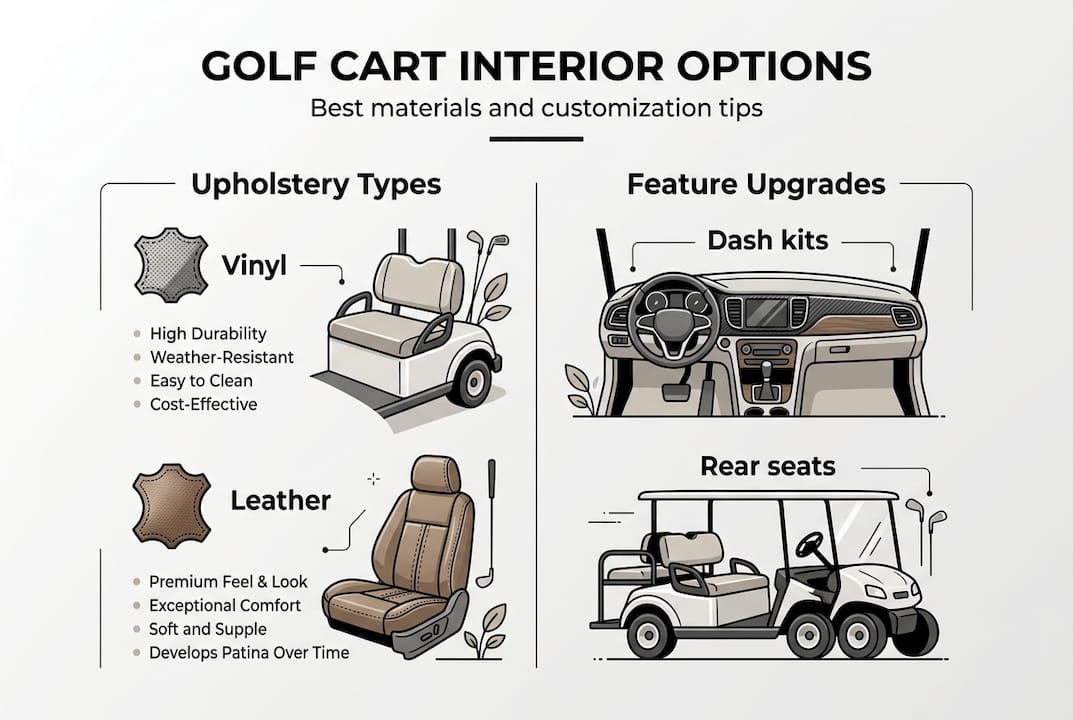
Choosing the right upholstery material impacts both appearance and longevity. Marine-grade vinyl costs $15 to $30 per yard and resists moisture, UV rays, and temperature extremes. Automotive-grade leather runs $40 to $80 per yard, offering premium aesthetics but requiring more maintenance. Standard vinyl at $8 to $15 per yard works for budget builds but degrades faster outdoors. High-density foam padding adds 2 to 3 inches of cushioning, dramatically improving ride comfort on rough terrain.
Pro Tip: Choose weather-resistant fabrics specifically designed for outdoor use to ensure your custom interior maintains its appearance through multiple seasons of exposure.
| Material Type | Cost Per Yard | Durability Rating | Best Use Case |
|---|---|---|---|
| Marine-grade vinyl | $15-$30 | Excellent | All-weather carts |
| Automotive leather | $40-$80 | Good with care | Covered storage |
| Standard vinyl | $8-$15 | Fair | Budget builds |
| Sunbrella fabric | $25-$45 | Excellent | Maximum UV protection |
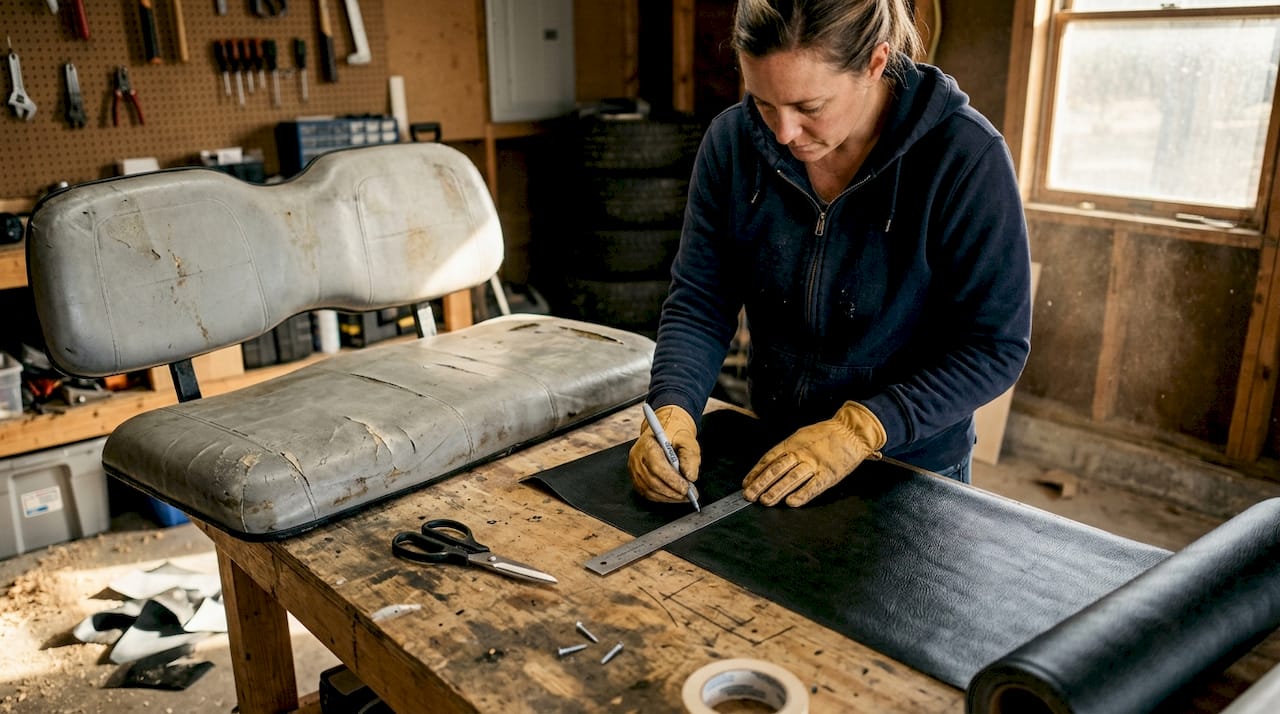
Removing old seat covers requires methodical attention to detail. Start by disconnecting the negative battery terminal to eliminate shock risk. Unscrew seats from their mounting brackets using a socket wrench, typically requiring 1/2-inch or 9/16-inch sockets. Flip seats upside down and use a flathead screwdriver or staple remover to extract old staples holding the cover. Work slowly around the perimeter, removing every staple to prevent tearing new material during installation.
Measuring and cutting new upholstery demands precision. Lay the old cover flat as a template, adding 3 inches on all sides for stretching and stapling room. Cut your marine-grade vinyl or leather with sharp scissors in smooth, continuous motions to avoid jagged edges. If adding foam padding, cut it to match the seat base exactly, using spray adhesive to secure it before applying the new cover. This extra cushioning transforms ride quality on bumpy paths.
Stretching and stapling creates a professional finish. Position the new cover over the seat, centering patterns or textures carefully. Pull material taut from the center of one side and staple, then repeat on the opposite side. Work your way around the perimeter, maintaining even tension to eliminate wrinkles. Space staples 1 to 2 inches apart for secure attachment. Rushing cuts and staples causes puckering and uneven surfaces that look amateur.
Pro Tip: Take your time with cuts and staples to avoid wrinkles and poor fits that require starting over with new material.
Dashboard upgrades complement seat customization beautifully. Popular additions include:
Minor drilling may be needed when fitting new dashboards or accessory mounts. Measure twice before drilling to ensure proper alignment with existing controls. Use a step bit to prevent cracking plastic dash materials. Avoid common golf cart dash mistakes like blocking airflow to electrical components or interfering with steering column clearance.
Rear seat kits transform two-seat carts into four-passenger vehicles or create versatile cargo beds. Flip4 designs cost $150 to $750 and support 250 to 400 pounds depending on construction quality. These bolt-on kits require minimal modifications, typically mounting to existing frame holes. Installation takes 1 to 2 hours with basic hand tools. The added capacity makes carts more practical for family outings or hauling equipment around properties.
Suspension upgrades become necessary when adding rear seat weight. Standard golf cart suspension systems compress under additional loads, causing the rear to sag and affecting steering responsiveness. Upgrading suspension with heavy-duty springs or lift kits maintains proper ride height and handling characteristics. Ignoring this step leads to premature tire wear, reduced battery range from increased drag, and uncomfortable bouncing over bumps.
Pro Tip: Upgrade suspension immediately after installing heavy rear seats to maintain safe handling and prevent frame stress from improper weight distribution.
Model compatibility determines which rear seat kits fit your cart. EZGO TXT models use different mounting points than RXV versions. Club Car Precedent and DS models have distinct frame designs requiring specific brackets. Yamaha G-series carts need yet another kit configuration. Verify your exact model year and type before ordering to avoid return hassles and wasted time. Manufacturers provide detailed fitment charts showing compatible years and models.
| Rear Seat Kit Model | Price Range | Weight Capacity | Key Features | Compatible Models |
|---|---|---|---|---|
| Standard Flip Seat | $150-$300 | 250 lbs | Basic cushioning, manual flip | Most EZGO, Club Car |
| Premium Padded Kit | $350-$500 | 350 lbs | Thick foam, armrests, cup holders | EZGO RXV, Club Car Precedent |
| Heavy-Duty Cargo Bed | $400-$600 | 400 lbs | Steel construction, tie-down points | Universal with adapters |
| Deluxe 4-Passenger | $500-$750 | 300 lbs | Individual seats, storage under | Yamaha G-series, EZGO TXT |
Check suspension components after installing golf cart rear seat kits by bouncing each corner and listening for unusual noises. Worn bushings create clunking sounds. Sagging springs fail to return to full height after compression. Damaged shocks leak fluid or feel loose when hand-tested. Address these issues immediately to prevent safety hazards. Fixing golf cart suspension problems often costs less than dealing with accident damage from poor handling.
Rushing through customization steps creates problems that require redoing work. Common errors include:
Model compatibility and weather-resistant materials prove crucial for lasting results. Standard automotive fabrics fade and crack within months of outdoor exposure. Non-compatible parts require expensive modifications or simply won’t fit. Taking time to research specifications prevents these frustrations.
Verifying your finished customization ensures safety and satisfaction. Test seat stability by applying firm downward pressure at multiple points. Seats should not rock, shift, or creak. Check upholstery for even stretching without wrinkles or loose areas. Operate all new accessories to confirm proper function. Cup holders should grip containers securely. Smartphone mounts need to hold devices firmly over bumps. Dashboard gauges must display accurate readings.
Inspect safety-critical elements carefully. Use a torque wrench to verify seat mounting bolts meet manufacturer specifications, typically 18 to 25 foot-pounds. Reconnect the battery securely with clean, tight connections. Test drive your cart in a safe area, listening for unusual sounds and feeling for handling changes. Rear seat additions should not cause excessive rear-end sway or difficulty steering. If problems arise, address them immediately rather than hoping they resolve themselves.
Taking time to verify model compatibility, use weather-resistant materials, and properly torque all fasteners separates professional-looking customizations from amateur attempts that fail within months.
Know when to seek professional help. Complex upholstery patterns with multiple seams and contours challenge even experienced DIYers. Electrical accessories requiring wiring into the main system risk damage if installed incorrectly. Suspension modifications on lifted carts demand precise alignment knowledge. Paying for expert installation on complicated projects often costs less than fixing mistakes. Many golf cart specialty shops offer partial installation services, handling difficult steps while letting you complete simpler tasks.
Avoid common golf cart dash mistakes by measuring clearances carefully and testing fit before drilling permanent holes. Mock up accessory positions with tape to visualize final placement. Consider how additions affect passenger comfort and driver visibility. A poorly placed smartphone mount that blocks the steering column creates safety issues. Storage compartments that interfere with leg room frustrate passengers.
Custom golf cart interiors have surged in popularity as owners recognize the comfort and style benefits of personalized vehicles. Finding quality parts that fit properly and last through seasons of use makes the difference between satisfying projects and frustrating failures. GolfCartStuff offers curated selections of interior accessories designed specifically for golf cart applications, ensuring compatibility and durability.

Explore categories including weather-resistant seat covers in multiple color options, rear seat kits engineered for easy installation, functional dashboard upgrades, and suspension components that maintain ride quality under added weight. Each product includes detailed compatibility information and installation guidance. Staying current with golf cart accessory trends 2026 helps you choose upgrades that enhance both function and resale value. Quality gear ensures your customization efforts deliver lasting results you’ll enjoy for years.
Marine-grade vinyl and automotive leather provide the best durability and weather resistance for golf cart seats. Marine-grade vinyl costs $15 to $30 per yard and withstands UV rays, moisture, and temperature extremes without cracking. Automotive leather offers premium aesthetics at $40 to $80 per yard but requires more maintenance. Pair either material with high-density foam padding for maximum comfort on rough terrain.
Upgrading suspension is strongly recommended when installing rear seat kits to prevent sagging and maintain safe handling. Standard suspension compresses under the additional 250 to 400 pounds that rear seats add, causing steering problems and premature tire wear. Heavy-duty springs or lift kits restore proper ride height and handling characteristics. Always verify compatibility with your specific golf cart model before purchasing suspension components.
Many dash upgrades are DIY-friendly and require only basic hand tools like screwdrivers and drill bits. Popular additions like cup holders, smartphone mounts, and storage compartments typically install in 30 minutes to an hour. Some upgrades need minor drilling for secure mounting, so measure twice before making permanent holes. Careful planning prevents common mistakes like blocking airflow to electrical components or interfering with steering column clearance.
Rushing cuts and staples during upholstery work causes wrinkles and poor fit that look unprofessional. Using materials not rated for outdoor exposure leads to rapid fading and cracking. Ignoring suspension needs when adding rear seat weight creates handling problems and safety hazards. Skipping model compatibility verification results in parts that don’t fit properly. Taking time to research specifications and work methodically prevents these frustrating issues.
A basic seat reupholstery project takes 3 to 5 hours for someone working carefully with proper materials. Adding a rear seat kit requires an additional 1 to 2 hours for installation plus suspension upgrades. Dashboard accessory installations range from 30 minutes for simple cup holders to 2 hours for complex gauge panels. Plan for extra time if you’re learning new techniques. Spreading the project across multiple days reduces fatigue and improves results compared to rushing through everything in one session.
Explore our store to see what our products and resources can do for you.

Leave a comment