
Your Cart Is Our Priority
Explore our store to see what our products and resources can do for you.

Most golf cart owners should start with a front disc brake conversion if their cart currently has no front brakes at all, and a rear hydraulic upgrade if they’re already running front discs or dealing with hills, heavy loads, or a lifted cart. Hydraulic systems give you better pedal feel and hold up longer under repeated stops. Mechanical cable systems cost less and install faster if you’re just replacing worn rear drums with rear discs.
Buyer guides consistently point to front-only or rear-only cable upgrades as the common starting points, with full four-corner hydraulic setups reserved for carts that need maximum stopping power. Golfcartstuff stocks model-specific kits and adapters for EZGO, Club Car, and Yamaha platforms, so fitment help is one message away before you order.
A successful disc brake conversion depends on matching the right system type to your cart’s use case and confirming exact fitment before you order parts.
| Point | Details |
|---|---|
| Start with front discs | Most stock carts lack front brakes, making a front-only kit the highest-impact first upgrade. |
| Choose hydraulic for demanding use | Hills, passengers, and power upgrades call for hydraulic systems over cable-actuated setups. |
| Measure before ordering | Confirm model year, hub type, wheel offset, and lift kit height to avoid rotor interference. |
| Budget real installation time | Front-only takes 2 to 4 hours DIY; full four-corner hydraulic runs 4 to 8 hours or a pro shop day. |
| Shop model-specific at Golfcartstuff | Golfcartstuff stocks fitment-verified parts for Club Car, EZGO, and Yamaha carts with support for confirming compatibility. |
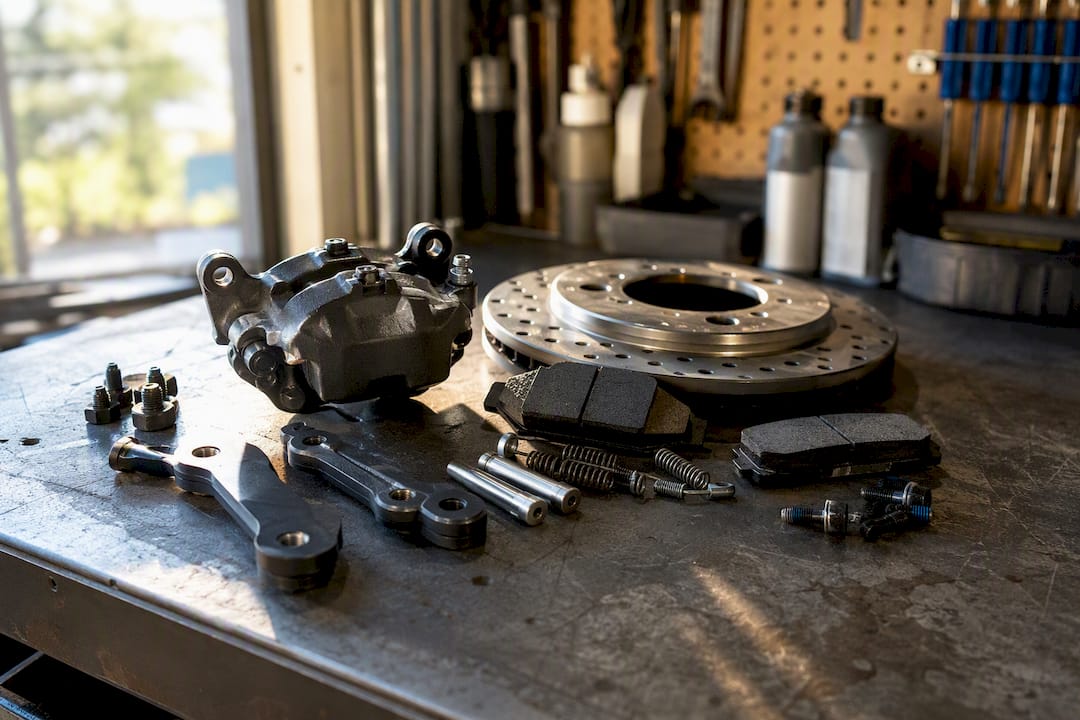
A complete kit gives you everything needed to bolt discs onto a stock spindle, minus a few items you may already own or need to order separately. Here’s what a properly packaged golf cart disc brake conversion kit typically includes:
Most modern kits are bolt-on for Club Car, EZGO, and Yamaha without welding, and typically bundle pre-charged hydraulic lines, dual-piston calipers, and heavy-duty rotors with the master cylinder. Watch for kits that sell the master cylinder, brake light switch, or wheel hubs separately. A brake light switch is easy to overlook and required if you’re running street-legal lighting.
Disc brake kits split into two camps: hydraulic and mechanical (cable-actuated). Hydraulic systems use fluid pressure to clamp the caliper, which gives you a linear pedal feel and self-adjusting pads as they wear. Mechanical systems pull the caliper closed with a cable, the same way your stock drum brakes probably work now, so they’re cheaper and simpler to retrofit.
Disc brakes shed heat faster than drums because the rotor sits exposed to open air, which cuts down on brake fade during long downhill runs. That’s the real driver behind most upgrades, not just the “disc brakes look better” factor.
Pro Tip: If you’re on a budget, do mechanical rear discs first and leave the master cylinder mount in place. You can swap to hydraulic later without redoing the whole rear end.
Fitment mistakes are the number one reason disc brake conversions get returned. Before you order anything, collect these details:
Lifted carts cause the most headaches. A lift kit changes ride height and suspension geometry, which can push a rotor into contact with a control arm or wheel that never gave a stock cart trouble. Buyer roundups repeatedly flag rotor interference on lifted carts as the top compatibility issue, so measure twice before you buy.
Before ordering, run this checklist:
Installing a disc brake conversion follows a predictable sequence, whether you’re doing a front-only swap or a full four-corner hydraulic build.
You’ll need jack stands, a torque wrench, a brake bleed kit, caliper grease, and sockets sized for your caliper bolts. A front-only conversion typically takes 2 to 4 hours for a DIY installer with basic tools. Rear-only cable jobs run 1 to 3 hours. A full four-corner hydraulic conversion takes 4 to 8 hours DIY, or a half-day to full day if you hire a shop.
Pro Tip: If you’ve never bled a hydraulic brake line before, practice on a cheap brake bleeder kit video first. A spongy pedal after installation almost always traces back to trapped air, and bleeding it out correctly the first time saves a return trip under the cart.
Hire a professional if your cart has a complex hub setup, a lift kit that changes suspension geometry, or if you’re not confident bleeding a hydraulic system without introducing air pockets.
Disc brakes need less upkeep than drums, but “less” isn’t “none.” Hydraulic systems are self-adjusting as pads wear, which eliminates the periodic adjustment drums require, but fluid and pads still need eyes on them.
Common problems and fixes:
Keep a spare set of pads, a bleed kit, and extra brake fluid on hand. Most troubleshooting starts with the pedal: soft pedal means air in the lines, hard pedal with poor stopping usually means glazed pads or a caliper that’s not clamping evenly.
This guide draws on Roshan’s technical breakdowns of golf cart braking and regenerative systems for Golfcartstuff, built specifically around real fitment questions from EZGO, Club Car, and Yamaha owners.
The conventional advice treats disc brake conversions like a single decision: drum or disc, done. That’s backwards. The real decision is sequencing. Most carts on the road today have no front brakes whatsoever, which means the highest-impact, lowest-cost upgrade is usually a front-only kit, not the four-corner hydraulic setup every forum thread pushes as the “proper” way to do it.
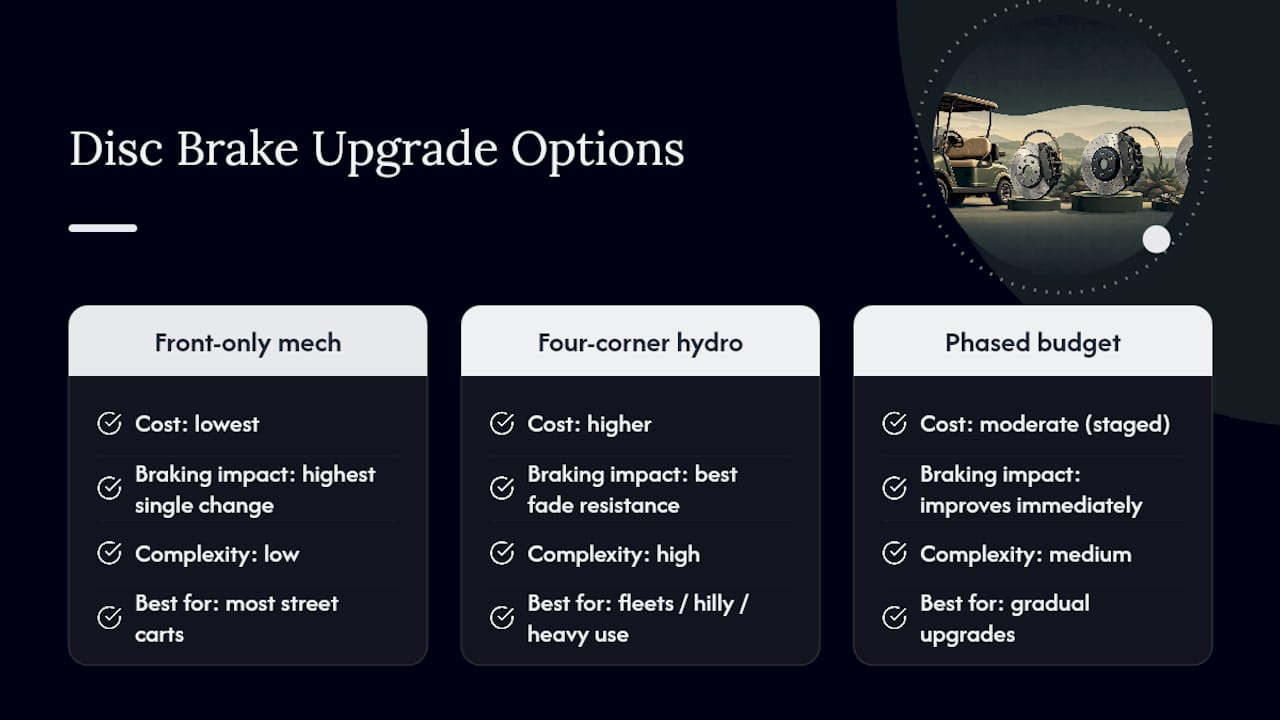
Dealers and heavy-use owners are the exception. If you’re running a fleet, adding power upgrades, or driving hills daily, skipping straight to hydraulic front and rear is worth the extra cost because fade resistance under repeated hard stops is where mechanical cable systems fall apart fastest.
What gets underestimated is fitment research. Owners spend more time comparing caliper piston counts than they do measuring rotor clearance against their own lift kit, and that’s exactly backwards. A dual-piston caliper that doesn’t fit your spindle is worthless. A single-piston caliper that fits perfectly and gets bled correctly will stop you every time. Measure first. Upgrade the parts second.
— Roshan
Golfcartstuff carries model-specific disc brake components across the three platforms this guide covers, so you’re not guessing whether a part fits before it shows up on your porch. Start with the collection that matches your cart: Club Car DS parts for Club Car owners, EZGO TXT parts for EZGO builds, or Yamaha G1 through G22 parts for Yamaha carts spanning two decades of model changes.
Search each collection page by model year and trim, since spindle and hub designs shifted more than most owners realize across production runs. If you’re unsure which rotor or caliper bracket matches your setup, use the photo-and-measurement checklist from the fitment section above and send it to customer support before you check out. For general hardware like brake light switches, mounting fasteners, and bleed kit accessories, the golf cart accessories collection rounds out what a kit doesn’t always include. Once you’ve confirmed your model, wheel offset, and lift status, ordering the right kit the first time is a five-minute conversation away.
Explore our store to see what our products and resources can do for you.

Leave a comment