


Your Cart Is Our Priority
Explore our store to see what our products and resources can do for you.

TL;DR:
- Golf cart batteries often fail prematurely due to neglect, especially during watering routines that require precision. Using distilled water and proper tools, such as auto-stop filler bottles and single-point systems, ensures correct electrolyte levels and extends battery life. Consistent maintenance, including charging before watering and scheduling regular checks, is essential for optimal performance and longevity.
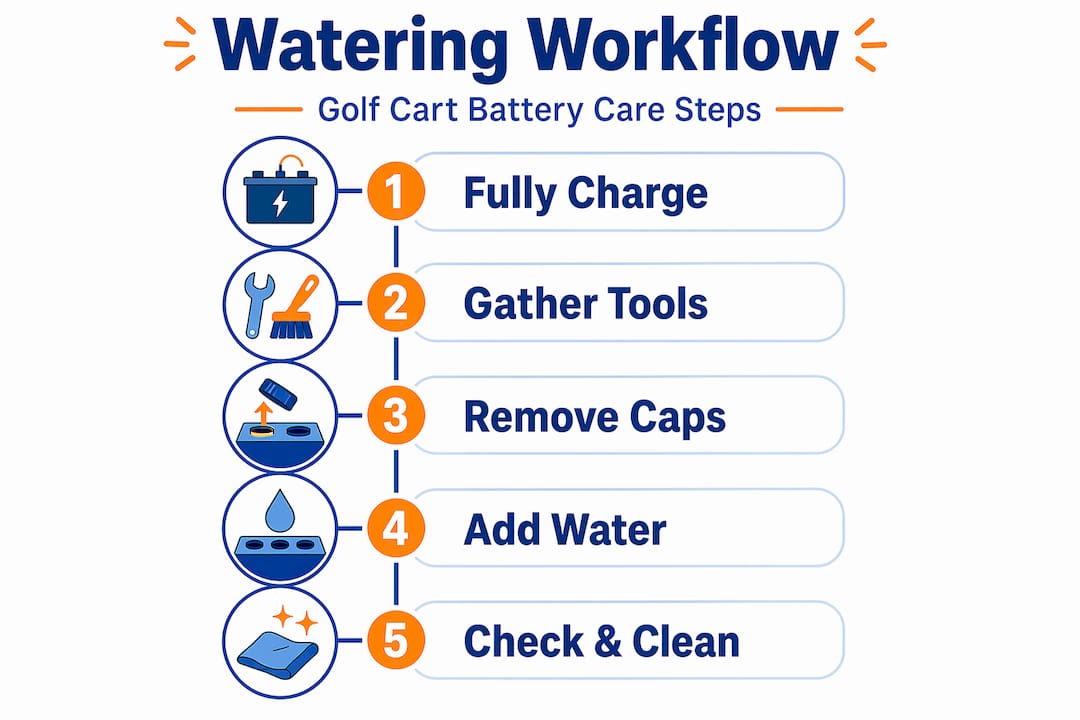
Most golf cart batteries die early not from age, but from neglect. The golf cart battery watering workflow is where that neglect usually starts. Fill too early, use tap water, overfill a cell, skip a month during summer heat, and you have shortened the life of a $600 to $1,000 battery pack. This guide walks you through every step of the process correctly, covering both manual and single-point automated methods, so you stop guessing and start doing this right.
| Point | Details |
|---|---|
| Always charge before watering | Watering after a full charge prevents electrolyte overflow and acid spills. |
| Use only distilled water | Tap water deposits minerals that damage lead plates and reduce battery capacity. |
| Target the right fill level | Water should sit just 1/4 to 1/2 inch above the plates, never higher. |
| Set a seasonal schedule | Water weekly in summer heat and monthly during cooler months or storage periods. |
| Consider a single-point system | Automated watering systems reduce human error and cut maintenance time significantly. |
Before you touch a single cap, you need the right materials in hand. Cutting corners on supplies is where most battery damage begins.
Distilled water is non-negotiable. Tap water contains calcium, magnesium, and chlorine, and those minerals form a crust on lead plates that permanently reduces battery capacity. Tap water damages batteries through mineral buildup that no maintenance routine can reverse. Distilled water, on the other hand, costs less than $2 per gallon at any grocery store, making it one of the most cost-effective battery maintenance decisions you can make.
Here is everything you need before you start:
| Tool | Why it matters |
|---|---|
| Distilled water | Prevents mineral deposits on lead plates |
| Auto-stop filler bottle | Reduces overfilling risk during manual watering |
| Nitrile gloves | Protects skin from battery acid contact |
| Safety glasses | Shields eyes from electrolyte splashes |
| Single-point watering system | Automates fill level and speeds up the process |
Pro Tip: Buy distilled water in bulk and store a few gallons near your cart. The moment “I need to get water” becomes a reason to skip a watering session, your batteries start losing ground.
This is where most mistakes happen, and almost all of them come from skipping step one.
Fully charge your batteries first. This is the most critical rule in any battery maintenance tips routine. Charging expands electrolyte levels, so if you add water before charging, the expanded fluid overflows during the charge cycle. That overflow contains sulfuric acid. It corrodes terminals, damages wiring, and creates a safety hazard.
Turn off the cart and let it cool. After a full charge, wait at least 30 minutes. Hot batteries read differently, and you want accurate electrolyte readings.
Put on your gloves and glasses. No exceptions here.
Remove each vent cap carefully. Use a flathead screwdriver or the cap tool included with most watering kits. Set the caps somewhere clean where they will not collect dirt before going back on.
Inspect the electrolyte level in each cell. You are looking for whether the lead plates are exposed or already covered. If the plates are submerged and the fluid is close to the fill ring, that cell may not need water at all.
Add distilled water slowly until the level sits 1/4 to 1/2 inch above the plates. The correct water level gives the electrolyte room to expand during future charging without spilling. Slow, incremental pouring with visual checks per cell is the most reliable way to hit that target consistently.
Replace all vent caps securely. A loose cap allows debris in and lets gases escape unevenly.
Wipe down the entire battery surface. Any spilled water or electrolyte sitting on top of the batteries creates a slow discharge path between terminals. A dry, clean battery top is part of the job.
Filling to the very top of the filler opening, even after charging, puts you at risk of acid spills during the next charge cycle. Stop filling once plates are covered by roughly half an inch and leave it there.
Pro Tip: Use an auto-stop filler bottle instead of pouring directly from a gallon jug. The auto-stop valve cuts off flow the moment the water reaches the correct level in each cell, removing the guesswork entirely.
Pair this routine with a broader battery care schedule to get the full benefit of your maintenance effort.
If you have ever spent 20 minutes hunched over a golf cart carefully filling 18 to 36 individual cells, you understand why single-point watering systems exist. They connect all cells through a tubing network, so one pump fills every cell automatically and stops at the correct level.
Setup takes about an hour the first time, but here is how it works:
Match valves to your battery brand. Trojan, US Battery, and Crown all have slightly different vent configurations. Using the wrong valve creates an improper seal and defeats the system.
Snap each valve into the cell vent. You should feel and hear a distinct click. Valves must snap securely into place. A loose valve will underfill that cell and potentially let acid vapor escape into the tubing.
Route the tubing between batteries. Cut lengths to fit without slack that drags on moving parts, but leave enough room that the tubing does not kink at corners. Kinked tubing restricts flow and causes uneven fills across cells.
Connect the hand pump to the quick-connect fitting. Most systems include a hand-squeeze pump with a single inlet port.
Pump until you feel firm resistance. That resistance is the valves signaling that every connected cell has reached the correct level. The tactile shutoff signal is the system’s built-in safeguard against overfilling.
Disconnect the pump and cap the inlet port. The system stays installed permanently; you only connect the pump during watering sessions.
| Feature | Manual watering | Single-point system |
|---|---|---|
| Time per session | 15 to 25 minutes | 2 to 5 minutes |
| Overfill risk | Moderate to high | Very low |
| Upfront cost | Low | Moderate |
| Consistency | Varies by user | Uniform across all cells |
| Annual maintenance | Minimal | Check tubing and valves once per year |
Pro Tip: Inspect your system tubing every spring for cracks or stiffness. Tubing that has gone brittle over winter will leak under pump pressure, leaving some cells underfilled without any obvious sign.
Single-point systems reduce human error at every step, which translates directly to more consistent electrolyte levels and longer battery life.
Even experienced cart owners run into these. Knowing them ahead of time saves you a battery replacement.
If you notice your cart losing range faster than usual, uneven electrolyte levels across your battery pack are often the first thing to check before assuming you need new batteries.
Pro Tip: After every watering session, run your hand lightly across the tops of each battery. Any moisture you feel points to a cap that is not fully seated or a cell you accidentally overfilled.
Preventing battery terminal corrosion after an acid spill is a separate task worth doing immediately if you suspect overflow has made contact with terminals.

Consistency matters far more than precision timing. A schedule you actually follow beats a perfect plan you abandon.
Here is a practical battery watering schedule for golf carts based on real-world use:
Golf cart battery upkeep improves significantly when you tie the watering check to another habit, like a monthly tire pressure check or pre-season inspection. Read through this step-by-step maintenance guide for a full maintenance schedule that pairs watering with every other key task.
Monitoring golf cart battery electrolyte levels does not require expensive equipment. A flashlight and your eyes are enough for a manual check once you know what a proper fill level looks like.
I have watched a lot of golf cart owners do everything right mechanically and then lose two years of battery life because they watered inconsistently. The discipline of watering only after a full charge sounds like basic advice, but it is the one rule people break most often when they are in a hurry.
The single-point watering system is the upgrade I recommend most to anyone with a fleet of two or more carts, or any cart that gets regular heavy use. Yes, the initial setup takes time. Yes, you have to route the tubing carefully and make sure every valve clicks in properly. But once it is in place, what used to be a 20-minute job requiring full concentration becomes a two-minute task with zero guesswork. That consistency is exactly what leads to longer battery life.
On the manual side, the biggest mistake I see is people filling right to the brim of the filler hole because it “looks full.” You want just enough water to cover the plates. That is it. Leave room for the electrolyte to expand during charging or you will be dealing with acid on your battery tops every single cycle.
My other recommendation: combine your watering session with a quick terminal inspection every time. Look for white or blue powder around connections. Clean it off before it works its way into the cable. Battery upkeep as a complete routine, not as individual isolated tasks, is what separates carts that last 8 years from those that need a new pack in four.
— Roshan

Having the right tools makes every part of the watering process faster and safer. At Golfcartstuff, you will find battery filler bottles, single-point watering system components, protective gear, and the accessories that make routine battery upkeep something you actually want to do. Whether you drive a Club Car, Yamaha, or EZGO, the parts are there when you need them. Browse Club Car DS parts and Yamaha golf cart parts for model-specific watering accessories, or explore the full golf cart accessories collection to find everything you need in one place.
Water your batteries only after they have been fully charged. Charging expands the electrolyte, so watering beforehand leads to overflow and acid spills that corrode terminals.
Fill each cell until the water level sits approximately 1/4 to 1/2 inch above the lead plates. Overfilling causes spills during charging, and underfilling exposes plates to air and reduces battery efficiency.
No. Tap water contains minerals like calcium and magnesium that build up on lead plates and permanently reduce battery capacity. Always use distilled water.
In summer with heavy use, check and water weekly. During cooler months or storage, monthly checks are sufficient. Adjust based on how frequently you use the cart and your local climate.
For anyone with regular use or multiple carts, yes. These systems fill every cell to the correct level automatically, cut session time from 20 minutes down to about 2 minutes, and significantly reduce the risk of overfilling or missed cells.
Explore our store to see what our products and resources can do for you.

Leave a comment