

Your Cart Is Our Priority
Explore our store to see what our products and resources can do for you.

Yes, camber is adjustable on most golf carts, but only within the limits of the factory design. On Club Car Precedent and DS models, the primary DIY fix is the eccentric stud built into the leaf-spring plate. This works well when one front wheel leans differently than the other. It won’t fix bent parts, worn bushings, or geometry changed by a lift kit.
Safety first: set the parking brake, chock the rear wheels, and support the front end on jack stands before you crawl underneath. Never trust a floor jack alone.
Most camber problems on stock Club Car carts trace back to a simple side-to-side mismatch the eccentric spring-plate stud can fix in under an hour.
| Point | Details |
|---|---|
| Try the eccentric stud first | It’s the factory fix for stock Precedent and DS front-end mismatch. |
| Rule out mimics early | Tire pressure, dragging brakes, and loose tie-rods can fake camber symptoms. |
| Camber before toe | Equalize camber first, then set toe so the steering wheel centers correctly. |
| Know the failure signs | Bent spindles, worn bushings, or a crooked wheel past 30 degrees mean stop and inspect. |
| Get parts from Golfcartstuff | Golfcartstuff carries the Club Car hardware and tools this procedure calls for. |
Before touching a wrench, confirm camber is actually the problem. The classic tell is uneven tire wear, inner tread wearing faster than outer (or the reverse), along with a steering wheel that sits crooked even when you’re driving straight. Some carts pull gently to one side on flat ground.
Rule out the mimics first: uneven tire pressure, a dragging brake, loose tie-rod ends, or play in a wheel bearing can all fake camber symptoms.
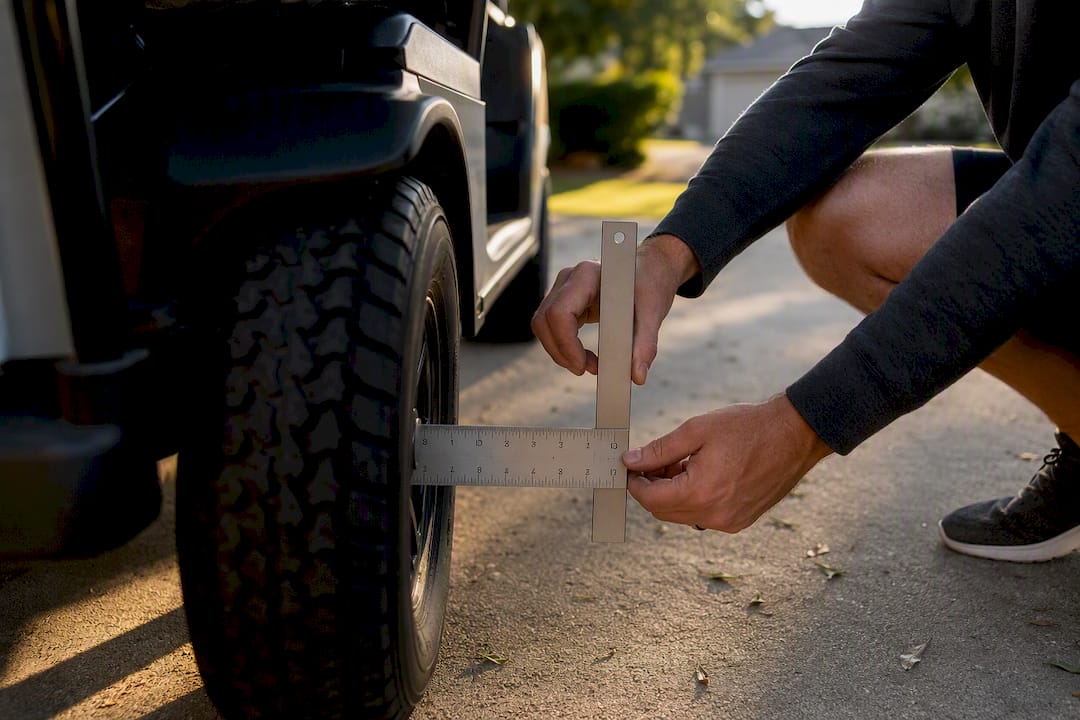
Pro Tip: Hold a framing square vertically against the tire’s sidewall, top to bottom. If there’s a visible wedge-shaped gap on one side and not the other, you’re looking at real camber trouble, not a tire pressure fluke.
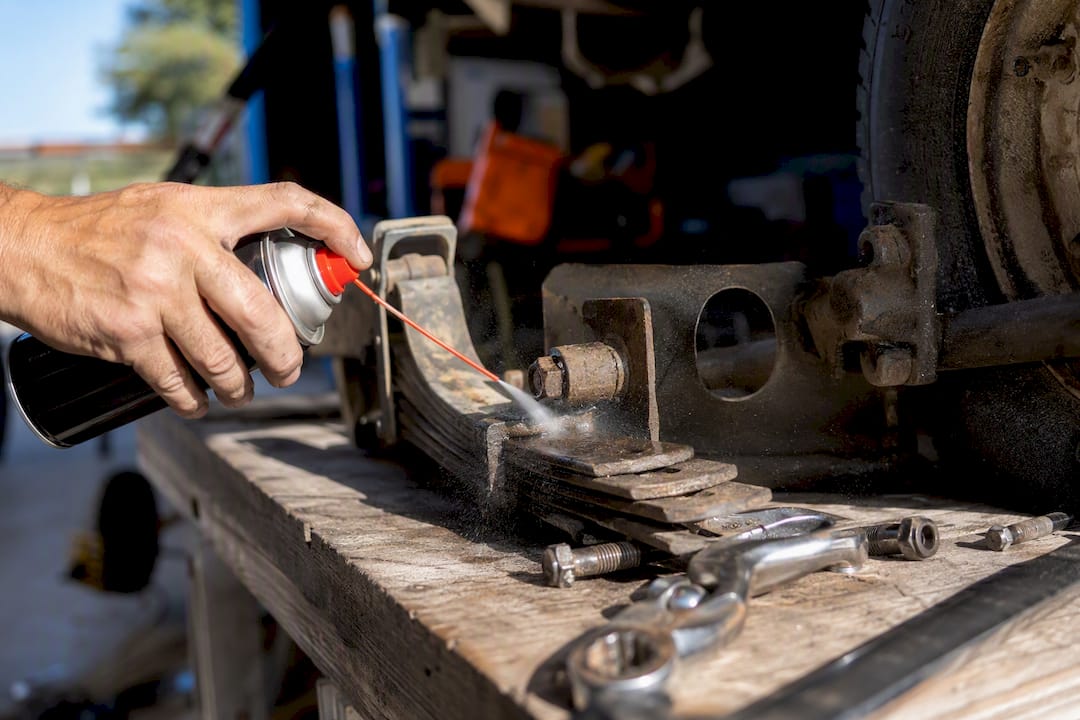
Golf cart wheel alignment work doesn’t require a shop lift, but it does require the right sockets. Corroded trilobe screws are the single biggest reason DIY jobs stall halfway through.
Set both front tires to the same pressure, park on level concrete, and roll the cart forward and back a few feet to let the suspension settle before marking anything.
Pro Tip: Mark the spring plate’s current position with a paint marker before you loosen a single bolt. If the adjustment goes sideways, you can return to the starting point in seconds.
Roughly one in three stalled DIY alignment attempts traces back to a stripped or snapped trilobe screw from forcing a corroded fastener instead of soaking it first.
Three methods work, ranked by what most owners actually have on hand.
Whichever method you use, keep the checklist consistent: same tire pressure both sides, cart on level ground, wheels pointed straight, and rolled forward and back to settle the suspension before you record a number.
| Point | Details |
|---|---|
| Best low-cost tool | A framing square catches obvious camber gaps without buying a gauge. |
| Gauge worth it for | Multi-cart owners who need repeatable degree readings. |
| Settle the suspension | Roll the cart forward and back before every measurement. |
| Record before and after | Write down both numbers so you know the adjustment actually worked. |
The factory method for Precedent and DS models is the eccentric bolt centered in the leaf-spring plate, and it’s the fastest fix available to owners. Here’s the sequence Club Car’s own alignment procedure walks through:
| Step | Action | Detail |
|---|---|---|
| 1 | Set tire pressure | Match both front tires to spec before measuring |
| 2 | Level the cart | Park on flat concrete, roll forward and back |
| 3 | Mark reference points | Paint-mark the spring plate’s current position |
| 4 | Apply penetrating oil | Spray trilobe screws if corroded, let it soak |
| 5 | Loosen spring-plate bolts | Loosen, don’t remove, all four trilobe screws |
| — | Loosen eccentric nut | Free the eccentric stud enough to rotate |
| 7 | Rotate the eccentric | Shift the spring until camber angles match |
| — | Torque spring-plate bolts | Tighten in a crisscross pattern to spec |
| — | Tighten eccentric nut | Lock the stud in its new position |
| — | Roll and recheck | Roll the cart forward and back, remeasure |
This eccentric adjustment only equalizes camber left to right. If both wheels lean the same wrong direction, the spring plate can’t fix it and you’re likely looking at worn bushings or a bent A-arm.
Work stubborn trilobe screws with penetrating oil and patience. Forcing a corroded screw risks snapping the head clean off, turning a twenty-minute adjustment into a drilled-out fastener repair. Once camber reads equal on both sides, move on to toe and center the steering wheel before you call the job done.
A Jake’s-style lift kit changes the geometry the eccentric stud was designed for. Once that geometry shifts, the stock adjustment point often runs out of range. Carts with double A-arm suspension need a different approach entirely.
On some double A-arm lift setups, disconnecting and reassembling the top heim joint at a slightly different angle is the only way to dial camber back into spec.
Pro Tip: If you’re mid-lift-install and haven’t set the geometry yet, get the lift-kit-specific instructions before you touch the eccentric stud. Adjusting stock hardware on a lifted cart usually just wastes your afternoon.
| Setup type | Primary adjustment point | When it falls short |
|---|---|---|
| Stock Precedent/DS | Eccentric stud in leaf spring | Both wheels leaning the same way |
| Double A-arm lift | Bottom heim joint | Insufficient range, worn bushings |
| Heavily lifted cart | Top heim joint reposition | Bent A-arm or spindle damage |
Golfcartstuff’s lift kit guide for Club Car models breaks down which adjustable A-arms pair with which lift height if you’re planning ahead rather than troubleshooting after the fact.
Camber comes first, toe comes second. Setting toe before camber is settled means you’ll chase a crooked steering wheel all over again once the front end shifts.
This matches the practical homeowner alignment workflow most techs follow: tire pressure, inspection, toe measurement, equal tie-rod adjustment, recheck. Golfcartstuff’s steering alignment guide covers the drag-link side of this in more detail if your wheel is still off-center after toe is set.
Some carts fight you no matter how carefully you follow the steps. Worn bushings, a bent spindle or steering arm, wheel-bearing play, a cracked frame rail, or a brake dragging on one side will all sabotage an otherwise correct adjustment.
If camber won’t hold after you’ve torqued everything to spec, or the steering wheel sits more than 30 degrees off-center even after toe adjustment, stop. That’s a parts problem, not an adjustment problem.
Pro Tip: Grab the top and bottom of the tire and rock it in and out. Play you can feel by hand usually means a bad bearing or bushing, not a camber setting waiting to be tightened.
A quick check and small eccentric tweak runs 20 to 45 minutes for most owners working alone. A full job, measuring camber, adjusting the eccentric, setting toe, and rechecking everything, takes closer to 45 to 90 minutes.
Club Car’s own procedure is the authority here, not a forum guess or a general alignment article written for full-size cars.
Loosen, don’t remove, the four spring-plate bolts. Loosen the eccentric nut. Rotate the eccentric or slide the spring until camber is equal. Torque the bolts in a crisscross pattern. Roll the vehicle and recheck.
Roughly a third of DIY camber jobs that go wrong trace back to skipping the roll-and-recheck step, tightening everything down once and assuming the number held. Corroded trilobe screws should get penetrating oil and patience, never brute force. For torque figures specific to your model year, the service manual beats any blog post, this one included.
The eccentric-stud method is the right first move for any stock Precedent or DS with mismatched camber, and it’s simple enough for most owners to handle in an afternoon. Where I’d pump the brakes is on modified carts. Once a lift kit is in the picture, the geometry that made the stud adjustment work no longer applies, and guessing your way through heim-joint changes without a reference spec usually makes things worse before they get better. Measure twice, mark your starting position, and don’t skip the recheck.
Sourcing the right eccentric bolt, tie-rod ends, or heim joints matters as much as knowing the procedure. Golfcartstuff stocks Club Car front-end hardware, tie-rod components, and the alignment tools that make measuring camber repeatable instead of a guessing game.

If you drive a DS model, the Club Car DS parts collection covers replacement spring-plate hardware and tie-rod ends sized for your front end. Owners working on a Precedent or another Club Car model will find broader coverage in the Club Car parts catalog, including bushings and A-arm components for carts that need more than an eccentric tweak. Double-check torque specs and part fitment against your model year before you order, then get the hardware on order and finish the job right the first time.
For torque specs and sequences unique to your cart’s model year, your Club Car service manual remains the final word.
Explore our store to see what our products and resources can do for you.

Leave a comment