


Your Cart Is Our Priority
Explore our store to see what our products and resources can do for you.

TL;DR:
- Regular maintenance of golf cart chargers prevents battery damage and extends their lifespan.
- Proper inspection, cleaning, and voltage testing are essential for safe charger operation.
- Using the correct charger type and following smart charging habits protects battery health.
A neglected golf cart charger is one of the fastest ways to kill an expensive battery pack. Most owners focus on tire pressure, brake pads, and oil changes, but the charger quietly sits in the garage doing damage through corroded terminals, frayed cords, and unchecked output voltage. Routine charger maintenance is not complicated, but skipping it can cut battery life in half and leave you stranded mid-round. This guide walks you through the right tools, a clear step-by-step process, common problem fixes, and smart charging habits that will keep your cart running strong all season.
| Point | Details |
|---|---|
| Use the right tools | Having the correct, insulated tools prevents accidents and charger damage. |
| Follow regular routines | Monthly cleaning and visual checks keep chargers efficient and batteries healthy. |
| Diagnose issues early | Common charger problems can often be fixed quickly without expensive repairs. |
| Optimize charging habits | Smart usage and proper handling extend both charger and battery longevity. |
Now that you’ve committed to better performance for your golf cart, let’s start by gathering everything you’ll need. Walking into this without the right gear is how accidents happen and how charger components get damaged.
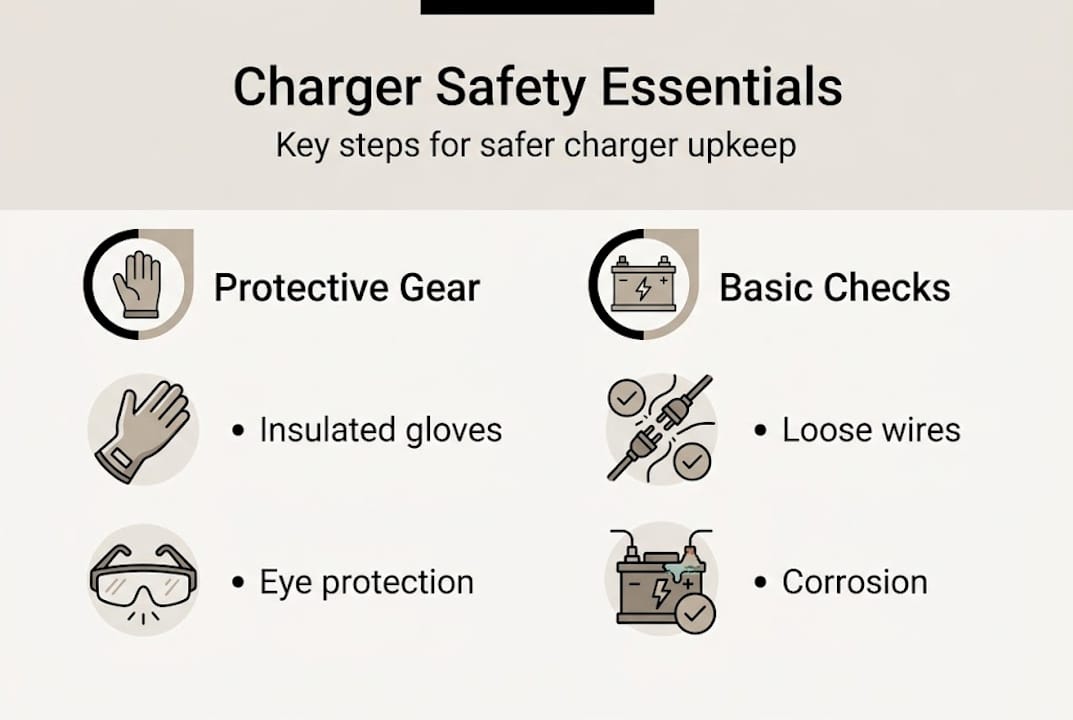
Safety equipment is non-negotiable when you’re working around electrical chargers. Voltage does not care how careful you think you are. A pair of insulated gloves rated for at least 1,000 volts is your first purchase. Safety glasses protect against corrosion splatter, especially when cleaning battery terminals nearby.
Here is a quick-reference table of the core tools and what each one does:
| Tool or material | Purpose |
|---|---|
| Insulated gloves | Protect hands from electrical shock |
| Voltmeter or multimeter | Verify charger output voltage |
| Wire brush | Remove corrosion from terminals |
| Baking soda and water solution | Neutralize acid corrosion safely |
| Clean dry cloths | Wipe down surfaces and remove moisture |
| Flashlight or work light | Inspect hard-to-see areas clearly |
| Zip ties and electrical tape | Secure loose wiring after inspection |
Beyond the basics, a few extra items make the job easier:
Using tools that are specifically compatible with your charger model matters more than most people realize. Golf cart charger maintenance steps confirm that having the right tools prevents accidental damage to charger components, which is especially true when dealing with older analog chargers that have exposed internal parts.
Pro Tip: Store all of your charger maintenance tools in a clearly labeled container kept near the cart. When everything is in one place, you are far more likely to actually do the maintenance on schedule.
Once you’re properly equipped, you’re ready for hands-on maintenance. Follow these steps in order every time.
Safety reminder: Never open the internal casing of a charger unless you are trained in electrical repair. Internal components can hold dangerous voltage even when unplugged.
Routine golf cart maintenance data shows that regular cleaning and inspection significantly reduce charger failures, which directly protects your battery investment. Understanding your electrical system basics also helps you spot problems that go beyond the charger itself.

Pro Tip: Clean off corrosion with a baking soda and water solution rather than plain water. The baking soda neutralizes battery acid, which stops the corrosion from returning as quickly.
Even with preventive care, charger problems can still happen. Here’s how to spot and fix them fast.
Most charger faults fall into a small number of categories. Knowing what to look for saves you from replacing a perfectly good charger when a simple fix will do. Charger faults are often easily resolved with basic checks, and that is true for the majority of issues owners encounter.
| Problem | Likely cause | Recommended fix |
|---|---|---|
| Charger won’t turn on | Blown fuse or tripped breaker | Check and replace fuse, reset breaker |
| Cart not charging | Corroded connector or bad contact | Clean terminals, check plug seating |
| Overheating during charge | Blocked vents or internal fault | Clear vents, test in cooler environment |
| Slow or incomplete charge | Low output voltage or aging unit | Test voltage output, consider replacement |
| Indicator light errors | Software reset needed or sensor fault | Consult manual for reset procedure |
For quick diagnostics, work through this checklist before assuming the charger is dead:
Diagnosing charger issues correctly before replacing parts is key because proper diagnosis extends the life of charger components and avoids unnecessary spending. If you’ve worked through every step and the problem persists, that is when a certified technician should take over. The motor troubleshooting guide also covers related electrical faults that can mimic charger problems.
Warning: Never attempt internal repairs on a charger unless you are fully confident in your electrical safety knowledge. Improper repairs create fire and shock hazards.
Maintaining your charger is only half the battle. Using it wisely is just as important.
The single biggest mistake golf cart owners make is waiting until the battery is nearly dead before plugging in. Lead-acid batteries, which are the most common type in golf carts, suffer permanent capacity loss when they are repeatedly deep-discharged. Charge after every use, even if you only drove the cart for 20 minutes.
Connecting and disconnecting chargers correctly preserves battery health in ways that most owners underestimate. Always connect the charger to the cart before plugging into the wall, and unplug from the wall before disconnecting from the cart. This simple sequence prevents voltage spikes that degrade battery cells over time.
Here is a practical routine broken down by frequency:
Daily habits:
Weekly habits:
Monthly habits:
Understanding charger types and performance also matters because not all chargers treat batteries the same way. Smart chargers with multi-stage charging profiles are far gentler on battery cells than older single-stage units. Pairing the right charger with your battery type, which you can verify using a golf cart voltage guide, can improve battery life by up to 25%.
Pro Tip: Store your charger in a dry, ventilated location away from extreme heat or cold. Temperature swings degrade both the charger’s internal components and the batteries it charges.
Now that you’ve mastered the basics, let’s rethink what really matters in charger care.
Here is something most maintenance guides won’t tell you: doing less with more focus beats doing more with less thought. We see owners who disassemble their chargers every few weeks, scrub every surface, and run full discharge cycles on a rigid schedule. The result? More failures, not fewer. Frequent unnecessary disassembly introduces loose connections and stripped screws that were never a problem before.
The counterintuitive truth is that over-maintenance can be just as harmful as neglect. The charger components most likely to fail are the ones that get touched and disturbed the most. A charger that is cleaned, inspected, and voltage-tested on a consistent monthly schedule will outlast one that gets pulled apart every two weeks.
What actually moves the needle is adapting your routine to your specific charger model and battery chemistry. A 48-volt lithium system has completely different needs than a 36-volt flooded lead-acid setup. Generic advice rarely accounts for that. Building your routine around reliable sources, like the charger maintenance myths that circulate in golf cart communities, helps you cut through the noise and focus on what genuinely protects your investment.
Simple, consistent, and model-specific beats complicated and frequent every time.
To keep your golf cart operating at its best, having the right parts on hand is essential.
Running through a maintenance routine only to discover you need a replacement cable or a new connector is frustrating. Stocking a few key items ahead of time means you can fix problems the moment you find them.

At GolfCartStuff.com, we carry a full range of golf cart chargers, replacement cables, connectors, and golf cart accessories built for real maintenance needs. Whether you drive a Club Car, Yamaha, or EZGO, we have parts that fit. Browse our Club Car DS parts selection or search by your model to find exactly what your cart needs. Keeping proven parts within reach makes every maintenance session faster and more effective.
Basic charger maintenance should be done monthly, with more detailed inspections and voltage testing every 3 to 6 months depending on how frequently you use the cart.
Key warning signs include the charger not turning on, unusual buzzing or clicking noises, the unit getting hot to the touch, or the indicator lights showing errors instead of normal charging status.
No. You should only use a charger that matches your cart’s voltage and connector type. Using the wrong charger for your model can damage batteries and void warranties.
Yes, most modern chargers include an automatic shut-off feature, but you should always check your model’s instructions to confirm this before making it a regular habit.
Explore our store to see what our products and resources can do for you.

Leave a comment