


Your Cart Is Our Priority
Explore our store to see what our products and resources can do for you.

TL;DR:
- Using model-specific wiring diagrams prevents costly errors and ensures correct component connections in your golf cart.
- Always verify wire functions with a multimeter and follow safety protocols to avoid damage or injury during repairs.
Grab any two golf carts parked side by side, and they might look nearly identical from the outside. Pop open the battery compartment or trace a wire under the seat, and you’ll quickly discover they’re nothing alike. Golf cart wiring diagrams are essential visual roadmaps showing every electrical component connection, including power flow from batteries through controllers, switches, solenoids, and motors. Skip the basics, and a simple wire swap turns into a fried controller or a cart that won’t move. This guide covers safety protocols, reading diagrams, step-by-step wiring, and when to put the tools down and call a professional.
| Point | Details |
|---|---|
| Always use correct diagrams | Rely on cart-specific wiring diagrams to avoid mistakes and ensure safe repairs. |
| Wire colors aren’t universal | Consult the legend for your cart’s exact wiring color codes, as they vary by model. |
| Protect yourself first | Disconnect all batteries, use safety gear, and avoid shortcuts every time you work on wiring. |
| Test before powering up | Use a multimeter for all connections before reconnecting batteries to prevent damage. |
| Know your limits | Tackle basic wiring yourself but seek professional help for controllers or motors. |
Every golf cart brand, model, and production year can have a completely different wiring layout. A 2018 Club Car Precedent and a 2018 EZGO RXV are both 48-volt electric carts, but their wiring schematics look nothing alike. The solenoid placement differs, the controller pinouts differ, and even the forward/reverse switch wiring uses different color conventions. Grabbing a generic diagram from a quick internet search and assuming it applies to your cart is one of the most common and costly mistakes DIY owners make.
Understanding your golf cart electrical system basics starts with recognizing that a diagram is more than a map. It tells you the exact sequence of power flow, which components are in series versus parallel, and what voltage each section of the circuit should carry. Without that precision, even a confident DIYer can accidentally reverse polarity on a controller or leave a ground wire floating, both of which cause immediate damage.
“Always match the diagram to the exact model and year to avoid errors. And because model-specific diagrams take priority over generic resources, no universal benchmark exists across all cart types.”
Here’s a quick breakdown of why model specificity matters so much:
| Scenario | Using a model-specific diagram | Using a generic diagram |
|---|---|---|
| Battery connections | Correct polarity and gauge confirmed | Risk of reverse polarity |
| Controller wiring | Exact pinout match | Pin mismatch possible |
| Solenoid placement | Matches your harness routing | May require improvised routing |
| Troubleshooting accuracy | High confidence | Unreliable reference |
| Warranty protection | Preserved if done correctly | Often voided if wrong |
The takeaway here is simple. Spend the extra ten minutes tracking down the exact wiring diagram for your make, model, and year before touching a single wire. Your local dealer, the manufacturer’s website, or dedicated golf cart community forums are all solid starting points.
Now that you know why diagrams matter, let’s dig into how to interpret the colored wires under your cart’s seat. Wire colors in golf carts follow a loose set of conventions, but they are absolutely not universal across all manufacturers.
Wire color codes vary by manufacturer but typically follow this pattern: black for negative ground, red for positive main power, blue for forward direction, yellow for reverse, white for throttle signal, and purple for key switch. Yamaha, EZGO, and Club Car each have their own variations, and even within a single brand, color assignments can shift between production years.
Here’s a reference table that covers the most common wire functions:
| Wire color | Common function | Notes |
|---|---|---|
| Black | Negative/ground | Nearly universal |
| Red | Positive main power | Nearly universal |
| Blue | Forward direction | Varies by brand |
| Yellow | Reverse direction | Varies by brand |
| White | Throttle signal | Check your legend |
| Purple | Key switch | Check your legend |
| Green | Accessories/ground | Not always present |
| Orange | Charger/DC output | EZGO specific variants |
When you’re working on an unfamiliar cart, a multimeter is your best friend for confirming what each wire actually does rather than assuming based on color alone. Set it to DC voltage, touch the probes to the wire in question and a known ground, and you’ll know exactly what voltage that circuit is carrying. This simple test prevents the guesswork that leads to expensive mistakes.
Key practices when working with wiring:
Pro Tip: Before disconnecting any wires, wrap a small piece of masking tape around each one and write its connection point with a marker. It takes two minutes and saves an hour of head-scratching during reassembly.
Once you’re clear on connections, prioritize these safety essentials before ever handling a wire. Golf cart batteries store a significant amount of energy, especially 48-volt packs, and they can deliver enough current to cause serious burns, arc flash, or worse if handled carelessly.
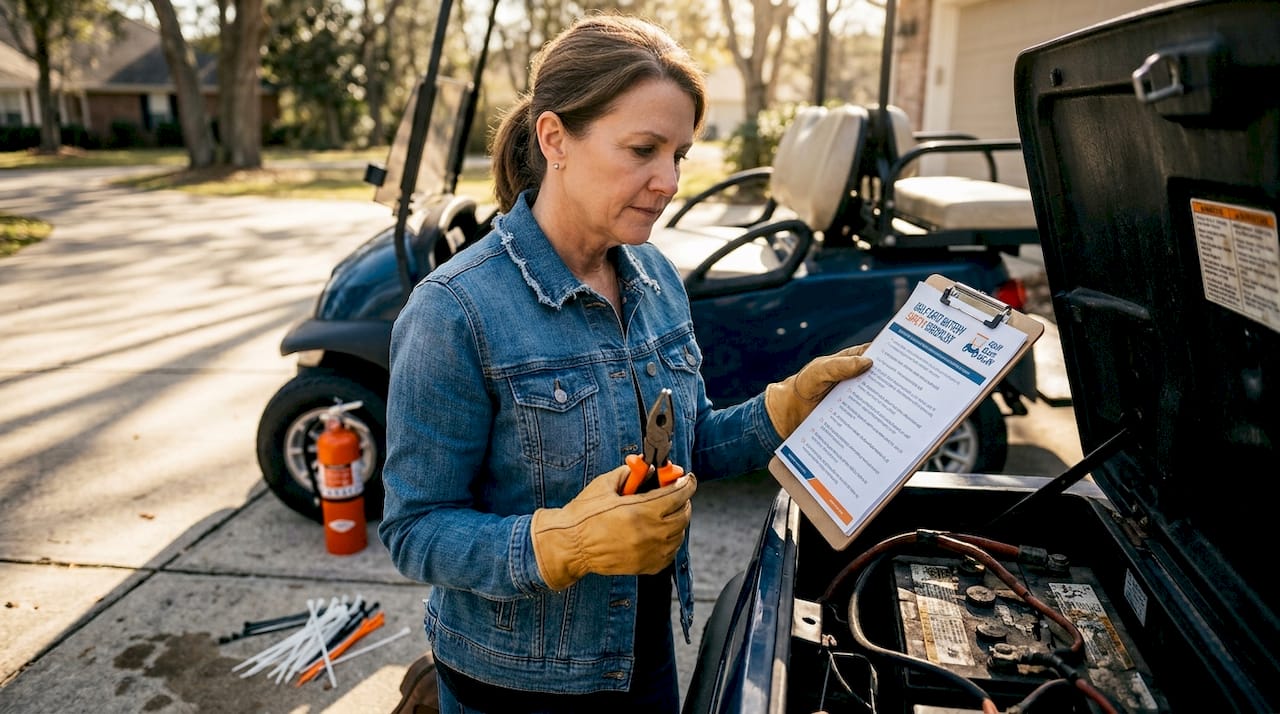
Disconnect batteries and the tow/run switch first, wear insulated gloves and safety glasses, remove all jewelry, and ventilate your workspace to prevent hydrogen gas buildup from lead-acid batteries. These aren’t optional suggestions. They are the baseline requirements before any wiring work begins.
Follow these steps every single time:
Check the golf cart battery safety tips for more details on handling lead-acid and lithium packs safely. For specific lighting circuits, the light relay wiring tips guide walks through relay-safe disconnection procedures. Before any major project, running through a golf cart safety inspection checklist is a smart habit that catches problems before they become dangerous.
Pro Tip: Keep a fire extinguisher rated for electrical fires (Class C) within reach whenever you’re working around batteries. You’ll probably never need it, but the one time you do, you’ll be glad it was there.
With safety sorted, you’re ready to walk through the actual wiring process, one step at a time. Whether you’re doing a complete rewire after a harness failure or just replacing a damaged section, the sequence below keeps you organized and reduces the chance of error.
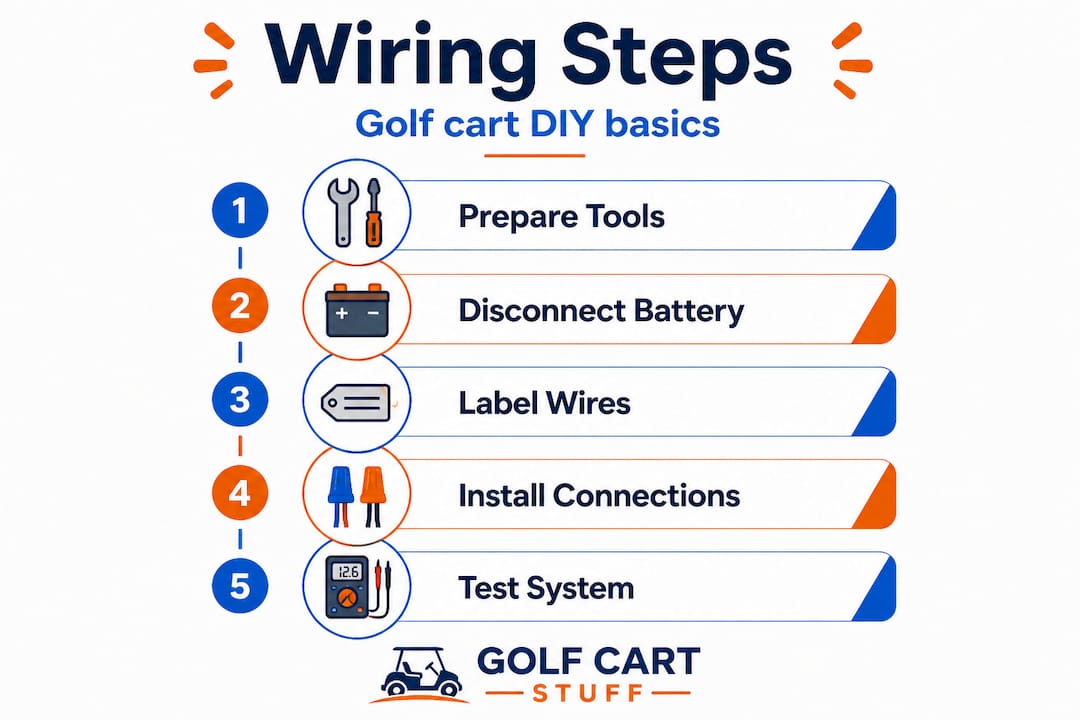
Basic wiring steps follow this order: reference your diagram, disconnect power, connect battery terminals to the controller and solenoid per the diagram, then wire from the controller to the motor, throttle, and FNR switch, test voltage and continuity, and finally secure the harness with ties or conduit. That sequence matters because each step builds on the last. You never want to connect a motor before the controller is properly wired, and you never want to power up before testing.
Here’s the full step-by-step breakdown:
Pro Tip: Take a video walkthrough of your entire wiring layout with your phone before removing anything. Watching it back during reassembly is faster and more reliable than any written notes.
You’ve seen the wiring steps, but it’s vital to know your limits and when professional support is the smarter call. Not every wiring task carries the same risk level, and being honest about your skill set protects both you and your cart.
DIY is viable for basic tasks like battery swaps, connector replacements, and harness repairs, but controller and motor-level work is best handled by professionals who have the diagnostic equipment and training to do it safely.
Tasks that are generally DIY-friendly for a prepared owner:
Tasks that call for a professional:
If you get controller wiring wrong, you risk a $400 to $800 replacement, plus potential damage to the motor itself. You could also void your warranty if the cart is still covered. The golf cart motor troubleshooting guide can help you identify whether a motor issue is actually a wiring problem you can fix yourself or something deeper that needs a shop.
“Knowing when to stop is the most underrated skill in DIY golf cart work. An honest assessment of your skill level before you start saves more money than any shortcut during the job.”
Here’s a perspective most guides skip entirely. The wiring problem most DIY owners face isn’t a lack of tools. It’s a lack of precision. People spend money on wire strippers, heat shrink guns, and fancy connector kits, but they try to save ten minutes by using a generic YouTube video diagram instead of pulling the actual factory schematic.
The honest reality is that printed, model-specific diagrams prevent the vast majority of wiring errors before they happen. One wrong wire on a 48-volt controller can cost you more than a full year’s worth of routine maintenance. A correct diagram costs nothing if you track it down from the manufacturer or a reputable parts source.
We’ve seen carts come through with three different colored replacement wires spliced into the original harness, none of them labeled, all installed by confident owners who were certain they knew what they were doing. The fix always starts the same way: pull the original diagram, trace every wire, and verify before reconnecting anything.
For even more wiring insights, revisiting the fundamentals of your cart’s electrical system regularly keeps your diagnostic instincts sharp. Tools matter, technique matters, but accurate information is what actually protects your investment. Skip the shortcuts and invest five minutes in finding the right diagram. It’s the single best thing you can do for any wiring project.
Once you’re ready to apply what you’ve learned or need to source parts for a repair, having the right components makes all the difference between a clean job and a frustrating one.

At GolfCartStuff.com, we stock exact-fit wiring components, battery harnesses, connectors, and upgrade accessories for the most popular cart models on the market. Whether you’re restoring a vintage Club Car or upgrading a newer EZGO, you’ll find what you need without guessing. Browse our full range of golf cart accessories for add-ons that install cleanly without modifying your existing harness. If you own a Club Car DS, our dedicated Club Car DS parts catalog includes OEM and quality aftermarket options so you get the right fit every time. OEM parts preserve wiring compatibility and protect your cart’s warranty coverage where applicable.
Using incorrect or generic wiring diagrams and failing to disconnect batteries first are the top sources of DIY wiring errors. Always use a model-specific diagram matched to your exact year and brand before starting any project.
Use a multimeter to check voltage and continuity at each connection point while the batteries are still disconnected, then recheck after reconnecting power at low load. This two-stage approach catches both wiring faults and live-circuit issues before they cause damage.
No. Model-specific diagrams are always required because wiring varies significantly between brands, models, and production years. A diagram that fits a 2015 EZGO TXT will not reliably apply to a 2020 Club Car Onward.
Common colors include black, red, blue, yellow, white, and purple, but their specific functions can vary by manufacturer, so always verify against your cart’s wiring legend rather than relying on color alone.
DIY works well for basics like battery cable swaps, connector replacements, and accessory installs, but controller reprogramming, motor-level repairs, and full harness replacements are best left to a qualified technician.
Explore our store to see what our products and resources can do for you.

Leave a comment