


Your Cart Is Our Priority
Explore our store to see what our products and resources can do for you.

TL;DR:
- Faulty wiring in golf carts can lead to safety hazards, drivability issues, and component damage if ignored.
- Systematic testing with proper tools, safety precautions, and documentation is essential for accurate diagnostics and lasting repairs.
Faulty wiring is one of the most frustrating problems a golf cart owner can face. One minute your cart runs fine, and the next it won’t move, the lights flicker, or the motor stutters without warning. Worse, ignoring electrical problems isn’t just inconvenient — it’s a genuine safety risk that can damage batteries, burn components, or strand you on the course. This guide walks you through exactly what tools to gather, how to systematically diagnose every major wiring fault, and how to verify your repairs so your cart runs reliably and safely.
| Point | Details |
|---|---|
| Preparation matters | Have the right tools and follow safety steps before starting any troubleshooting. |
| Follow a methodical process | Systematic diagnostics of solenoids, battery feeds, relays, and the motor prevent guesswork and missed faults. |
| Multimeter tests are essential | Using a multimeter for voltage and continuity checks quickly pinpoints wiring and component failures. |
| Address issues and recheck | Fix all connection problems and always verify repair success with final checks before driving. |
| Document your fixes | Careful documentation and labeling of wiring changes prevent future confusion and recurring issues. |
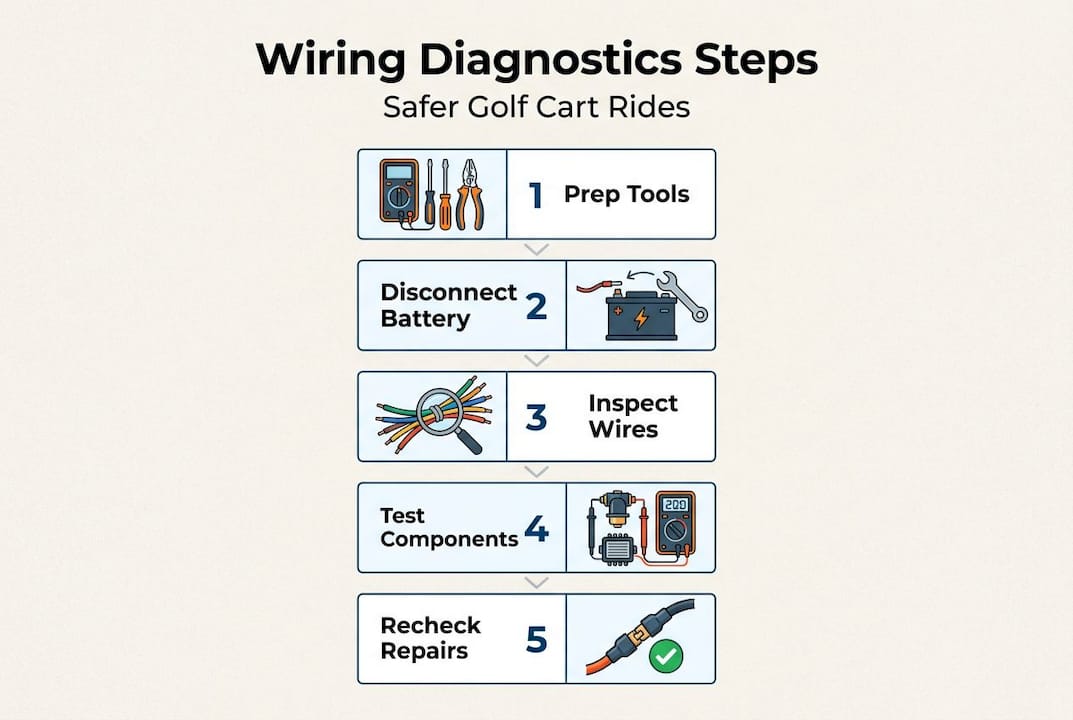
Before you touch a single wire, make sure you’re set up correctly. Rushing into diagnostics without the right tools or safety habits leads to mistakes, damaged components, and sometimes injury. Taking ten minutes to prepare saves hours of frustration later.
Here’s what you’ll need to cover the full range of golf cart wiring diagnostics:
| Tool | Task |
|---|---|
| Digital multimeter | Voltage, continuity, and resistance testing |
| Wire brush | Cleaning corroded terminals and connections |
| Insulated gloves | Shock protection during live voltage checks |
| Jumper wires | Relay bypass tests |
| Dielectric grease | Corrosion prevention after repairs |
| Heat-shrink connectors | Splicing and replacing damaged wire sections |
Understanding golf cart electrical basics before you start helps you read wiring diagrams accurately and know exactly where each wire should lead.
Never skip disconnecting your battery pack before working on any wiring connections. Even a brief contact with a live terminal can cause severe burns, component damage, or worse. Treat every wire as live until you’ve confirmed otherwise.
Always disconnect the negative cable of your main battery first, then the positive. If your cart has a main disconnect switch or a tow/run switch, set it to “tow” mode before starting. Keep a fire extinguisher rated for electrical fires (Class C) within reach, and work in a ventilated space.
Running a full cart safety inspection before and after any wiring work is a smart habit that catches issues you might have missed.
Pro Tip: Before you disconnect or move any wires, photograph all the connections from multiple angles. This takes 60 seconds and saves you from the guesswork of reassembly. Color-coded wires look identical once they’re unclipped, and a photo eliminates confusion entirely.
With your tools and safety steps ready, let’s move through a proven diagnostic flow that pinpoints wiring problems efficiently.
A key statistic to keep in mind: Solenoids are responsible for up to 60% of golf cart starting failures, making them your first serious stop in the diagnostic process after a visual check.
Follow these steps in order. Skipping ahead wastes time and can lead you to replace components that were never the problem.
Start with a full visual inspection. Look for burned, cracked, or brittle wire insulation. Check for loose terminal connections at the battery pack, solenoid, controller, and motor. Pay close attention to any discoloration or melted plastic around terminal blocks, which signals excess heat from a bad connection or overload.
Check battery voltage. Set your multimeter to DC voltage and test across the full battery pack. A 48V cart should read 50 to 52V when fully charged; a 36V cart should read 38 to 40V. Low voltage across the pack before any load is applied points to a battery problem rather than a wiring issue.
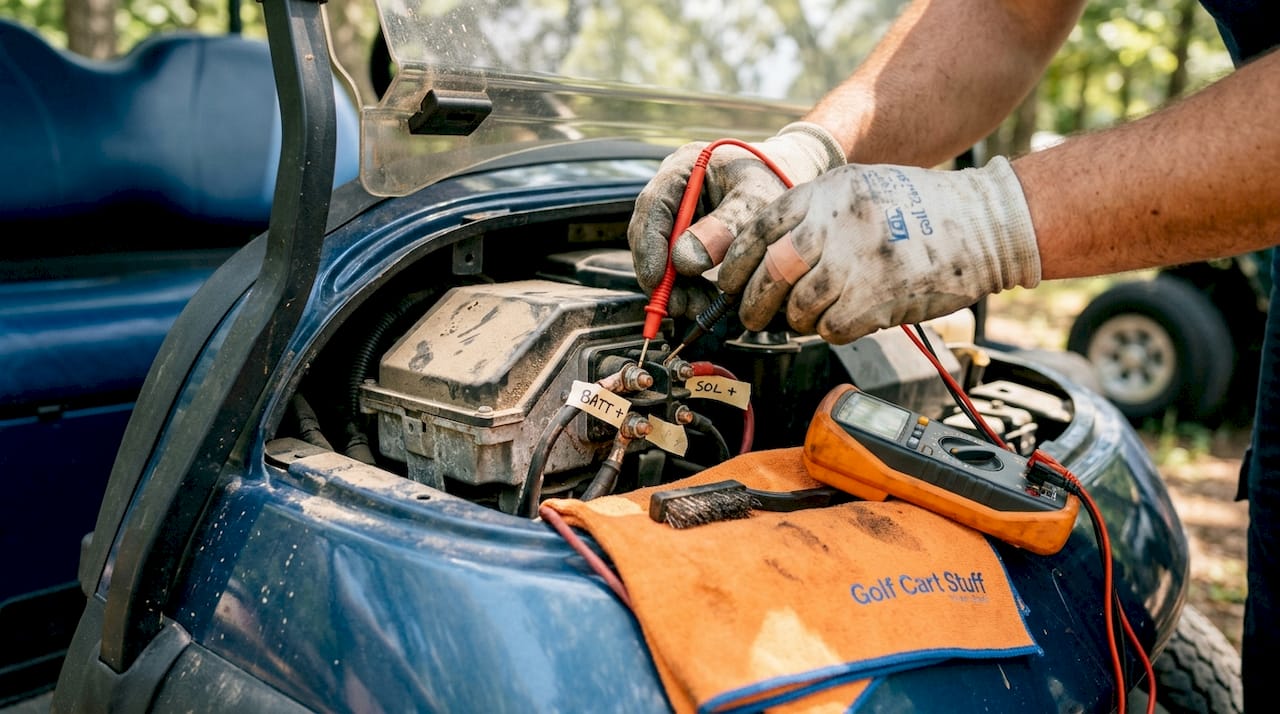
Test the solenoid. The solenoid is the large relay that connects battery power to the motor controller. You can validate solenoid operation using multimeter DC voltage and continuity tests. With the cart in run mode and the key turned on, place your multimeter leads on the two large terminals. You should read battery voltage when the solenoid is energized (clicking sound). If you hear a click but read no voltage across the large terminals, the solenoid’s internal contacts have failed.
Inspect the relay circuits. Relays control accessory circuits like lighting, horn, and charging systems. Check for voltage at the input side and confirm it passes through to the output side when the relay is triggered. Light relay wiring issues are a common cause of flickering lights or accessories that stop working intermittently.
Trace battery feed wires. Follow the main positive cable from the battery pack through the main fuse, solenoid, and controller. Check for resistance at each connection point. Any reading above 0.2 ohms in a main power cable suggests resistance from corrosion, a bad crimp, or damaged wire strands.
Isolate and test the motor connections. Only reach this step after confirming the battery, solenoid, and wiring are sound. Motor troubleshooting involves testing each terminal pair for expected resistance values and confirming no shorts to the motor case.
Pro Tip: To test a relay quickly without a full bench setup, use jumper wires to apply 12V (or the relay’s rated voltage) directly to the coil terminals while checking continuity across the switch terminals. If the relay doesn’t click and close, it’s defective regardless of what the wiring looks like.
Once basic diagnostics are finished, these focused tests will help you further narrow the source of electrical issues to specific wiring or components.
You can validate solenoid operation fully with just a multimeter before spending money on a replacement.
Checking continuity and shorts between motor terminals and the motor case is the definitive way to isolate motor wiring faults. Here’s how:
A short to case means the motor’s internal insulation has failed. Do not operate the cart until the motor is repaired or replaced. Running a motor with a case short creates a serious shock and fire hazard.
| Test | Purpose | Tool setup | Expected result | Common fault found |
|---|---|---|---|---|
| Solenoid coil resistance | Confirm coil integrity | Ohms, leads on small terminals | 3 to 7 ohms | Open coil (coil burned out) |
| Solenoid contact voltage drop | Check main contact condition | DC voltage, leads on large terminals | Less than 0.5V drop | High drop (worn contacts) |
| Motor terminal resistance | Check field/armature windings | Ohms, leads on terminal pairs | Within spec range | Open winding |
| Motor case continuity | Detect insulation failure | Continuity, terminal to case | Open (no continuity) | Short to case (insulation failure) |
Pair this testing with your battery voltage guide to confirm you’re working with a battery pack that’s actually delivering adequate voltage before condemning other components.
Understanding relay function also helps you recognize when a relay, not a motor or solenoid, is the root cause of an intermittent starting or accessory fault.
Pro Tip: Label both ends of every wire you disconnect using masking tape and a marker before removal. Combine this with your pre-work photos for a foolproof reassembly reference.
Once you’ve pinpointed the problem, here’s how to make lasting repairs and ensure your cart is safe and ready for the road.
Following a thorough car maintenance checklist approach, adapted for your golf cart, keeps you systematic and ensures nothing gets overlooked during the repair process.
Pro Tip: After cleaning and reassembling any connection, apply a thin layer of dielectric grease over the terminal. This creates a moisture barrier that dramatically slows future corrosion, especially on carts stored outdoors or near coastal areas.
Reconnect the battery pack starting with the positive cable, then the negative. Turn the key on and test all systems before driving. Watch for any unusual smells, sparks, or warning lights. Take the cart on a short, slow test drive and listen for unusual sounds from the motor.
Consistent battery care after your repair extends the life of both your battery pack and the wiring connected to it. And keeping up with regular maintenance means you catch small wiring issues before they grow into expensive repair bills.
Here’s the hard truth we’ve seen play out time and again: the fix itself is rarely what trips people up. It’s everything around the fix. Most DIY wiring repairs that fail within a few months weren’t done with bad parts or wrong techniques. They were done without documentation.
When you “quick fix” a corroded terminal without writing down which wire came from where, or reconnect a solenoid and assume you’ll remember how it was wired, you’re building future problems into your cart. Six months later, when something acts up again, you’re starting from zero instead of from a known baseline. That’s the real cost of skipping documentation.
We also notice that many owners focus entirely on the obvious, the burned wire or the clicking solenoid, and never inspect the surrounding connections. Electrical faults rarely travel alone. Heat from a failing connection weakens insulation on adjacent wires. A corroded battery terminal stresses the solenoid. Fix one and ignore the neighbors, and you’ll be back under the hood sooner than you want.
“Documentation saves more headaches than any tool in your kit.” Write down every wire you touch, every reading you take, and every part you replace. Your future self will thank you.
One more thing worth saying: patience is a diagnostic skill. Rushing through steps or skipping ahead because “it’s probably just the solenoid” leads to misdiagnosis. We’ve seen owners replace three components in sequence, spending real money, before slowing down and finding a single loose ground wire behind the motor. Systematic is always faster than reactive.
If your cart develops persistent speed inconsistencies after a wiring repair, check out resolving speed issues as a follow-up step. Speed problems often trace back to incomplete wiring repairs or controller connections that weren’t fully seated.
When you’re ready to make repairs or upgrades, the parts you use matter as much as the process.

Using quality components means your repairs last. Substandard wire connectors corrode faster, cheap solenoids fail sooner, and undersized wire creates heat over time. We carry everything you need to restore your cart’s wiring system, including replacement components, connectors, and protective supplies. Browse our full range of golf cart accessories for wiring tools, terminal kits, and electrical supplies that make every repair clean and durable. If your diagnostics revealed battery problems alongside wiring faults, our selection of replacement batteries covers 36V and 48V systems with options from trusted manufacturers. We’re here to support DIY owners at every step of the repair and upgrade process.
Loose or corroded connections near the battery or solenoid are the most frequent culprits, causing intermittent starting failures and voltage drops under load.
Use a multimeter to check voltage across the large terminals when the solenoid is energized, and run a resistance test on the coil terminals with the battery disconnected. You can validate solenoid operation fully with DC voltage and continuity tests to confirm whether the coil or contacts have failed.
Continuity between a motor terminal and the case signals insulation failure inside the motor. Checking continuity and shorts to the motor case is the key test for this fault, and the cart should not be operated until the motor is repaired or replaced.
Yes. Faulty wiring or a partial short can cause parasitic drain, pulling a small but continuous current that depletes the battery pack even when the cart is parked and the key is off. Always test for voltage at key-off positions if your batteries are mysteriously losing charge.
Explore our store to see what our products and resources can do for you.

Leave a comment