


Your Cart Is Our Priority
Explore our store to see what our products and resources can do for you.

TL;DR:
- A faulty golf cart solenoid frequently causes clicking sounds, intermittent power, or complete failure to start. Replacing it involves proper diagnosis, careful wiring, and voltage drop testing to ensure correct operation and prevent issues. Using quality parts and thorough testing improves reliability and extends the lifespan of your cart’s electrical system.
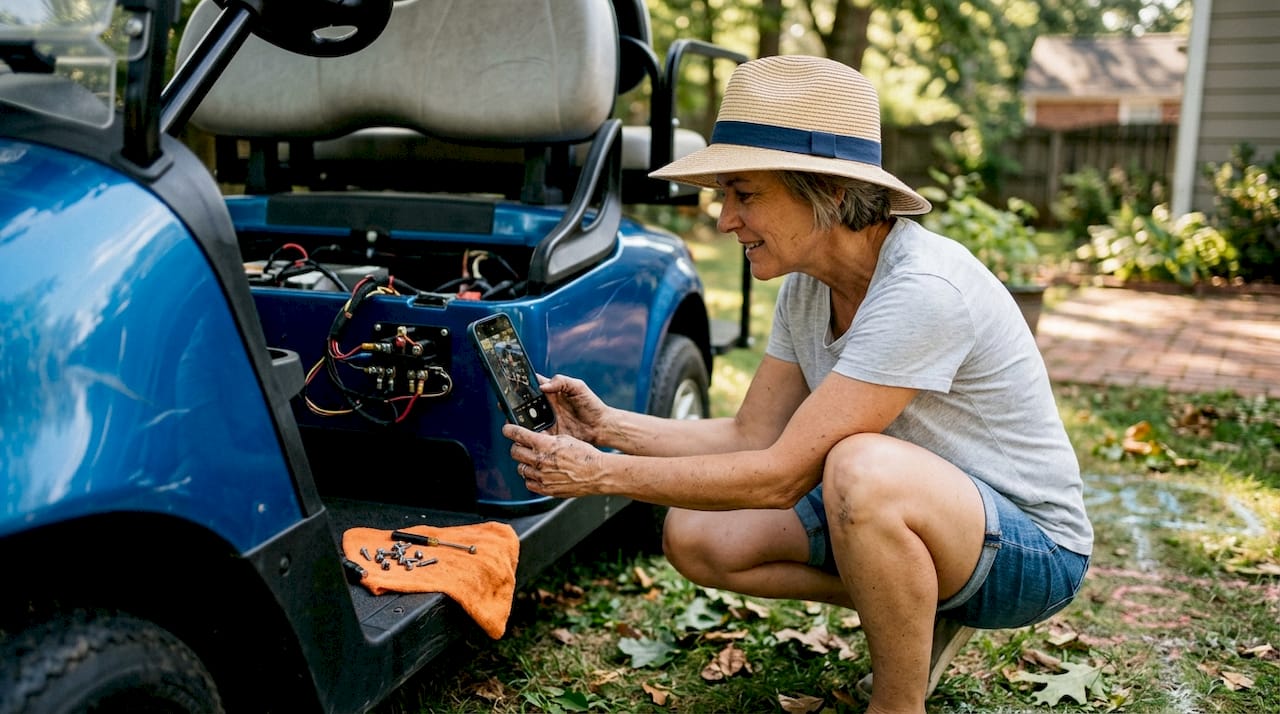
Your golf cart cranks, clicks, or just sits there doing nothing — and you’re standing in the driveway wondering what went wrong. Nine times out of ten, that stubborn behavior points back to one small but critical component: the solenoid. This electromagnetic switch controls the flow of power from your batteries to the motor, and when it starts to fail, your entire cart suffers. The good news is that replacing a solenoid is a job most cart owners can handle themselves, without a trip to the repair shop. This guide walks you through every stage, from diagnosis to the final test drive.
| Point | Details |
|---|---|
| Diagnose before replacing | Always confirm solenoid failure with a voltage drop test to avoid unnecessary work. |
| Document wires and polarity | Photograph and label all connections before removal—exact orientation can matter, especially on certain models. |
| Follow a step-by-step process | Replacing the solenoid safely means disconnecting power, mapping wires, swapping, and testing thoroughly. |
| Test and retest after install | Verify engagement and low voltage drop after replacement and listen for any abnormal sounds. |
The solenoid is essentially a high-current relay. When you press the pedal or turn the key, a small control voltage energizes a coil inside the solenoid, which pulls together two heavy-duty contact points. Those contacts close the circuit and allow full battery power to reach the motor or starter. It’s a simple design, but it does a lot of work every single ride.
Common symptoms of a failing solenoid include:
Here’s a detail most guides skip over: even if the solenoid clicks, it can still be failing due to bad internal or high-resistance contacts. That click just means the coil is energizing. It says nothing about whether those main power contacts are actually doing their job. This is exactly why a voltage drop test across the main terminals is the only definitive way to confirm solenoid failure.
“A voltage drop test across the main solenoid terminals while engaged is the definitive check — not just listening for a click.” — Golf Cart Solenoid Repair and Troubleshooting Guide
For a healthy solenoid, you want to see a voltage drop of 0.1V or less across the main terminals when engaged. If you measure above 0.5V, those internal contacts are corroded, burned, or worn through, and replacement is the right call. Before you assume it’s the solenoid though, spend a few minutes troubleshooting golf cart wiring to rule out loose connections, corroded terminals, or a damaged wire elsewhere in the circuit.
Solenoids typically fail because of heat buildup from high current loads, corrosion from outdoor exposure, vibration that weakens internal contact surfaces, or simply age. Most quality solenoids last between 3 and 7 years depending on usage and environment.
Understanding the solenoid sets the stage — now let’s cover what you need and how to prepare before you touch anything.
Tools you’ll need for the job:
Before confirming the solenoid needs replacement, diagnose battery voltage and verify that the solenoid actually receives control voltage and carries low voltage drop across its main contacts. If you have no voltage reaching the coil at all, the solenoid may actually be fine — the problem could live upstream in the key switch, pedal switch, or wiring harness. Replacing the solenoid in that scenario wastes both time and money.
Here’s a quick comparison of what counts as acceptable versus problematic readings:
| Measurement | Healthy reading | Problem threshold |
|---|---|---|
| Battery pack voltage | Within 5% of rated | More than 10% below rated |
| Solenoid coil voltage | Matches system voltage | Less than half system voltage |
| Voltage drop across main terminals | 0.1V or less | Above 0.5V |
| Battery terminal resistance | Near 0 ohms | Any measurable resistance |
Pro Tip: Before you disconnect a single wire, take a clear photo of every terminal on the solenoid and the surrounding wiring. Add a small piece of tape and a handwritten label to each wire. This takes three minutes and saves you from an hour of guessing during reassembly.
For a broader understanding of how the solenoid fits into your cart’s electrical architecture, review golf cart electrical system basics before starting. If you’re unsure about your cart’s rated voltage, consult a golf cart voltage guide to confirm whether you’re working with a 36V, 48V, or 72V system — this affects which replacement solenoid you need.
Pre-replacement safety checklist:
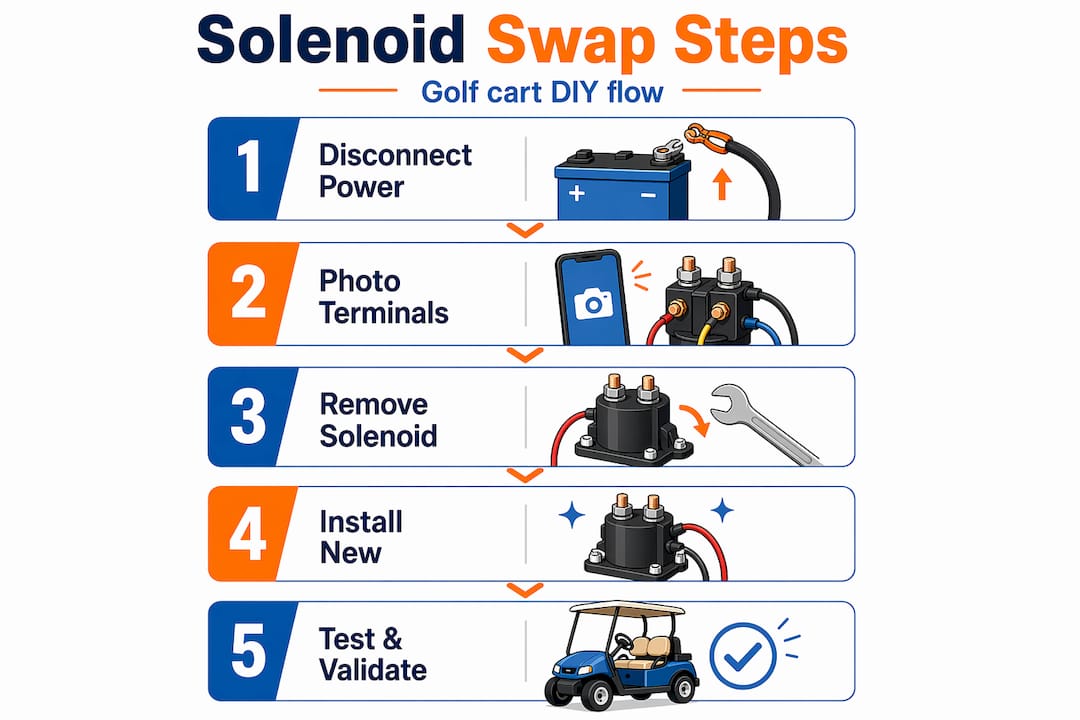
With your tools ready and preparation complete, let’s walk through the actual replacement process with clear, logical steps.
“Always disconnect the negative battery cable first. This single step prevents accidental shorts and protects both you and the controller during the entire swap.” — DIY Safety Best Practice
Locate the solenoid. On most electric carts, it sits near the battery bank. On gas carts like Club Cars, it’s typically near the starter motor beneath the seat or front cowl. Consult your service manual if you’re uncertain.
Disconnect the negative battery cable. Use your wrench and set the cable aside so it cannot accidentally make contact with any terminal.
Photograph and label all wires. Even if you already did this, do it again now with the solenoid visible in full view. Capture the large power terminals and the smaller coil control terminals separately.
Disconnect the wiring. Start with the small coil wires, then remove the large power cables. Keep track of which large terminal connects to the battery side and which connects to the motor or controller side.
Remove the solenoid mounting hardware. Most solenoids use two or four bolts. Remove them and set the hardware in a small container so nothing rolls away.
Swap in the new solenoid. Mount it in the same position and orientation as the original. Reinstall mounting bolts snugly but don’t overtighten — you’re threading into metal, not concrete.
Reconnect the wiring. Label and photograph wires before removal — now those photos pay off. Reconnect large power cables first, then the small coil wires. Check that every terminal is tight and seated properly.
Reconnect the negative battery cable. This is the last thing you reconnect, not the first.
Test. Turn the key, press the pedal, and listen for a clean click followed by motor engagement.
For electric carts, reviewing golf cart wiring basics before step seven will help you map the terminals with confidence. And if this is part of a broader maintenance session, a step-by-step golf cart maintenance routine pairs well with a solenoid swap.
Here’s how the generic workflow compares to the Club Car gas cart specific process:
| Step | Generic electric cart | Gas Club Car specific |
|---|---|---|
| Locate solenoid | Near battery compartment | Near starter, under seat |
| Disconnect power | Negative battery cable | Negative battery cable |
| Remove wiring | Large + small coil terminals | Wiring harness connector |
| Mount new solenoid | Bolt in place | Bolt in place |
| Reconnect wiring | Manual terminal matching | Harness plug alignment |
| Test | Pedal press, listen for click | Key to start, listen for click and starter engagement |
The Club Car specific process follows the same core logic: locate, disconnect, remove, swap, reconnect, test. What changes is where the solenoid lives and how the wiring connects.
Pro Tip: Check your service manual for your exact model before starting. Some solenoids have polarity-sensitive large terminals, and the manual will tell you exactly which side connects where.
With the swap done, the final step is to validate your work and iron out any odd symptoms.
Once your new solenoid is installed, test solenoid engagement by listening for the click and verifying that the starter or controller responds properly. Then re-run your voltage drop test. A healthy new solenoid should read 0.1V or less. If it reads high right out of the box, you may have a wiring issue, a loose connection, or a defective part.
Common post-replacement mistakes to watch for:
“After any solenoid swap, re-running voltage tests is best practice — it confirms the new unit is energizing correctly and carrying current efficiently.” — Golf Cart Solenoid Repair and Troubleshooting Guide
Quick troubleshooting reference after replacement:
| Symptom | Most likely cause | Fix |
|---|---|---|
| No click at all | Coil wire not connected or wrong voltage | Check coil wiring and system voltage |
| Click but no movement | Reversed large terminals or controller fault | Recheck polarity, inspect controller |
| Cart runs backward | Large terminals reversed | Swap large terminal connections |
| Solenoid gets very hot | Wrong voltage rating or loose connection | Verify rating, retighten all terminals |
| Intermittent operation | Loose connection or defective solenoid | Retorque all terminals, test or return part |
Pro Tip: Always double-check your wiring against the photos you took before removal. This single habit eliminates most post-installation headaches before they start.
For any symptoms that persist after a confirmed good solenoid install, dig into golf cart motor troubleshooting to rule out motor, controller, or deeper electrical issues.
Most solenoid replacement guides focus on the steps and stop there. What they rarely address is the layer of model-specific details that can make a technically correct job go sideways.
Wire labeling is one example. Almost every guide mentions it, but few stress that the gauge of the wire also matters during reconnection. If you’re installing a new solenoid and you accidentally connect a control wire to a main power terminal — because the photo wasn’t clear and the wires are similar colors — you can damage your controller instantly. Taking detailed, well-lit photos from multiple angles before removal is not optional.
The solenoid terminal polarity issue on some carts is another detail that trips up experienced DIYers. Many solenoids are non-polar on the large terminals, meaning you can connect them either way. But on certain models, polarity is absolutely critical. If your service manual isn’t nearby, matching the exact orientation of the original solenoid before removal is your best insurance policy.
The other thing most guides skip is the closing voltage drop test. Replacing the solenoid and calling it done feels satisfying, but it leaves you flying blind. That final test tells you whether your work actually solved the problem or whether something else is still contributing to poor performance. Think of it as your quality check — the confirmation that the repair is complete, not just finished.
For sourcing parts, being choosy pays off. Smart parts sourcing matters more than most people realize. A clone solenoid that costs half the price of an OEM-quality part may last six months before the contacts burn out — and then you’re doing this job again. Match the voltage rating, amperage rating, and terminal configuration exactly to your cart’s specifications.
After a successful solenoid swap, your cart should feel responsive and reliable again. But this kind of hands-on work often opens the door to other improvements you’ve been putting off.

At GOLFCARTSTUFF.COM, we stock OEM-quality solenoids, wiring components, and everything else you need to keep your cart running at its best. Whether you’re finishing up this repair or planning your next upgrade, our catalog covers a wide range of models and configurations. Browse our full selection of golf cart accessories for add-ons that improve comfort, performance, and utility. If you drive a Club Car DS, check out our dedicated section of Club Car DS golf cart parts for model-specific components that fit correctly the first time. Quality parts make every DIY job easier and more durable.
A bad solenoid often causes no start, erratic movement, or a clicking sound with no motor response. A definitive check is a voltage drop test across the main terminals — more than 0.5V while engaged confirms failure.
On many carts it doesn’t, but large terminal polarity does matter on models like the Club Car DS — reversing them can cause wrong-direction movement or controller faults.
Yes. The click only means the coil is working. Internal high-resistance contacts can still be failing — run a voltage drop test to confirm whether the main contacts are actually doing their job.
Check all wiring connections, confirm battery voltage is within spec, and test for other electrical faults. If you have no voltage to the coil or the voltage drop is still high after replacement, the root cause may lie elsewhere in the system.
Explore our store to see what our products and resources can do for you.

Leave a comment